
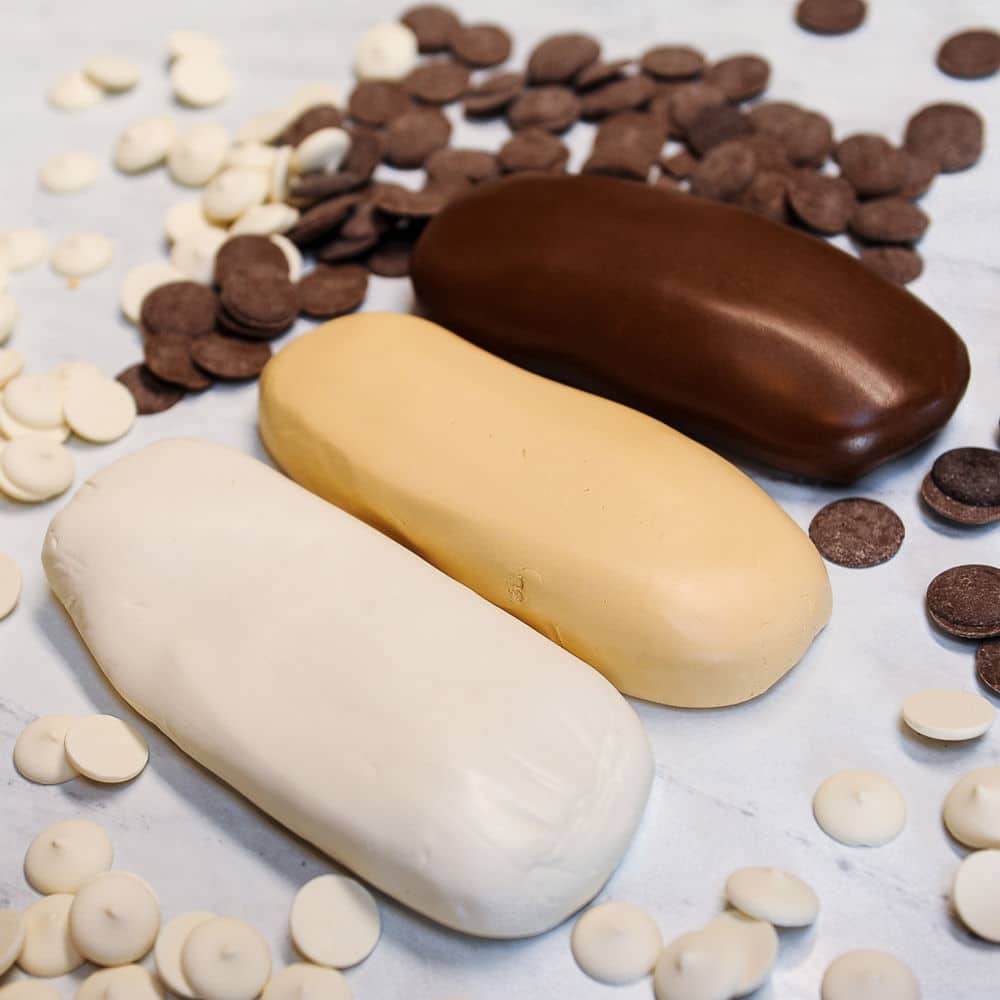
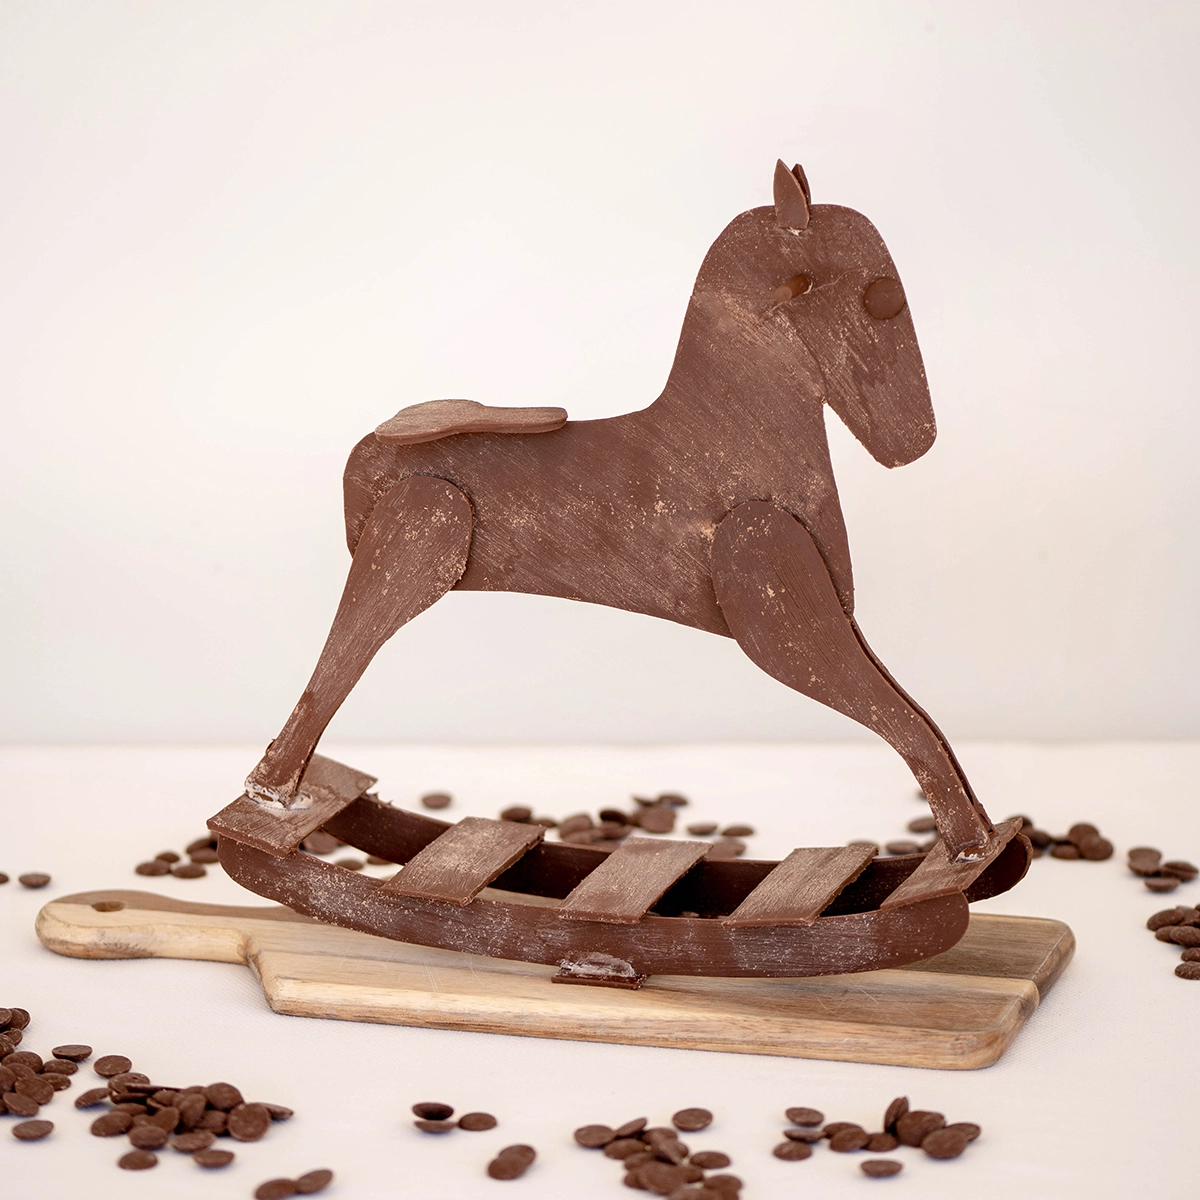
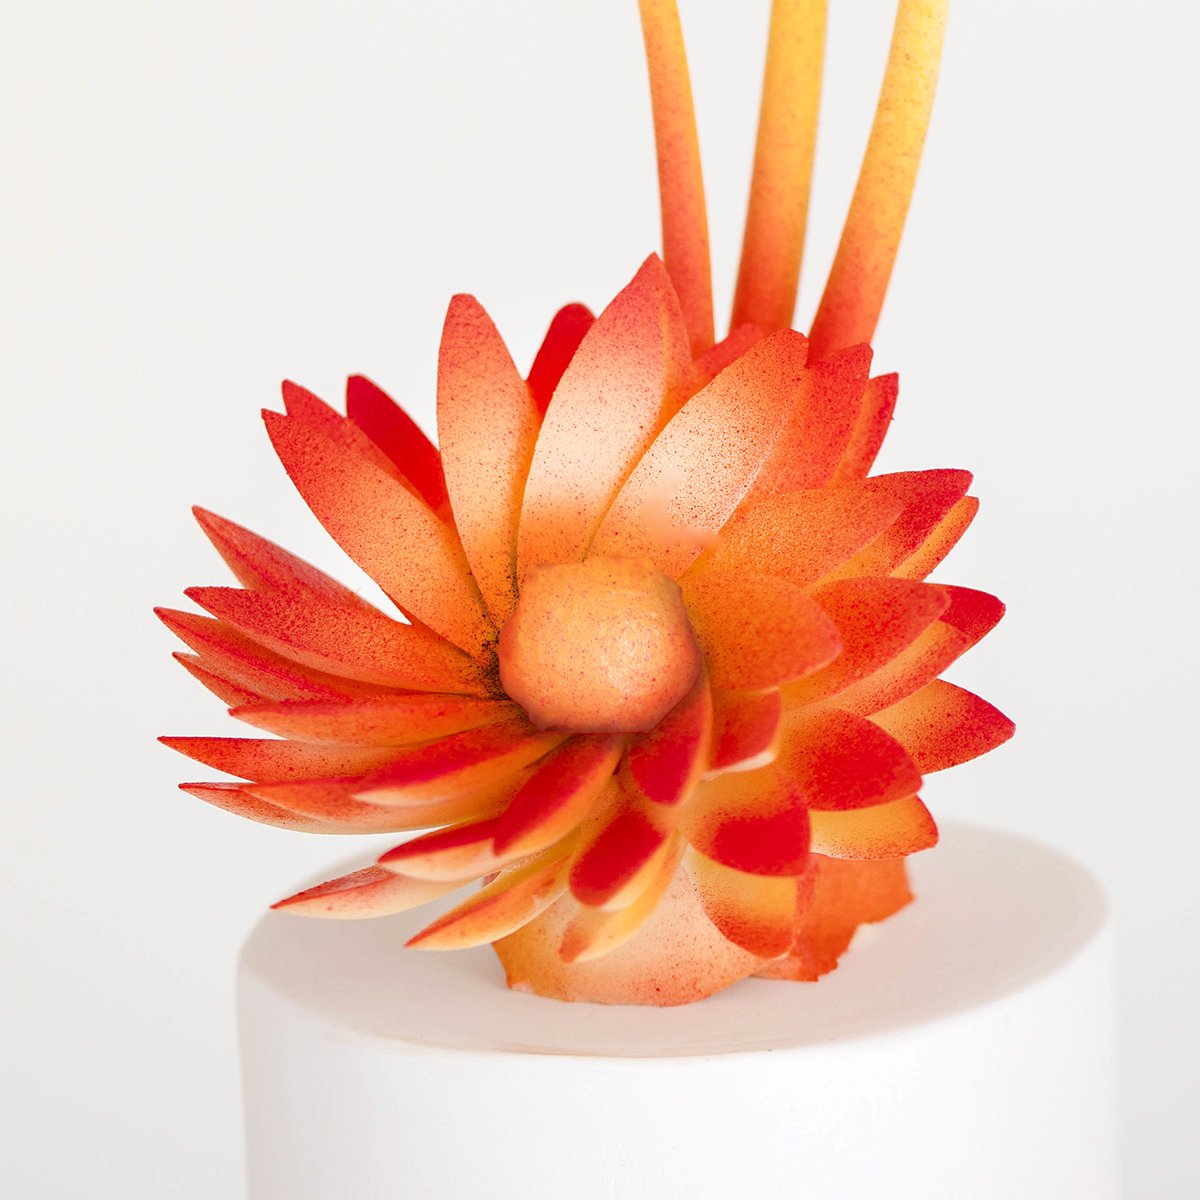
Modeling chocolate is the sculpting medium that professional cake decorators reach for when fondant just will not cut it, and once you try it you will understand why. It holds fine details like a dream, tastes like real chocolate, and gives you the ability to sculpt everything from realistic faces to delicate flowers with something that actually looks and feels like edible clay. I have been using this exact formula for over a decade and it has never let me down.
Quick Glance: Modeling Chocolate Recipe
- Recipe Name: Modeling Chocolate Recipe
- Why You'll Love It: A smooth, clay-like chocolate you can sculpt into figures, flowers, and realistic faces - and it actually tastes amazing, unlike fondant
- Time and Difficulty: 5 minutes active, 2-3 hours to set / Easy
- Main Ingredients: Chocolate or candy melts, corn syrup, optional gel food coloring
- Method: Melt, fold, set, knead
- Texture and Flavor: Pliable and clay-like when worked, firm when rested - rich chocolate flavor
- Quick Tip: Stop mixing the moment the mixture looks like soft-serve ice cream - over-stirring causes the cocoa butter to separate and turn oily
Why This Recipe Works
Modeling chocolate gets its clay-like texture from two things working together: corn syrup and fat. Corn syrup is an invert sugar - it contains glucose and fructose molecules that physically block sucrose crystals from forming, which is exactly why the mixture stays pliable instead of setting hard like regular chocolate.
The fat in your chocolate, whether cocoa butter in real chocolate or vegetable fat in candy melts, acts as a plasticizer. It coats the sugar and cocoa particles and gives the mixture its workable, smooth consistency. This is also why the chocolate-to-syrup ratio matters so much. Too little corn syrup and the mixture is dry and crumbly because the fats have nothing binding them together. Too much and it's sticky and won't hold its shape.
Candy melts are more forgiving than real chocolate because the vegetable fat has a higher melting point than cocoa butter, making it harder to over-soften with your hands. Real dark chocolate is more sensitive but produces a richer, firmer result that's ideal for detailed sculpting.
If you love working with white chocolate, my white chocolate ganache is another must-have recipe that is silky smooth and incredibly versatile for frosting, glazing, and drips.
Modeling Chocolate Ingredients
Modeling chocolate is super versatile and used for a lot of things in the cake decorating industry. I personally use it a lot for sculpting realistic faces because it works very much like clay. You can build it up, smooth out the seams, and it holds details really well.
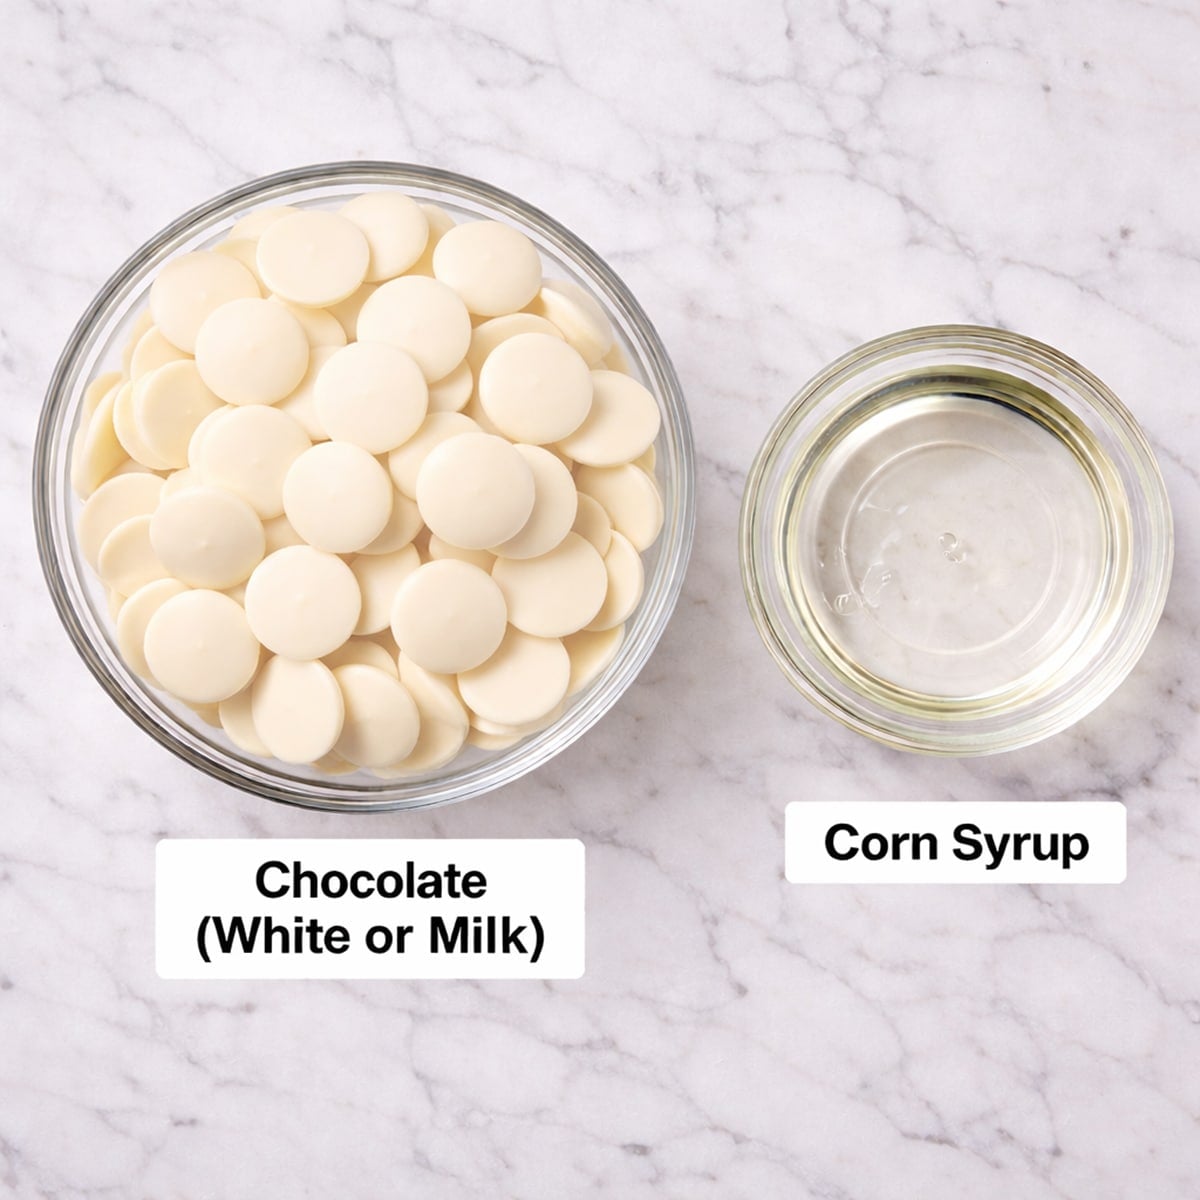
White candy melts are used instead of real white chocolate because they contain vegetable fat instead of cocoa butter, which makes them much more forgiving and resistant to heat. They don't require tempering and are very difficult to scorch. If you prefer real white chocolate, use the same amount but reduce your corn syrup slightly to 3.5 oz since real white chocolate has more natural fat.
Corn syrup is what makes modeling chocolate pliable and clay-like. It's an invert sugar, meaning it interrupts cocoa butter crystallization and keeps the mixture from setting hard and brittle. It must be warmed before adding to the chocolate - if it's too cold it will cause the chocolate to seize unevenly and create lumps. Glucose syrup can be substituted in the same amount, though it may produce a slightly stiffer result.
Gel food coloring is added to color white modeling chocolate. Gel coloring works well here because it's highly concentrated and won't add excess liquid that could throw off the ratio. It's best mixed into the warm corn syrup before combining with the chocolate for the most even distribution. You can also leave the coloring out and color the modeling chocolate later by kneading color in after it has set.
How To Make Modeling Chocolate Step-By-Step
Making modeling chocolate takes minutes! Just melt the chocolate and stir. Most of the time is spent waiting for it to set up again.
- Melt your candy melts or chocolate in a microwave-safe bowl in 30-second increments, stirring between each burst. The chocolate is ready when it's completely fluid and smooth with no lumps.
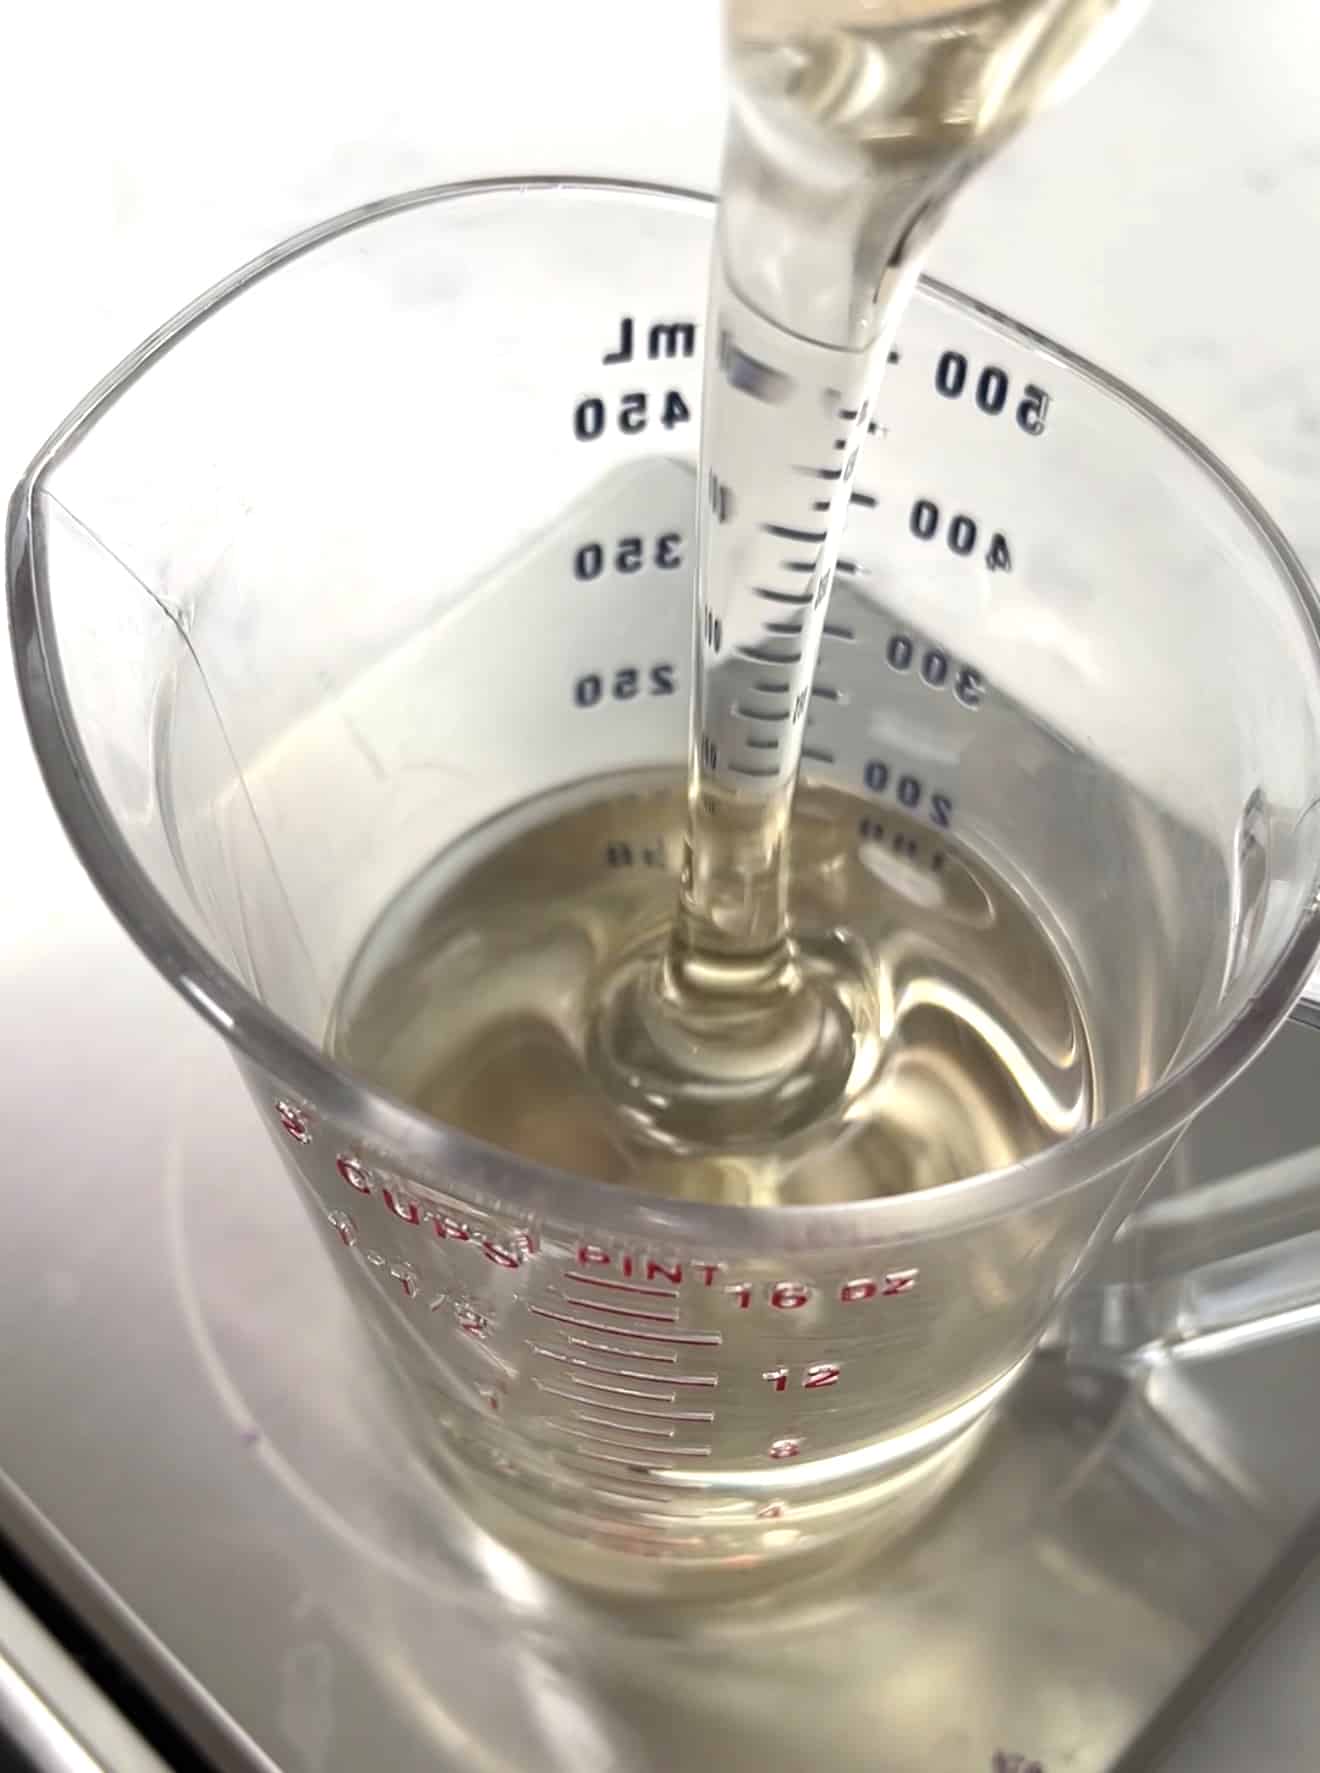
- In a separate small bowl, warm your corn syrup for 10 to 15 seconds until it's just above body temperature and pours easily off a spoon.
- Pour the warm corn syrup into the melted chocolate all at once. Do not add it gradually - adding it in stages causes uneven seizing.
If you're adding in food coloring, add it now.

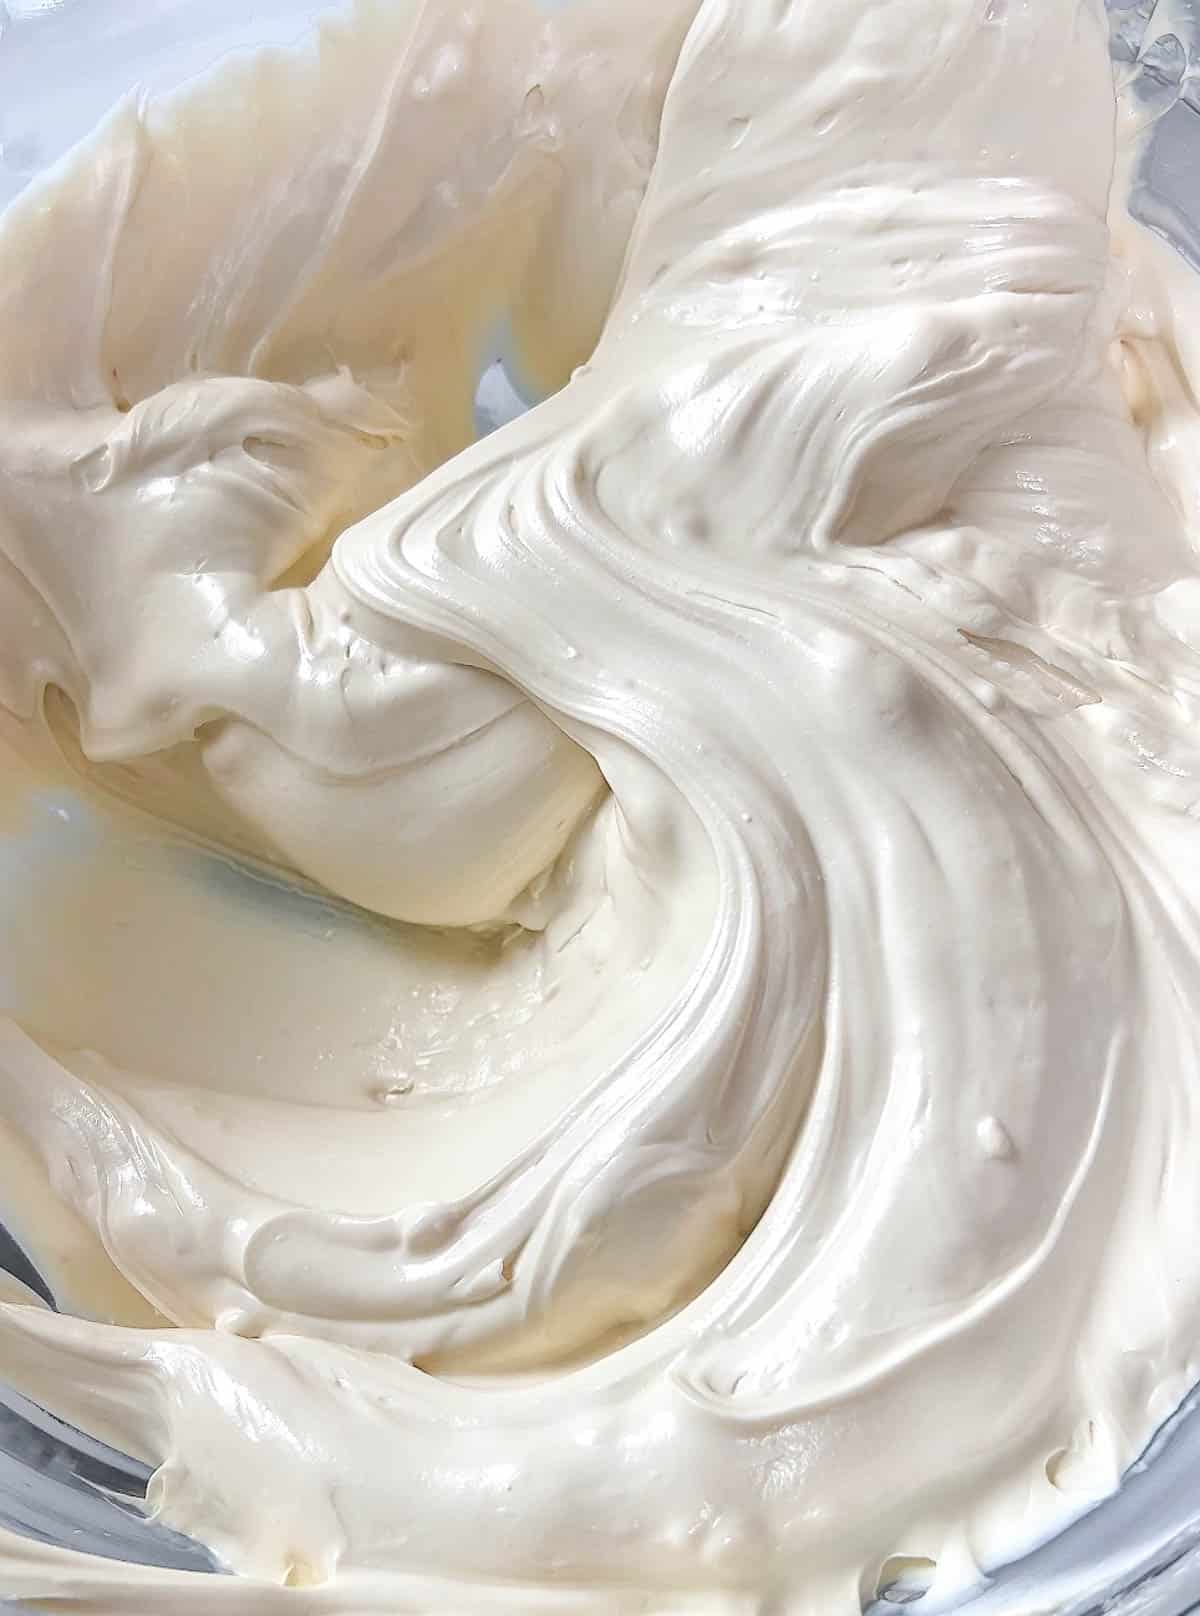
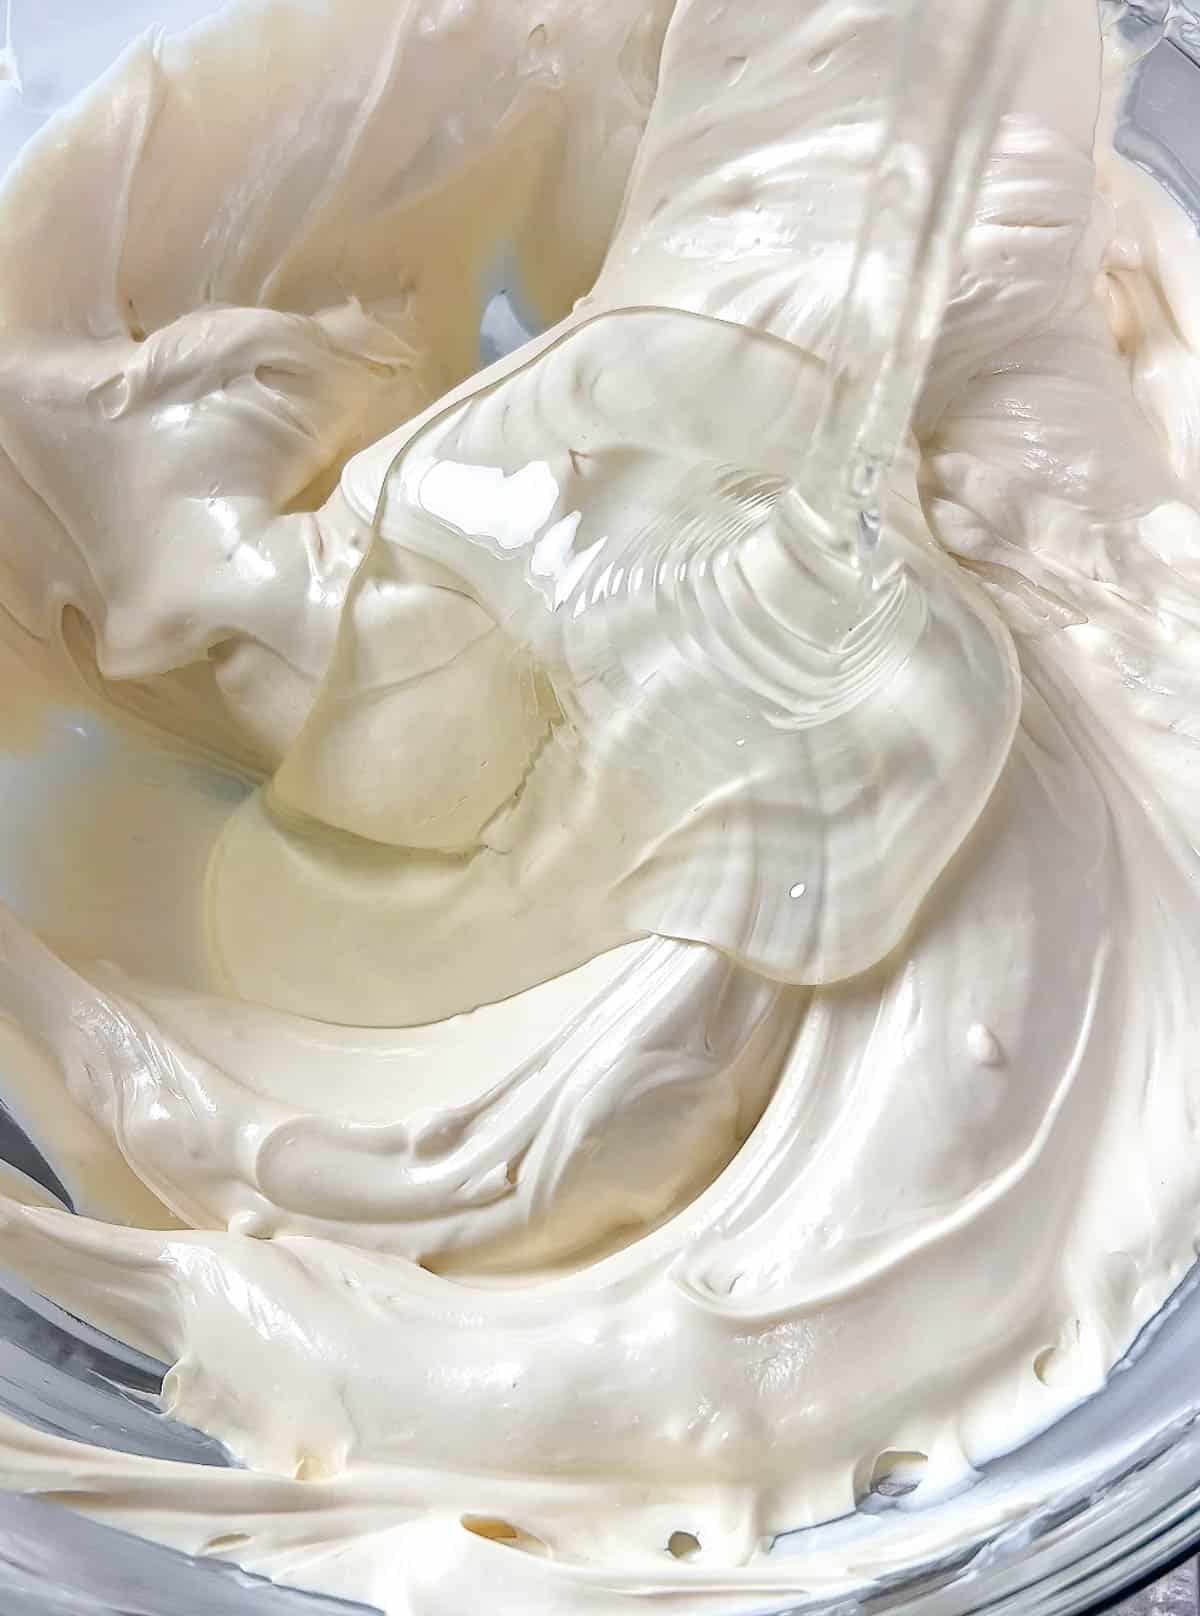
- Fold the mixture together with a silicone spatula using slow, deliberate strokes. Watch carefully as it transforms: the mixture will begin to pull away from the sides of the bowl, thicken, and lose its glossy sheen. Stop the moment it looks like soft-serve ice cream.
EXPERT TIP: Different types of chocolate will need different amounts of corn syrup. See the recipe card below for measurements.
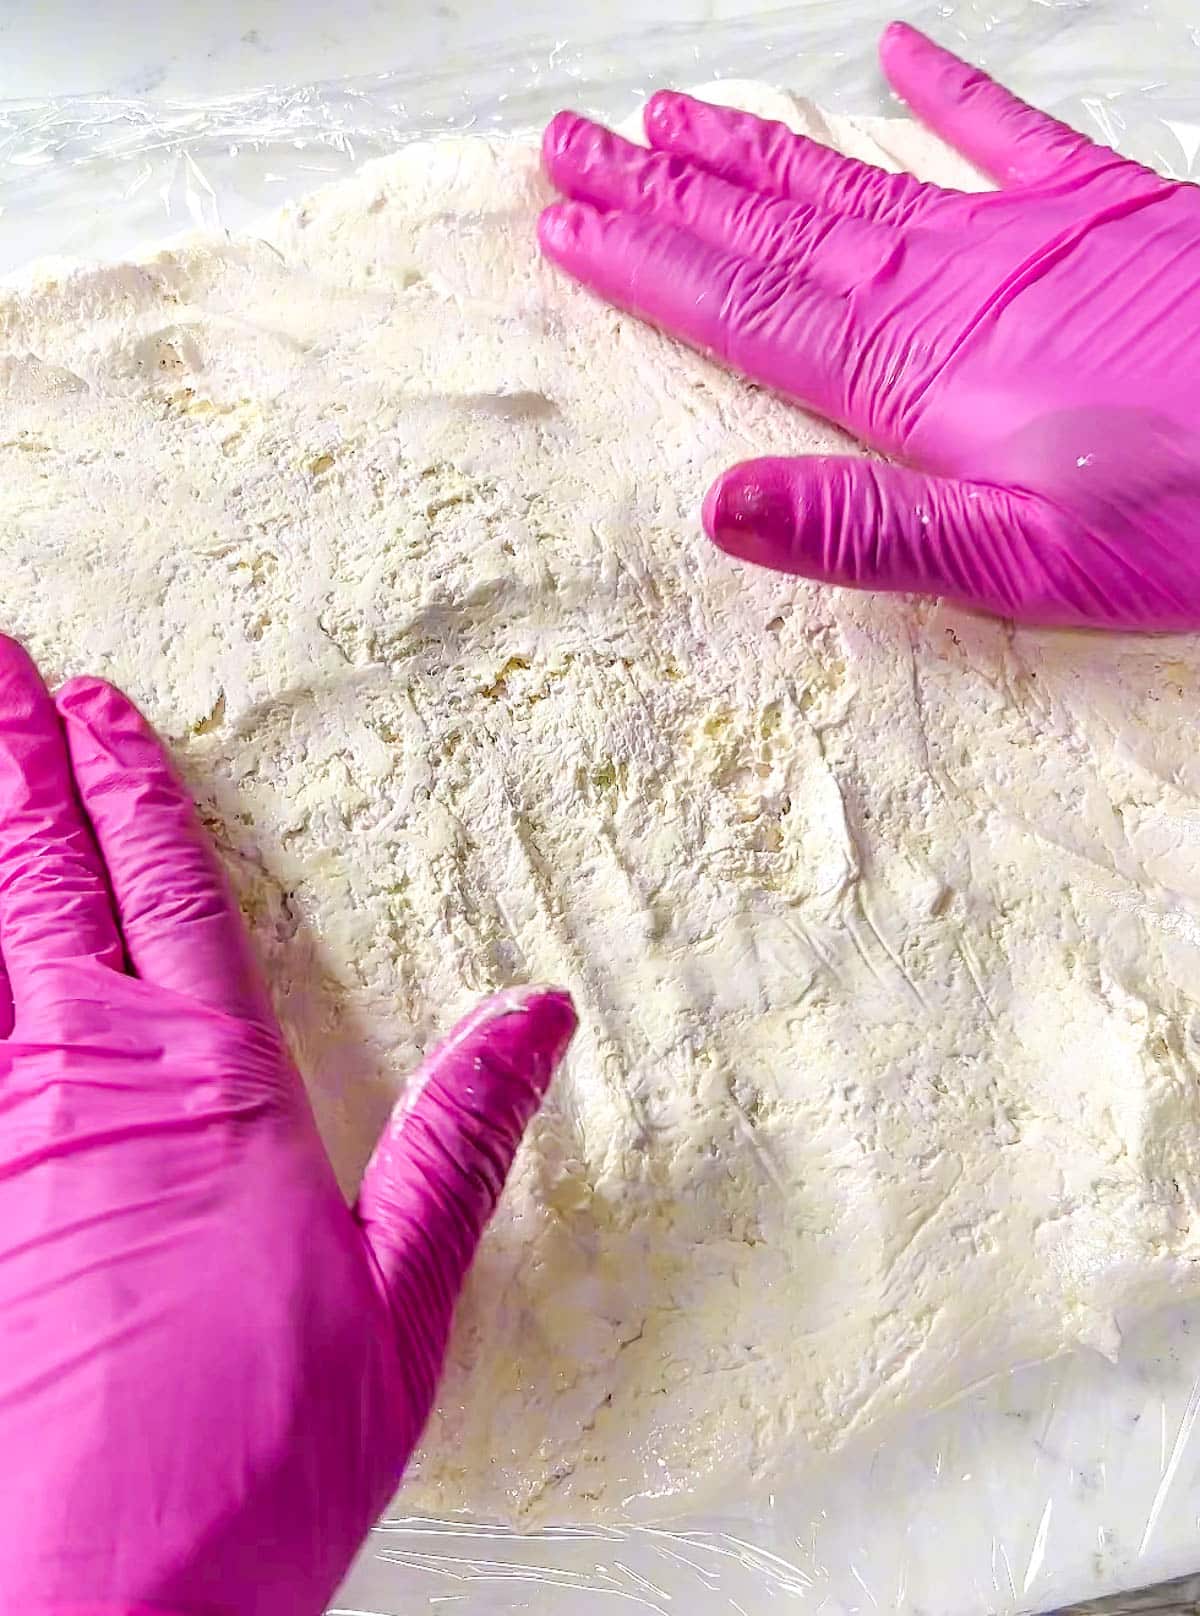
- Immediately scrape the mixture onto a large sheet of plastic wrap. It will feel thick and slightly grainy, but that's normal.
Press it into a flat disc about half an inch thick so it sets evenly, then wrap tightly.
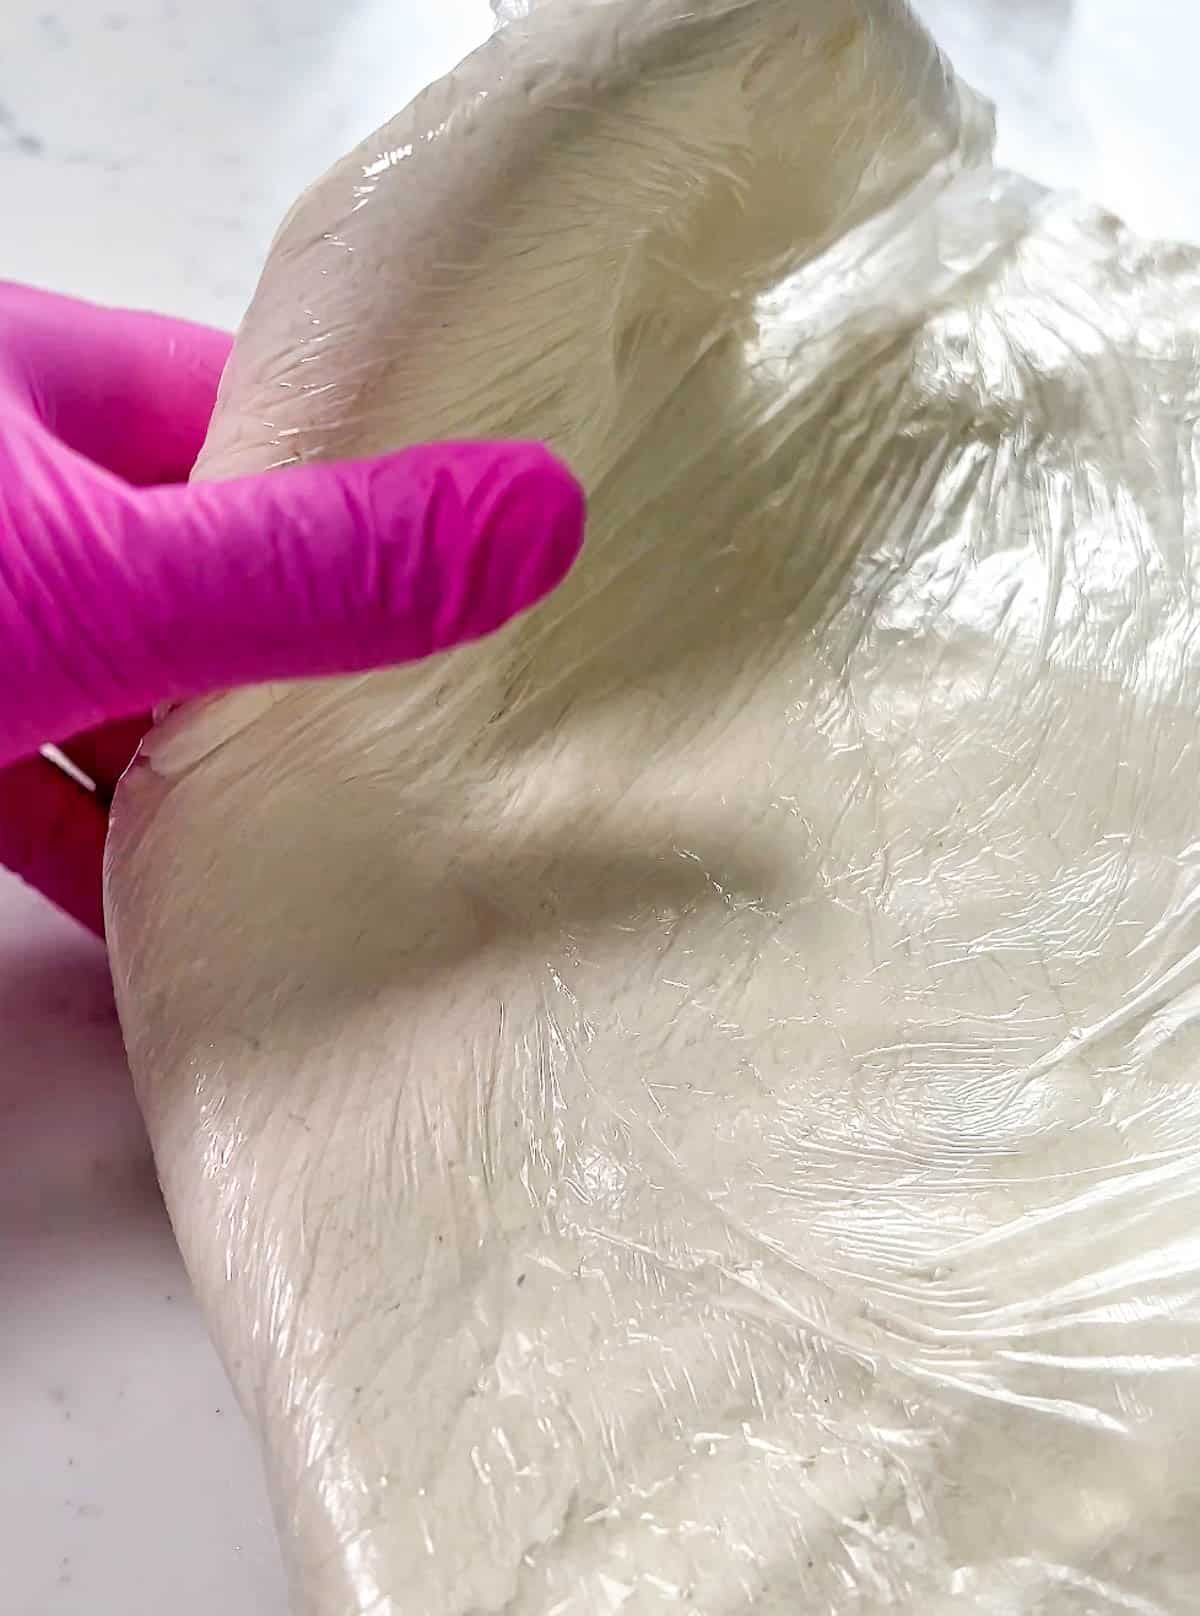
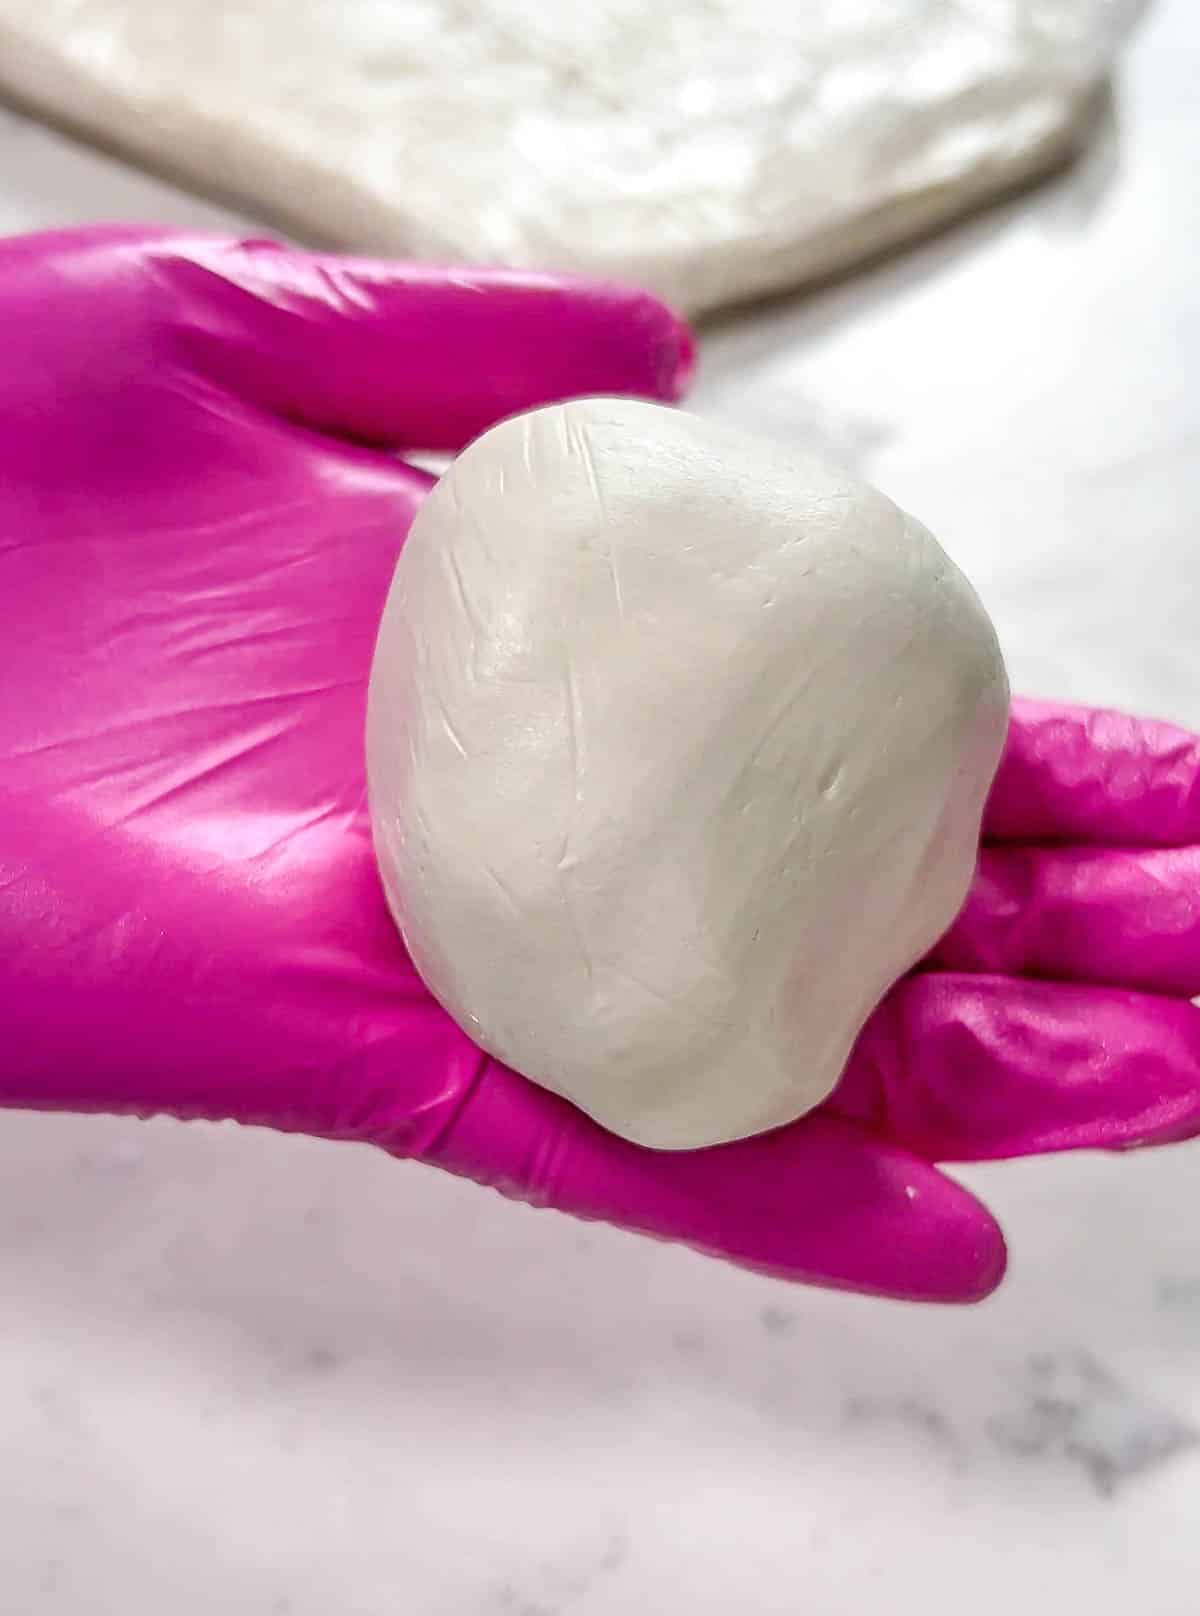
- Let it set at room temperature for 1 to 2 hours. It's ready to knead when it's firm but has a slight give when you lift it up to bend it.
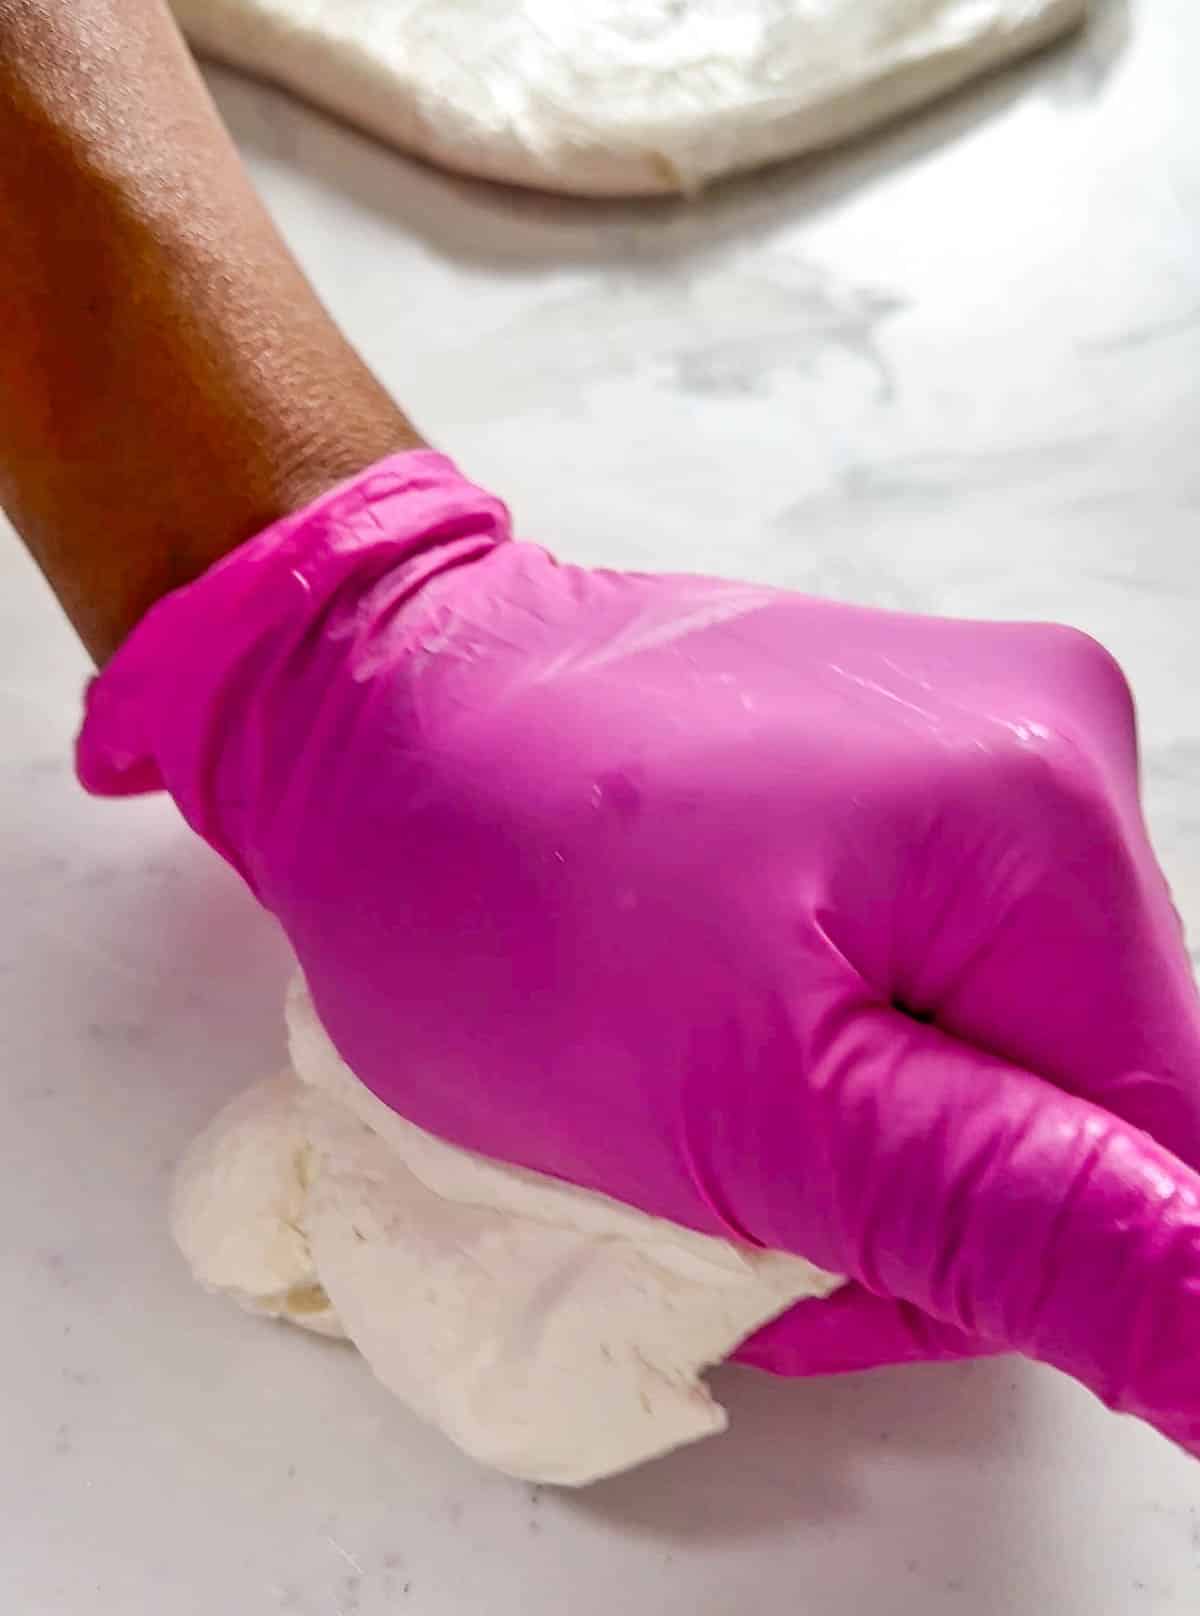
- Unwrap and knead a handful for 2 to 3 minutes, pressing any hard lumps firmly against the table with the palm of your hand and pushing forward. The warmth and pressure will smooth everything out until the texture is completely uniform. This technique is called fraisage.
- Once the modeling chocolate is smooth, re-wrap and let it set at room temperature. If you leave it overnight it will set up completely rigid. This is normal. Just re-warm in the microwave for about 10 seconds and knead again until pliable before use.
Common Mistakes To Avoid
Over-mixing the chocolate. This is the number one mistake. If you keep stirring past the soft-serve stage, the cocoa butter separates out and pools on the surface of the mixture. If this happens, do not panic - stop immediately, let it cool completely, and then slowly work the oil back in by folding it back together with your hands. It takes patience but can be rescued.
Adding cold corn syrup. Cold corn syrup hitting warm, melted chocolate causes the chocolate to seize on contact before everything is evenly incorporated. Always warm your corn syrup before adding it.
Expecting it to be soft when fully set. Modeling chocolate is always very hard after it's been resting for several hours or overnight. This is not a sign that something went wrong. It softens back to a workable consistency after 5 to 10 seconds in the microwave and 2 minutes of kneading.
Holding the chocolate too long in your hands. Unlike fondant, modeling chocolate is extremely sensitive to heat. If you hold it while thinking through a detail, it will become soft and greasy before you use it. Work quickly, let the table support the piece, and use a smooth clay tool for refining details rather than your fingers.
Using the wrong ratio for your chocolate type. Candy melts, white chocolate, and dark chocolate all have different fat contents and require different amounts of corn syrup. Always follow the ratio chart for your specific chocolate type.
Modeling Chocolate FAQs
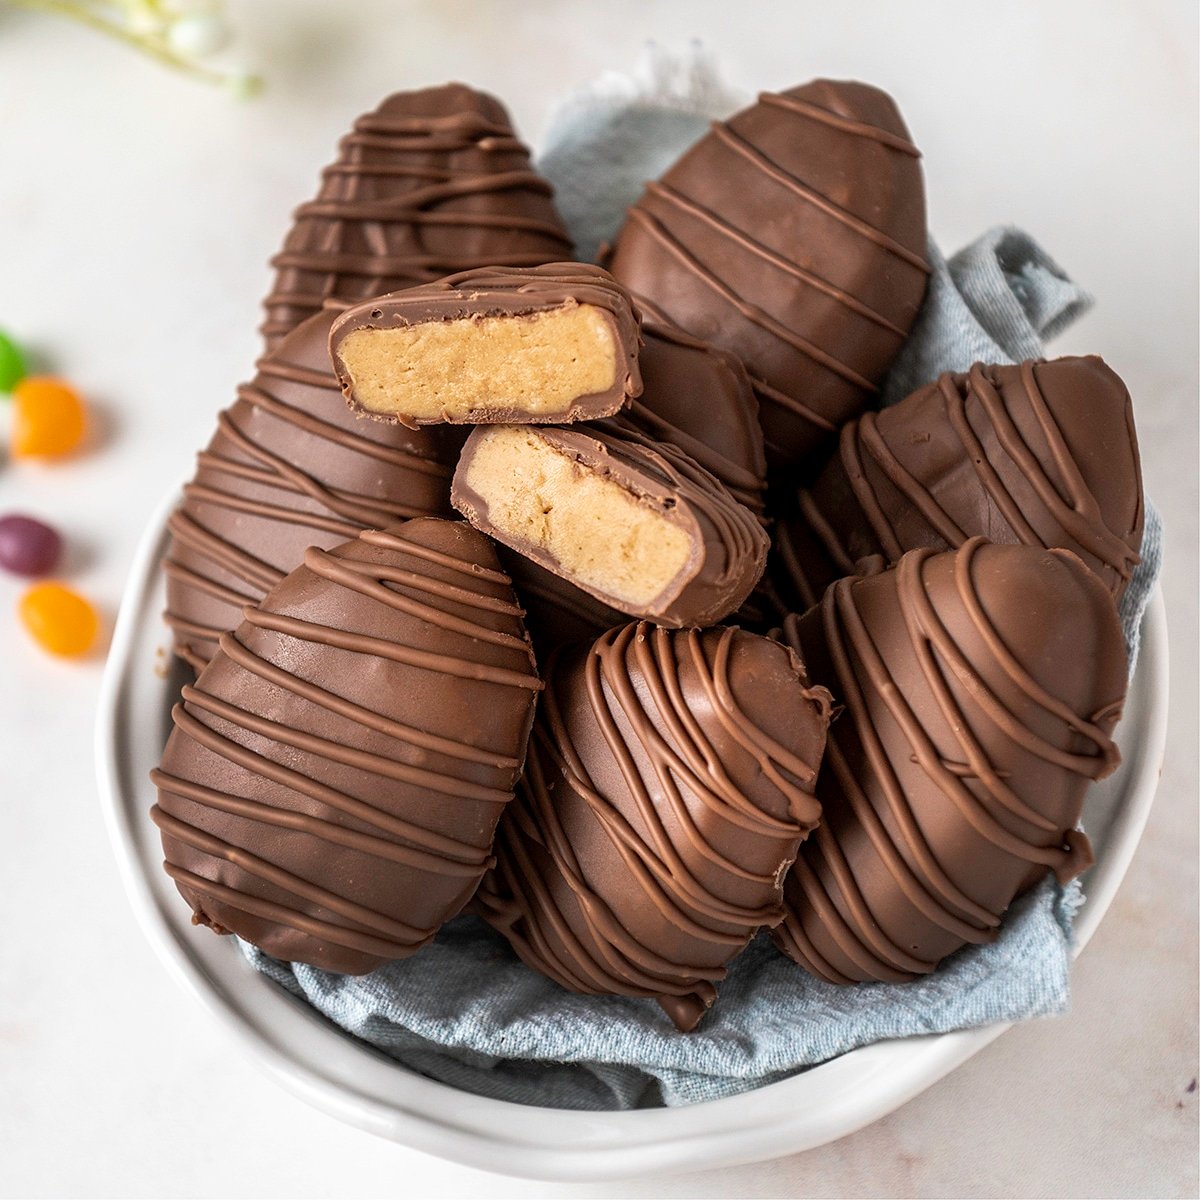
Modeling chocolate is used for sculpting cake toppers, figures, realistic faces, flowers, bows, and decorative accents. It behaves like clay - you can build it up in layers, blend seams until they disappear, and press fine texture details into the surface. It's especially popular for professional sculpted bust cakes because it holds anatomical details far better than fondant. Some decorators also use it to panel tiered cakes as an edible alternative to fondant panels.
Modeling chocolate and fondant are both edible sculpting mediums but they behave very differently. Fondant is stretchy and elastic, which makes it ideal for covering cakes smoothly. Modeling chocolate has no stretch - it's clay-like and holds edges and details precisely. Modeling chocolate is also significantly better tasting than fondant because it's made from real chocolate and corn syrup. For covering cakes in modeling chocolate, you must panel rather than drape it.
Mix gel food coloring directly into the warm corn syrup before combining it with the chocolate. This distributes color evenly throughout the mixture without requiring extra mixing after the chocolate is combined. For very deep colors like black or burgundy, start with dark chocolate as your base so you need less color to reach the target shade. Expect the color to deepen slightly as the modeling chocolate sets and cures.
Yes, you can substitute glucose syrup in the same quantity as corn syrup. However, glucose is thicker and less fluid than corn syrup, which can make the modeling chocolate slightly stiffer and more prone to crumbling. If the mixture sets too firm, add an additional half ounce of glucose and knead it in after re-melting. The correction process is forgiving - there's no need to throw out a batch that doesn't set correctly.
Oily modeling chocolate means the cocoa butter separated out because the mixture was over-stirred. Let it cool completely at room temperature, then slowly knead the oil back into the mixture by folding and pressing. Work slowly and patiently. It may take several minutes, but the oil will reabsorb back into the chocolate and the texture will smooth out again.
Crumbly modeling chocolate is most often caused by too little corn syrup or by the corn syrup being added too cold, which caused uneven incorporation. If the ratio is off, re-melt the batch, add an additional half ounce of warm corn syrup, and start the process again. If it's simply been resting overnight and hardened, microwave for 5 to 10 seconds and knead firmly for 2 to 3 minutes - most crumbliness resolves within a few minutes of working it.
Yes, modeling chocolate is made entirely from edible ingredients - chocolate and corn syrup. It's much more pleasant to eat than fondant and tastes like a soft, dense chocolate candy. Guests who normally remove fondant from their cake slices will typically eat modeling chocolate decorations.
More Chocolate Recipes To Try

Ready To Master Cake Decorating?
Join Sugar Geek University and learn professional techniques through detailed cake decorating courses, tutorials, and real kitchen demonstrations by
award-winning cake decorator, Liz Marek.

Recipe
Ingredients
White Modeling Chocolate (from melties)
- 16 oz white candy melts
- 4 oz corn syrup (or glucose) Warmed for a few seconds until about body temperature
- Few drops gel food coloring If you plan on coloring, if not, leave out
Modeling Chocolate (from real chocolate)
- 16 oz chocolate (any kind)
- 6 oz corn syrup
Instructions
- Melt the chocolate or candy melts in 30 second increments until smooth.
- Warm corn syrup for 10-15 seconds and add food coloring. Remember that your final product will be lighter than the color of your corn syrup. You can also add color later if you want.
- Fold mixture together with a spatula until mixture starts to seize and resembles soft serve ice cream.
- It is important to not over-mix or your modeling chocolate will get oily.
- Pour it onto some plastic wrap. Press into a flat disc about half an inch thick so it sets evenly. Wrap it up and let set until chocolate is firm but still pliable. Usually a couple of hours depending on how hot it is in your room.
- Unwrap chocolate and knead until smooth, smashing any hard lumps with your fingers.
- Re-wrap chocolate and place back in plastic wrap to set up until hard.
Video
Notes
Nutrition
{ "@context": "https://schema.org", "@type": "WebPage", "@id": "https://sugargeekshow.com/modeling-chocolate-recipe/", "name": "Modeling Chocolate Recipe", "about": [ {"@type": "Thing", "name": "Modeling chocolate", "sameAs": "https://en.wikipedia.org/wiki/Modeling_chocolate"}, {"@type": "Thing", "name": "Corn syrup", "sameAs": "https://en.wikipedia.org/wiki/Corn_syrup"}, {"@type": "Thing", "name": "Cocoa butter", "sameAs": "https://en.wikipedia.org/wiki/Cocoa_butter"}, {"@type": "Thing", "name": "Compound chocolate", "sameAs": "https://en.wikipedia.org/wiki/Compound_chocolate"}, {"@type": "Thing", "name": "Chocolate", "sameAs": "https://en.wikipedia.org/wiki/Chocolate"}, {"@type": "Thing", "name": "Food coloring", "sameAs": "https://en.wikipedia.org/wiki/Food_coloring"}, {"@type": "Thing", "name": "Cake decorating", "sameAs": "https://en.wikipedia.org/wiki/Cake_decorating"}, {"@type": "Thing", "name": "Confectionery", "sameAs": "https://en.wikipedia.org/wiki/Confectionery"}, {"@type": "Thing", "name": "Sugar sculpture", "sameAs": "https://en.wikipedia.org/wiki/Sugar_sculpture"}, {"@type": "Thing", "name": "Invert sugar", "sameAs": "https://en.wikipedia.org/wiki/Inverted_sugar_syrup"} ] }

Heather says
Hi. I have tried several times but always end up with lumps. I’ve tried microwaving after set a few seconds and kneading, but they don’t go away! What can I do for smooth modeling chocolate?
I’m using white Wilton melts
The Sugar Geek Show says
The key to not having lumps is to knead the chocolate when it's half set as in the directions, otherwise you will have lumps
Bobbie jo wehrman says
When you say panel the chocolate to cover the cake does that mean? Im and experienced baker but i work with on the heartier side yeast breads and such. Ive been asked ro make birthday cakes and i want to expand my selections can you expain the method on how to cover the cake also if i wanted to do a figure should i or can i make it all out of modeling chocolate or would covering rice crispy figure be better? Thank you
The Sugar Geek Show says
Check out my tutorial on paneling for more info on that technique. To make small figures you would use straight modeling chocolate or a wire structure if it's a dynamic figure like my my little pony topper
Kavya r says
Hello Liz,
How do I fix modeling chocolate which turned dry and crumbly after setting it for the second time? Please help I’ve make 2kgs of it and I’m worried if I have to dump it all in the garbage! ?
Kavya
The Sugar Geek Show says
It's always dry and crumbly when it's set. You have to microwave for a small piece (about the size of your hand) for about 5-10 seconds to just slightly soften it and then knead it until it's smooth. This is just the nature of modeling chocolate. If you warm it too much it will become soft and oily. In which case you just let it set up again. You never have to throw out modeling chocolate.
Puspa says
Hi,
Is the Ratio for compound chocolate is same? Tq
The Sugar Geek Show says
Yes, thats what I use
Michelle Morgan says
Could this be used to cover a cake instead of fondant?
The Sugar Geek Show says
Modeling chocolate doesnt have any stretch to it so if you use it to cover a cake you would have to panel
Andrea says
How long in frig before it's half set.
The Sugar Geek Show says
I don't put it in the fridge, I leave it on the countertop. The fridge will cause it to harden too quickly
C. Reed says
Two questions,
Do you ever make it with colored candy melts?
And any secrets to rolling it out thin? Put anything down like powdered sugar?
The Sugar Geek Show says
Yes you can use colored candy melts but typically more color is needed because the colors are not very bright. To roll mod choc out thin I do use powdered sugar like you would for rolling out fondant
Susheila says
Hi there, thank you for this recipe. I was wondering how long do you knead for to get smooth. Mine seems to be crumbly and following some advice given above I warmed it in microwave and now it's crumbly and a bit oily. Help? ?Thanks
The Sugar Geek Show says
If it's oily, it's too hot. Knead until it's smooth but only heat for maybe 5 seconds
Azinta Alvares says
Hi Liz,
Mine has the same issue. When I tried kneading it at the half set stage. The dough was held together but it was a little crumbly when broken into.
So I saw a comment where you said to remelt it and add more corn syrup which will make it smoother. (Did I get that right?), which I proceeded to do, which got me to the next question. When you say remelt. The consistency is to be like the original white chocolate? Cause I didn't get that far. I stopped when all the oil started to separate. Which obviously is because it got too hot..so I guess I need clarification on what consistency should be so that I can add more corn syrup..
But also now that I have this oily mess, you have mentioned I can just knead it back in after it cools off. If it doesn't get smooth after doing this, is there anyway to salvage it?
Sorry for the lengthy query!! But your techniques are off the hook! And I'm forever amazed by the work you share. I'm saving up to sign up to your tutorials!!
The Sugar Geek Show says
Yes the oil will start to separate if you re-melt, that is why you knead it all back in when it's half set and the oil is the consistency of shortening and not yet hard.
Scarlett says
id like to make this but would like to have the raitio for both white and dark choc so i can mix with fondant. a lady made it on her cake and i loved it but she would not tell ratio she just said half fo danr and half moderling choc but i tried making it ones and i failed thanks
The Sugar Geek Show says
I don't know what the question is. The ratios are stated in the recipe for white chocolate or regular chocolate. I dont know what "danr" is.
Jodi Morgan says
I think it's supposed to say "half fondant and half modelling chocolat" I guess to make a softer chocolate flavoured fondant to cover cakes?
Cath says
I need help. I read a lot of articles on modeling chocolates. I did the instructions exactly and I was able to create different colored modeling chocolates but when I started working with them (creating cake topper figures), they started to melt and become oily so quickly in less than 10 seconds. I don't even want to touch it. I live in Asia and our weather is not all year round. Does this mean it's never be suitable for me to use modeling chocolate?
The Sugar Geek Show says
Modeling chocolate is sensitive to the heat of your hands and the room so yes if it's very hot where you are then the chocolate will melt.
Cecil says
Is there any way to get the chocolate softer once set? I would like to cut the chocolate with a knife so I am thinking of adding some butter to get a play doh/fondant consistency ... have you tried something like that?
Thanks!
The Sugar Geek Show says
When your modeling chocolate is set it will be very hard, once you start kneading it and working with it, it becomes very soft. If it't really hard, try microwaving it for 5 seconds to get it warmed up. I would not add any sort of butter or anything like that, it's not going to react the way you think, its just going to be an oily mess.
Charles Forsyth says
Quick note to say what a very talented artist you appear to be in the clips I watched. Anxious to try your recipe, but am confused on the "white chocolate" thing. I know the difference between true white chocolate and the white chocolate coating/baking bar/candy melt products. I have found white chocolate in chip form--the cocoa butter level is consistent (along with other ingredients) to that of the white chocolate one would order from a supplier etc., and seems to have the same properties in all other recipes I've tried it in. In your comments (and I have to commend your patience with a couple) you mentioned that you wouldn't use chips for your recipe. Just curious if you feel that would apply in my case---just thought if I am going to end up chopping up a block of white chocolate why would there be any difference if I used chips? Appreciate comments, thank you for posting your recipe and suggestions, and your obvious willingness to help others create!
The Sugar Geek Show says
The reason I don't recommend using real white chocolate is because it has a lot of cocoa butter in it which tends to separate out of the modeling chocolate. I hope that clears it up for you.
Arlette Pace says
Is there a way to get white chocolate from real chocolate? Mine is very yellow and I need it to be white. I do not have access to candy melts.
The Sugar Geek Show says
No but you can add white food coloring to your corn syrup to make it whiter 🙂
Alyssa says
If you make it white to add food coloring later, is it similar to adding color to fondant? A drop and knead to get the desired color?
The Sugar Geek Show says
Yep, same way but you'll need more color to tint chocolate then you normally need for fondant
Debra shipp says
CAN you use colored wilson chips? Like red or do you need to start with white and color them?
The Sugar Geek Show says
You can definitely start with colored if you have them