
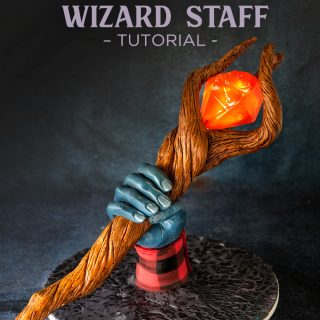
This Onward wizard staff cake tutorial is one of my favorite collaboration projects. I made it as part of a video swap with a few of my YouTuber friends, and it gave me an excuse to finally try making a glowing isomalt gem without a mold. The result is a sculpted wizard staff with a glowing diamond gem, a modeling chocolate hand, a hand-bent PVC handle, and a crackled fondant board, all inspired by Disney Pixar's Onward.
Quick Glance: Onward Wizard Staff Cake
- Tutorial Name: Onward Wizard Staff Cake
- Why You'll Love It: Glowing isomalt gem, sculpted modeling chocolate hand, and a movie-night-worthy fan project that uses every cake-decorating skill you have
- Time and Difficulty: 6 to 8 hours • Advanced
- Main Materials: Isomalt, modeling chocolate, fondant, foil tape, PVC pipe, fairy lights, ivory food coloring
- Method: Cast a custom isomalt gem in a foil-covered paper mold, sculpt the hand in modeling chocolate, bend the PVC handle with a heat gun, texture and paint the staff to look like wood
- Visual Style: Sculpted, fantasy, fan-art-meets-cake-decorating
- Quick Tip: Hide the LED light behind the gem rather than embedding it inside. Way easier and looks just as magical from the front.
Jump to:
- Quick Glance: Onward Wizard Staff Cake
- What Is the Onward Wizard Staff
- Equipment and Supplies Needed
- Free Paper Diamond Mold Template
- How to Make the Glowing Isomalt Gem
- How to Sculpt the Modeling Chocolate Hand
- How to Bend PVC Pipe with a Heat Gun
- How to Texture and Paint the Wizard Staff
- How to Cover the Board with Crackled Fondant
- Common Problems to Avoid
- Final Thoughts
- Onward Staff FAQs
- More Tutorials To Try
- Ready To Master Cake Decorating?
What Is the Onward Wizard Staff
The wizard staff is one of the central props from Disney Pixar's 2020 movie Onward, a fantasy adventure where two elf brothers go on a quest to bring back their late father using a magical staff. The staff has a glowing gem at the top that powers all the magic, which made it the perfect candidate for an isomalt-and-LED cake project.
I made this staff as part of a YouTube collaboration with a few of my decorator friends, and decorated it as a movie-release tribute. The whole project comes together in 6 to 8 hours of sculpting and finishing time, not counting the dry time for fondant.
Equipment and Supplies Needed
For the gem:
- Isomalt (I use ready-to-melt sticks)
- Heavy duty aluminum foil tape
- Cardstock or thick paper for the mold template
- Battery-operated LED tea light or single fairy light
- Gold or amber food-safe luster dust (optional, for tinting)
For the hand:
- Blue modeling chocolate (homemade or store-bought)
- Modeling tools (ball tool, knife tool)
- Plastic wrap for storage
For the staff:
- ½ inch PVC pipe (length depends on your design)
- Heat gun
- Heatproof gloves
- Modeling chocolate or fondant for the wood layer
- Wood-grain modeling tool or veining tool
- Ivory food coloring
- Soft food-safe brush for painting
For the base and details:
- Cake board
- Crackled fondant (recipe linked below)
- Plain fondant (for the painted plaid shirt detail)
- Food-safe paint or food coloring + clear alcohol for painting
Free Paper Diamond Mold Template
Download my free paper diamond mold template below. You'll print it, fold the diamond shape, cover the inside with aluminum foil tape, and pour your hot isomalt directly into the mold to set.
[optin-monster slug="indznicadkrnszobbp4a"]
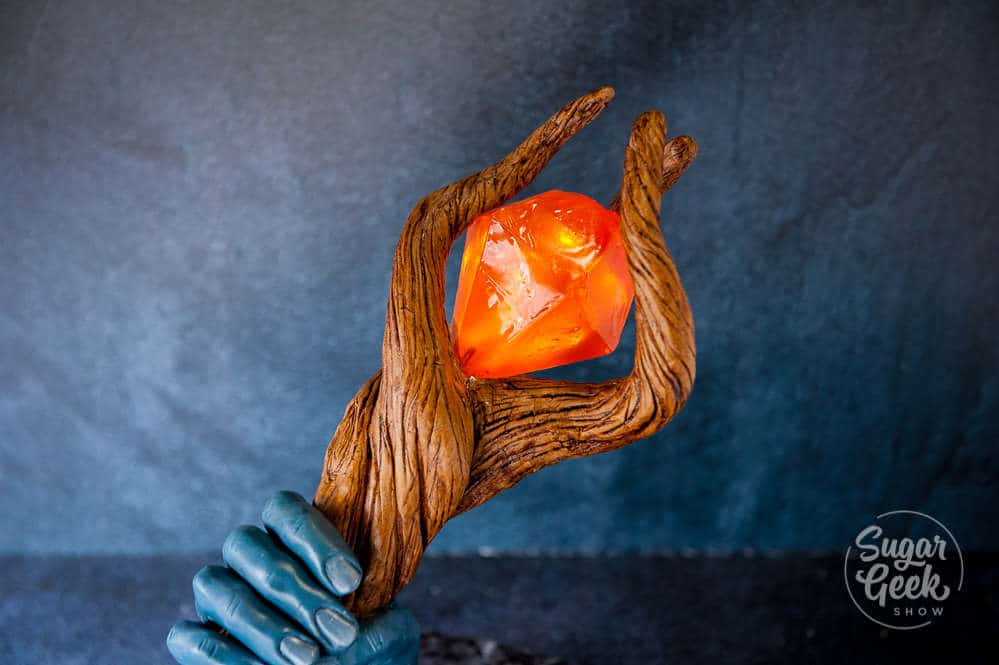
How to Make the Glowing Isomalt Gem
The isomalt gem is the star of the staff. Here's how to make a custom one without buying a mold.
I designed my gem using a paper diamond template, then covered the inside of the paper mold with heavy duty aluminum foil tape. Foil tape gives you a smooth, heat-safe surface that the hot isomalt won't stick to or melt through.
Pour the melted isomalt into the foil-lined mold and let it cool completely before peeling away the paper. The gem pops out clean every time.
A few options I considered for the lighting:
Hiding a single LED behind the gem and embedding it into the fondant prong holding the gem. This is what I went with. The light shines through the back of the gem and looks magical from the front. The back isn't perfect but the camera (and your guests) only see the front.
Embedding a fairy light inside a gummy candy gem. Pretty, but the gummy texture diffuses the light too softly and there was no good way to switch it on once it was inside.
Running battery-operated fairy lights through the staff and switching them on at the base. The wires would have to come out somewhere visible, which broke the look.
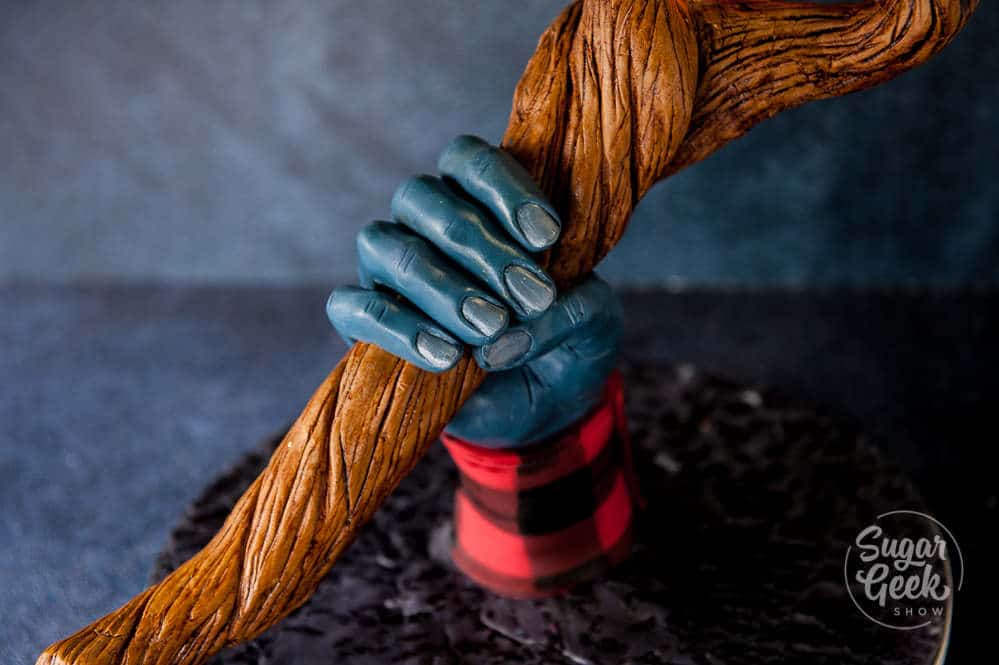
How to Sculpt the Modeling Chocolate Hand
The hand on the staff is made of blue modeling chocolate. Modeling chocolate behaves a lot like water-based sculpting clay but is firmer and harder to blend, so it holds detail really well once you smooth it.
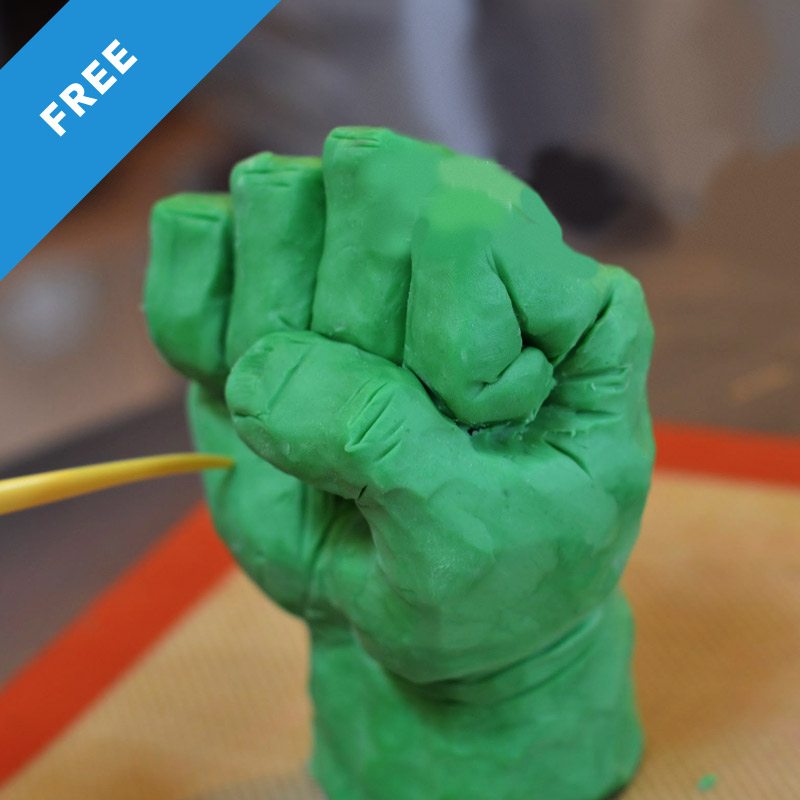
I learned a lot of my hand-sculpting technique from this hand sculpting video from sculptor Philippe Feraut, who is one of my heroes. For a more detailed walkthrough of how I sculpt knuckles, fingers, and realistic hand shape, watch my Hulk fist tutorial. I go step by step in that one and the same technique applies here.
For the wizard staff specifically, the hand is gripping the staff so you only need to sculpt the front of the fingers and the knuckles. The back of the hand is hidden against the staff, which makes this a great first hand-sculpting project if you're new to it.
How to Bend PVC Pipe with a Heat Gun
This was the discovery of the project for me. I had no idea PVC pipe was so easy to bend with just a heat gun.
Heat the section of PVC you want to curve evenly with a heat gun until it goes soft and pliable, then bend it carefully into your desired shape. Hold the bend until the PVC cools and locks in place. Done.
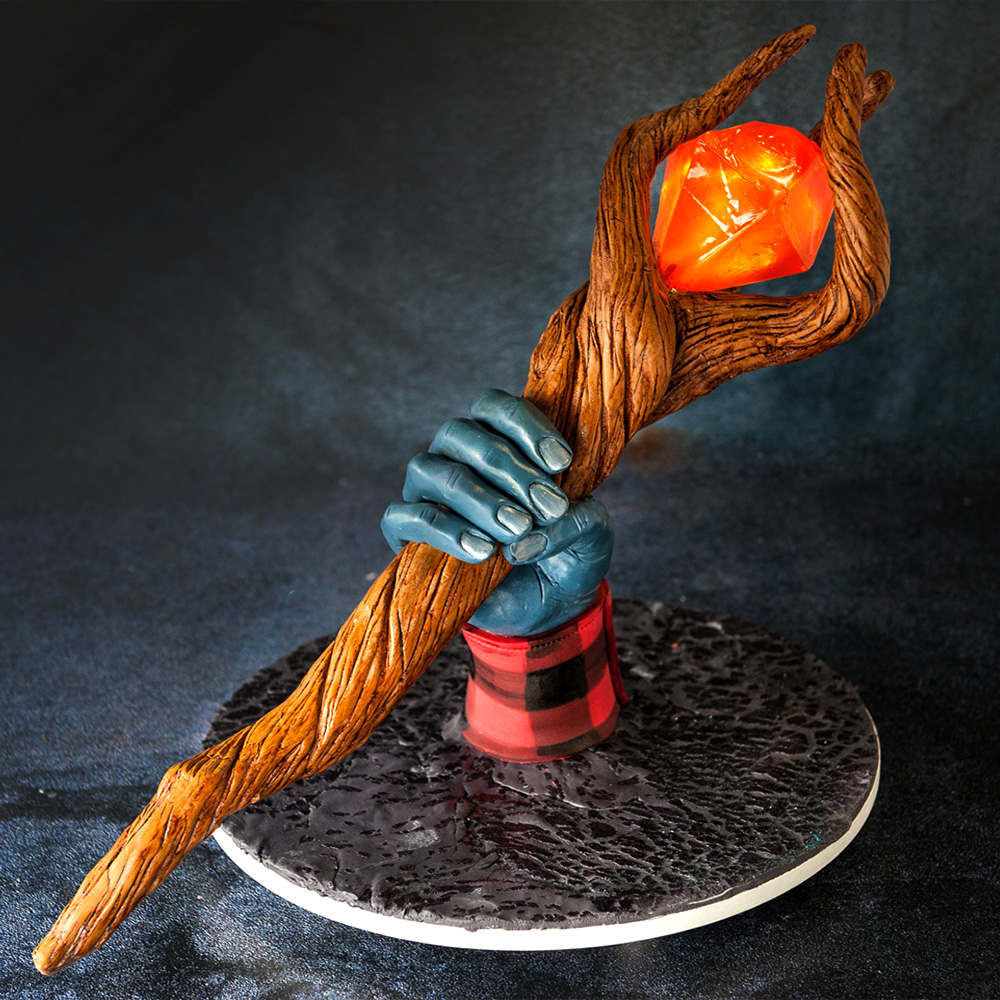
For the wizard staff, I added a slight curve to the top so the gem and hand sat at a more natural angle. Any time you're making a sculpted cake and need a slight bend in the PVC support, this is the trick. Wear heatproof gloves and keep the heat moving so you don't melt or scorch one spot.
How to Texture and Paint the Wizard Staff
The wood texture on the staff is simpler than it looks.
Cover the PVC in a layer of modeling chocolate or fondant. Use a modeling tool or veining tool to drag long, irregular lines down the length of the staff to mimic wood grain. Add a few knots and bumps for realism.
Once the texture is set, brush ivory food coloring over the entire surface. Wipe off the excess with a clean paper towel. The food coloring stays in the texture grooves and gives you instant aged-wood depth without needing to airbrush or layer multiple paints.
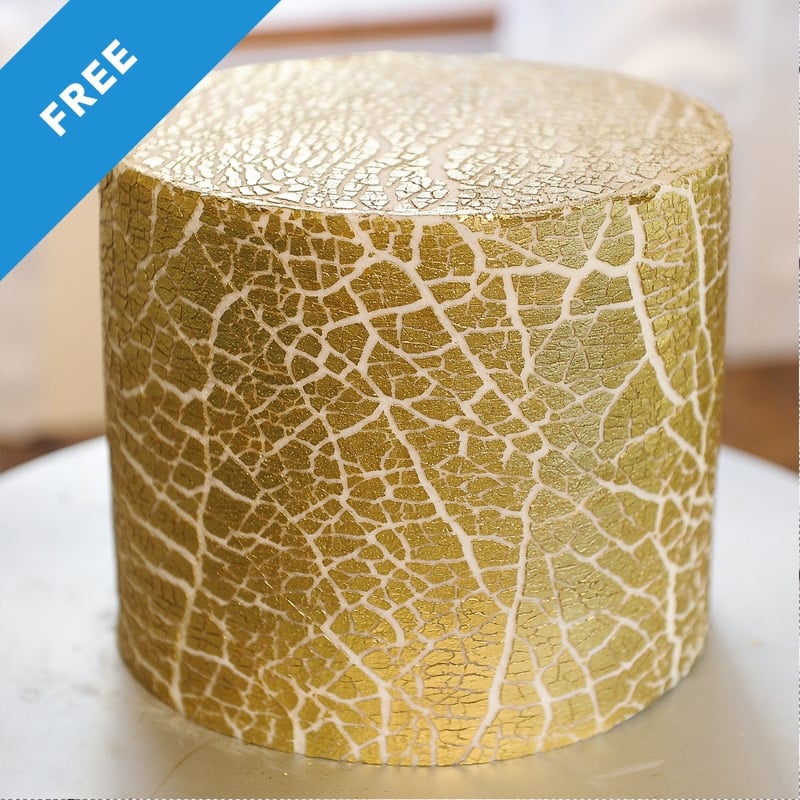
How to Cover the Board with Crackled Fondant
The cake board for the staff is covered in crackled fondant, which gives it that earthy, weathered look that fits the fantasy theme. The full crackled fondant tutorial walks through how to apply, paint, and seal the crackle pattern.
The plaid shirt detail (a callback to the brothers' fashion in the movie) is painted directly onto white fondant with food coloring and a fine brush. Pick two or three colors, draw your grid, and fill in the squares for instant plaid.
Common Problems to Avoid
- Crackled fondant cracking too much (or not enough). Follow the crackled fondant tutorial linked above for the right ratio of fondant to crackle medium.
- Isomalt sticking to the mold. This usually means the foil tape wasn't pressed flat against the paper mold. Make sure every surface is smooth and creased into corners before pouring.
- LED light visible from the front. Tuck the LED deep into the fondant prong behind the gem, not flush with the back. The deeper the light sits, the more it diffuses through the gem.
- Modeling chocolate hand cracking. Modeling chocolate gets brittle when cold. Work with it at warm room temperature and re-knead any pieces that start to crack before you sculpt.
- PVC pipe melting instead of bending. Keep the heat gun moving constantly. Holding it in one spot too long melts a soft pocket that won't bend evenly.
- Wood texture looking too uniform. Vary the depth and direction of your texture lines. Real wood grain is irregular, not perfectly straight.
Final Thoughts
This is one of those projects that uses almost every cake-decorating skill you have. Sculpting, isomalt, PVC bending, texturing, painting, fondant work. If you're an intermediate cake decorator looking to push into more advanced sculpted projects, the wizard staff is a fun way to try a bunch of techniques at once without committing to a full character cake.
If you make it, I'd love to see it. Tag me on Instagram so I can share it.
Onward Staff FAQs
No, you can substitute clear hard candy (like a melted lollipop) or even a clear gelatin gem if you want to skip isomalt. The isomalt gives the cleanest, most glass-like finish and holds up at room temperature better than gelatin, but if you cannot find isomalt, both alternatives work.
A small battery-operated LED tea light or a single LED from a fairy light strand both work. Go with a warm white or amber LED for a magical glow that matches the gem color. Avoid colored LEDs unless you want a colored gem.
A modeling chocolate sculpture keeps at room temperature for several weeks if stored in an airtight container away from sunlight and heat. The hand on the wizard staff will stay in display condition for at least one week before it starts to soften or lose detail.
Yes, you can use fondant if that is what you have on hand, but the result will be different. Fondant is softer and harder to hold sharp sculpted detail, so the hand will look smoother and less defined. Modeling chocolate is preferred for any sculpted human or animal feature.
The cake portion is fully edible. The PVC pipe, foil tape, fairy lights, and any battery-operated LEDs are not edible and must be removed before serving. Always disclose any non-edible components to anyone eating the cake.
The heat gun is the easiest way to bend PVC. If you do not have one, you can submerge the PVC in boiling water for a few minutes to soften it, then bend. The result is similar but messier. A blow dryer on the highest setting can work for very small bends but is much slower.
More Tutorials To Try
Ready To Master Cake Decorating?
Join Sugar Geek University and learn professional techniques through detailed cake decorating courses, tutorials, and real kitchen demonstrations by
award-winning cake decorator, Liz Marek.

Leave a Reply