• Skip to primary navigation
  • Skip to main content
  • Skip to primary sidebar
  • Father's Day
  • Recipes
  • Free Tutorials
  • Sign Up
  • About Liz

Sugar Geek Show logo

menu icon
go to homepage
  • Father's Day
  • Recipes
  • Free Tutorials
  • Sign Up
  • About Liz
subscribe
search icon
Homepage link
  • Father's Day
  • Recipes
  • Free Tutorials
  • Sign Up
  • About Liz
×
Home › Recipes › Blog

Updated on September 23, 2019 by Liz Marek · This post may contain affiliate links · 59 Comments

Gold Crackled Fondant Tutorial

59005 shares
  • Facebook
  • Flipboard
Jump to Recipe

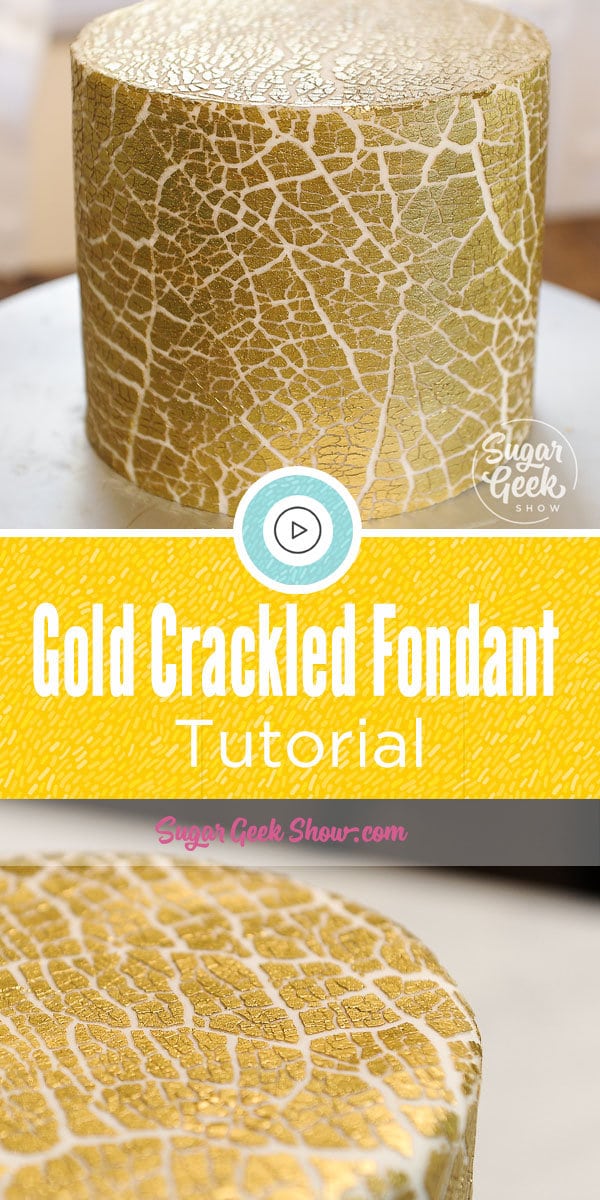
Gold Crackled Fondant Is A Beautiful Texture For Many Different Cake Applications

gold crackled fondant

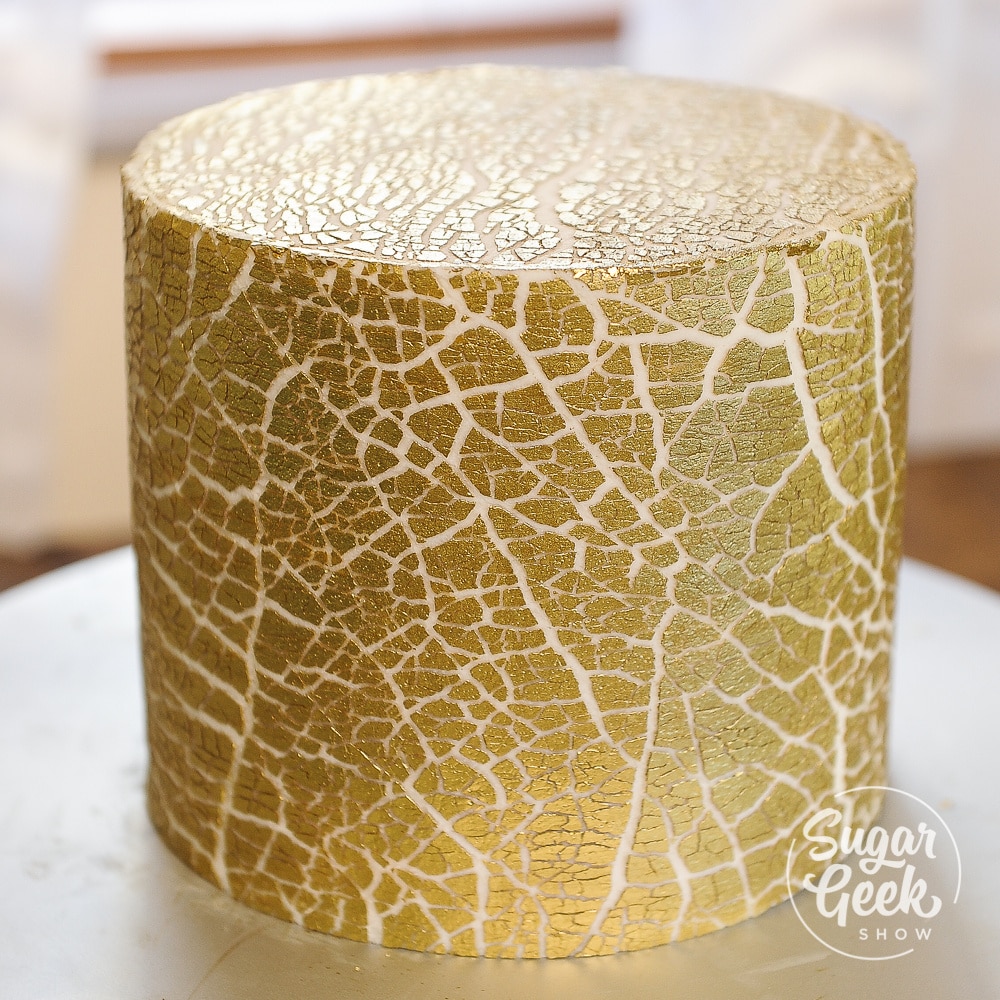
Gold crackled fondant is so beautiful and easy to make! All you need is some fondant, non-toxic or edible gold paint, everclear or rose water, confectioners glaze, a blow torch and a rolling pin! I love the beautiful effect the gold crackle has on a simple tiered cake or you can use it on sculpted cakes for a reptile scale or weathered look. Check out my cute sea turtle cake tutorial to see how this gold crackled fondant looks on a sculpted cake.

I first fell in love with the gold crackled look from that amazing work from Angela Morrison. Her technique uses gumpaste over fondant and is really beautiful as well!

How To Make Gold Crackle

gold crackled fondant

Making gold crackle is easier than you think. Here are the supplies that you're going to need.

Gold Crackled Fondant Materials List

Fondant
Creme brulee torch
Confectioners glaze
Corn starch
Non-toxic gold or edible gold  (note: if you use the edible gold paint then you don't need confectioners glaze)
Everclear, rosewater or lemon extract
Rolling pin
X-acto blade
Fondant smoother
Chilled Cake

How To Achieve Crackle Fondant On A Cake

gold crackled fondant

First roll out your fondant to about half as thick as you normally would. Torch the surface with your creme brulee torch until the surface is nicely toasted. If there are any light spots, that place will not crackle.

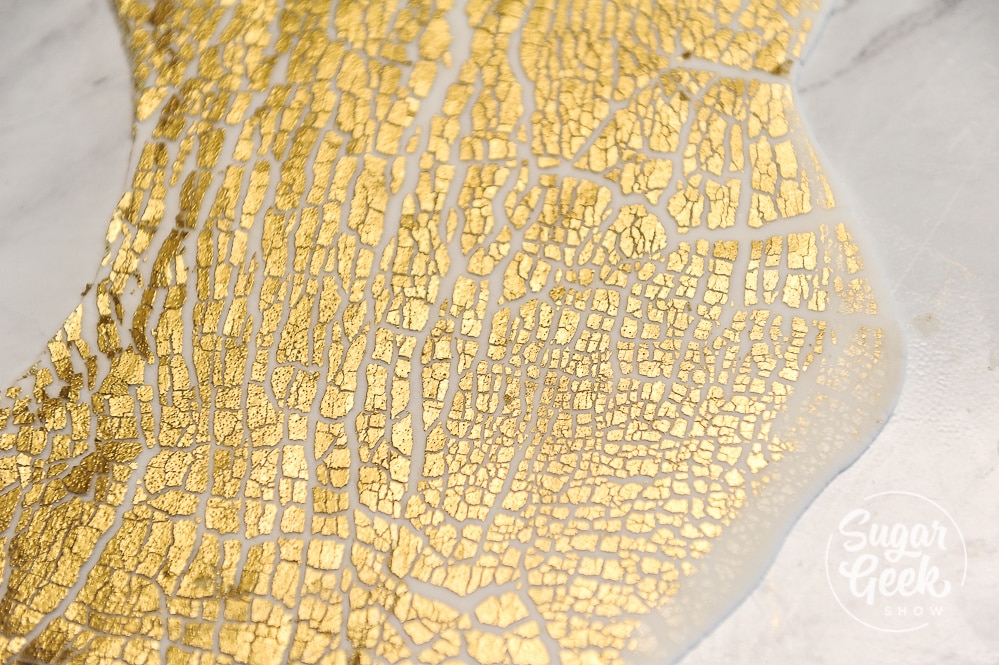
Paint the surface with confectioners glaze then paint it with your gold/everclear mixture. Let dry completely to avoid the gold from flaking off when you crack it with your rolling pin.

gold crackled fondant

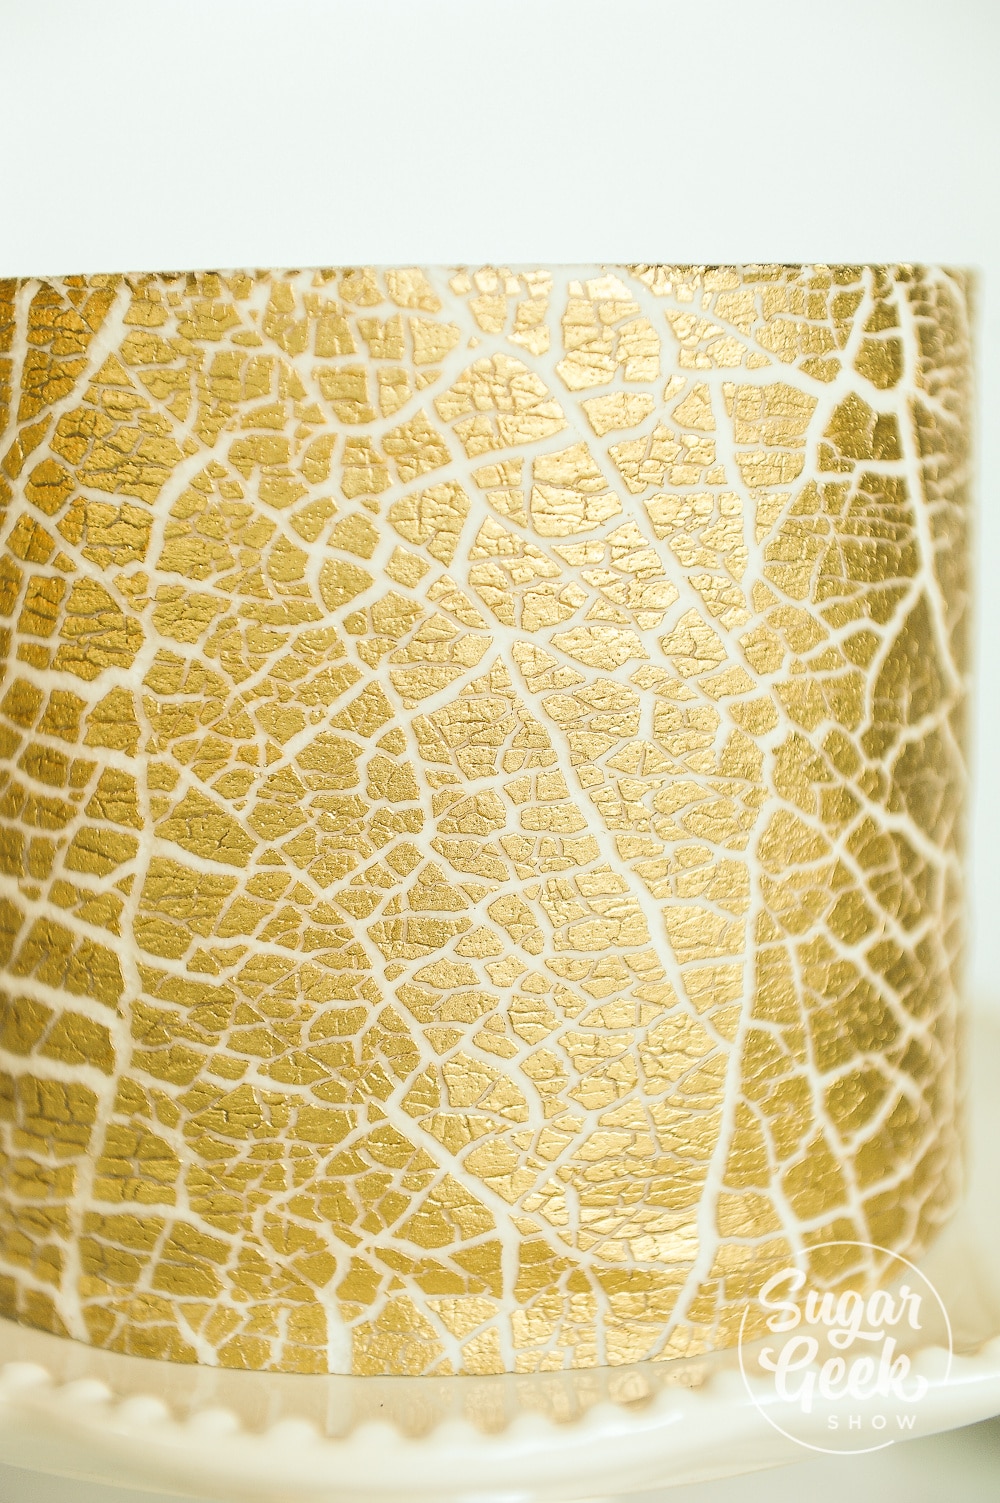
Crackle your fondant by rolling it out with your rolling pin. Go in both directions. The more you roll, the bigger the cracks will be. I prefer to keep my cracks pretty small.

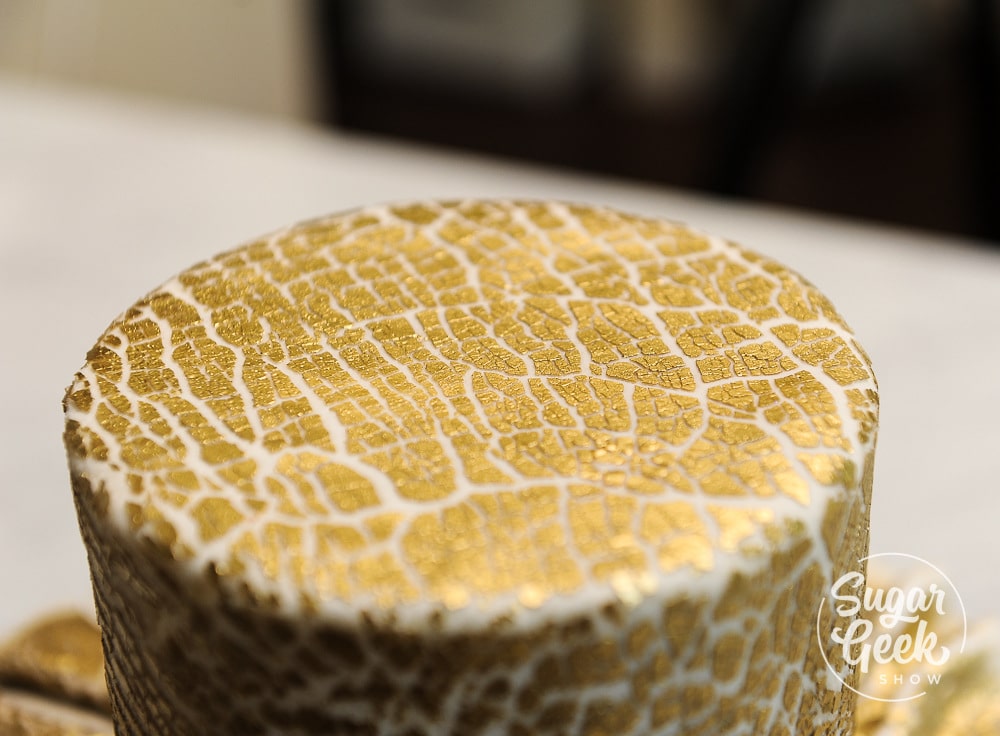
Now you can cover your cake in one piece or you can panel it depending on the final look you are going for.

Edible Crackle Paint

gold crackled fondant

If you want to make a crackle that isn't gold, you can paint the surface of your fondant with food coloring and it will crackle the same way. I used black airbrush for this crackled fondant tutorial but you could use any type of food coloring. Just paint it on and let it dry. Edible artist decorative paints are great for this because it dries really fast.

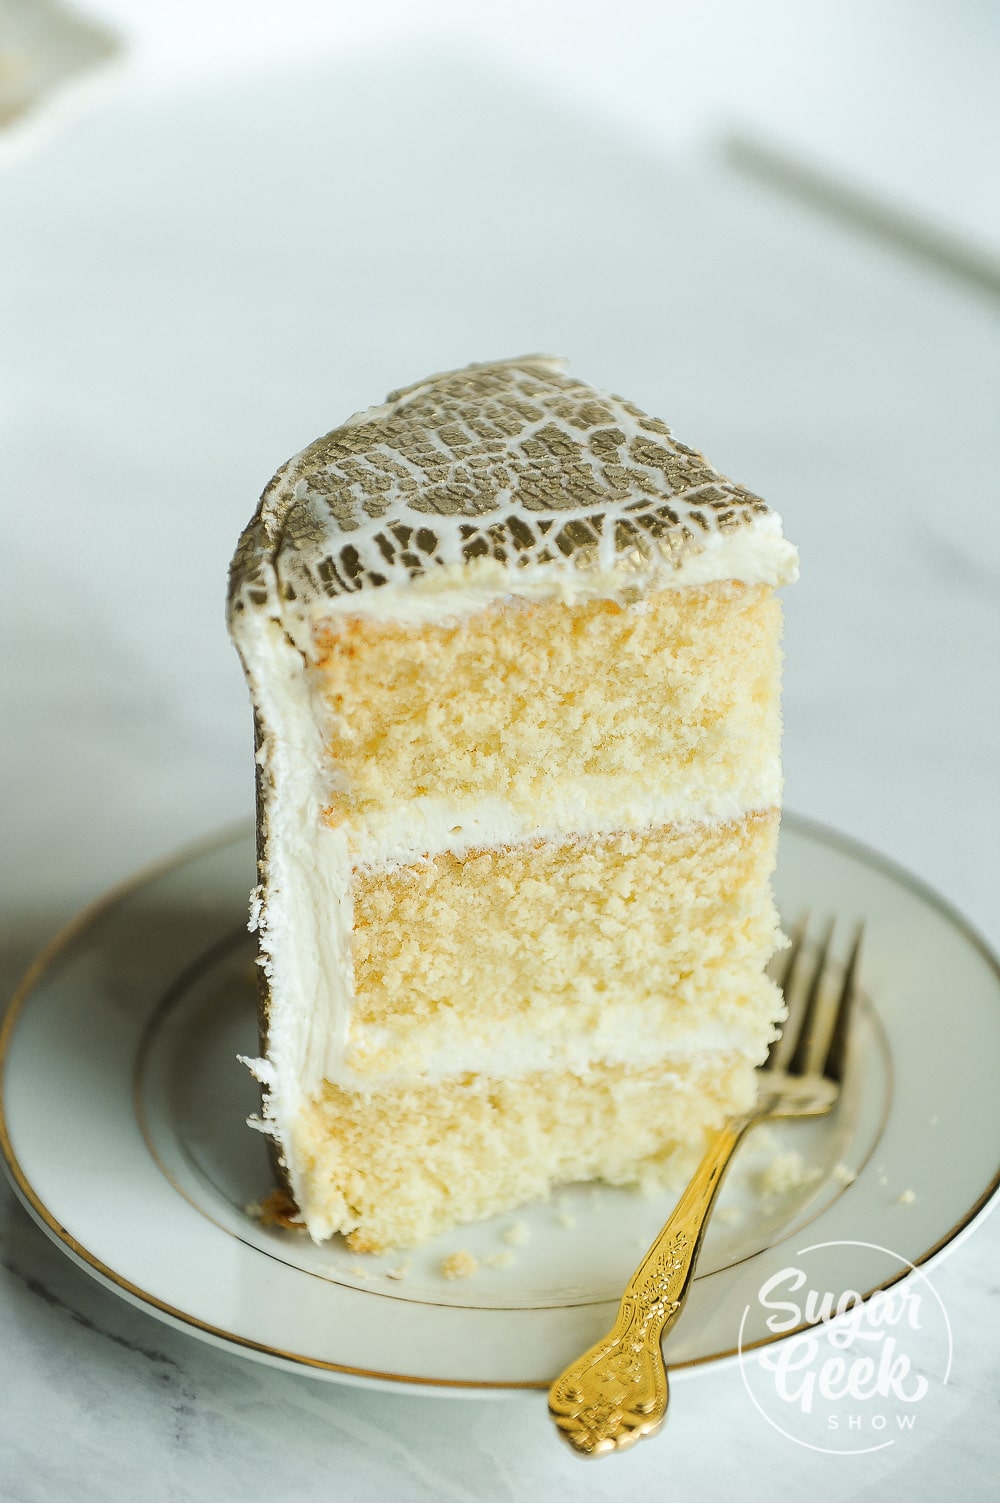
For the inside of this cake I used my delicious vanilla cake recipe from scratch filled with easy buttercream frosting. I always make sure my cakes are fully chilled before covering with fondant.

Recipe

gold crackled fondant

Gold Crackled Fondant

How to make a beautiful gold crackled texture on fondant. This recipe is enough to cover one 6" round cake plus a little leftover. 
Print Recipe Rate Recipe
Prep Time: 13 minutes minutes
Cook Time: 10 minutes minutes
Total Time: 23 minutes minutes
Course: Dessert
Cuisine: American
Servings: 1
Calories: 3245kcal
Author: Liz Marek

Ingredients

Gold Crackled Fondant

  • 1 ½ lbs fondant
  • 1 teaspoon confectioners glaze
  • 2 teaspoon Non-toxic gold or edible gold

Instructions

Tools Needed

  • Creme brulee torch
    Corn starch duster
    Rolling pin
    X-acto blade
    Fondant smoother
    Chilled Cake
  • Roll out fondant to half as thick as your normally do. Torch the surface of the fondant until it's brown and bubbly. Let cool. 
  • Brush the surface of the fondant with confectioners glaze. Combine your everclear and gold dust to make a paint. Paint over the glaze and let dry fully. At least 10 minutes. 
  • Use a bench scraper to loosen the fondant from the table and then using a rolling pin, roll out your fondant to the desired thickness. The more you roll, the thicker the cracks will be. I like thinner cracks. 
  • Cover your cake in one piece as you would normally or panel to keep the texture more intact. 

Video

Notes

Gold crackled fondant is so beautiful on a cake! Learn how to make two ways, traditional and paneled fondant. 

Nutrition

Serving: 1g | Calories: 3245kcal | Carbohydrates: 342g | Protein: 74g | Fat: 180g | Saturated Fat: 14g | Sodium: 224mg | Potassium: 1837mg | Fiber: 20g | Sugar: 272g | Vitamin A: 85IU | Calcium: 401mg | Iron: 12.9mg
Tried this recipe?Let us know how it was!

Gold Crackled Fondant Tutorial

More Blog

  • close up of fresh pasta held in two hands
    Easy Homemade Egg Pasta
  • jar of Speculaaskruiden
    Speculaaskruiden (Dutch Spice Mix)
  • homemade edible Christmas gift ideas
    Homemade Edible Christmas Gift Ideas Everyone Will Love
  • Crispy Parmesan Potato Stacks

About Liz Marek

Liz Marek is a professional cake artist, sweet and savory recipe developer, and the founder of Sugar Geek Show, where she teaches cooking, baking and cake decorating through detailed tutorials, food science explanations, and kitchen-tested recipes. She has been creating recipes and teaching baking techniques since 2008, helping bakers of all skill levels gain the confidence to make professional-quality desserts at home.

Liz is known for breaking down complex cooking and baking concepts into simple, approachable methods. Her work focuses on helping people understand not just how a recipe works, but why it works. Through Sugar Geek Show, she shares step-by-step recipes, cake decorating tutorials, and practical baking guides designed to make professional techniques accessible to everyone.

Over the years, Liz has taught thousands of students through online tutorials, classes, and educational content focused on real kitchen results. Her recipes are carefully tested and written to help people succeed the first time they make them.

When she’s not developing recipes or teaching baking techniques, Liz also hosts curated travel experiences for women through her travel brand Soul Sisters.

You can find Liz’s latest recipes, baking tutorials, and food science tips at Sugar Geek Show.

Reader Interactions

Comments

  1. Kylie says

    July 17, 2018 at 11:35 pm

    5 stars
    I am in love with this effect! It's gorgeous! Just one question, did you mean to put roll the fondant twice as thick as you normally would instead of half as thick? Thank you for sharing!

    Reply
    • The Sugar Geek Show says

      July 18, 2018 at 1:47 pm

      Yes the fondant needs to be thicker than it normally is so that when you roll it out the rest of the way it's not too thin

      Reply
  2. Dolores says

    July 16, 2018 at 3:01 pm

    5 stars
    Beautiful tutorial

    Reply
  3. Eleonora says

    July 15, 2018 at 7:28 pm

    5 stars
    Great tutorial! Have a question what's confectioners glaze? I can not find it in my country. Do you have the recipe ? Thanks

    Reply
    • The Sugar Geek Show says

      July 16, 2018 at 10:47 am

      You can use another paint like poppy paints, edible artist decorative paints or rainbow dust gold paint

      Reply
  4. Jacque says

    July 15, 2018 at 6:25 pm

    4 stars
    Hi what do you mean by confectioners glaze?

    Reply
    • The Sugar Geek Show says

      July 16, 2018 at 10:47 am

      Confectioners glaze is an ingredient. Check the link in the materials list

      Reply
  5. Tameckea says

    July 15, 2018 at 1:35 pm

    Wow..thisbis great. I am trying to make a solid gold top...can you please advise which paint was used in the video?

    Reply
    • The Sugar Geek Show says

      July 16, 2018 at 10:48 am

      This is non-toxic gold from Truly Mad Plastics

      Reply
  6. Ana says

    July 14, 2018 at 3:27 pm

    5 stars
    Hi, I was wondering if this could be done on covered cake?

    Reply
    • The Sugar Geek Show says

      July 14, 2018 at 8:46 pm

      Hi there, what do you mean covered?

      Reply
  7. sueli conceição says

    July 13, 2018 at 11:37 am

    maravilhoso .

    Reply
  8. Flor Malaspina Baca says

    July 13, 2018 at 7:54 am

    Hola Es un efecto muy elegante sencillo y bello . Me gustaría saber si quiero darle el mismo efecto en color rosa , se haría del mismo modo? . Mil gracias

    Reply
  9. Nikki from Tikkido says

    July 12, 2018 at 11:06 am

    5 stars
    Seriously cool technique, thank you for sharing!

    Reply
    • Candice Gilkison says

      November 26, 2019 at 4:28 am

      Do you have to buy the glaze or can it be made?

      Reply
      • The Sugar Geek Show says

        November 26, 2019 at 9:10 am

        I don't know if there is a way to make the glaze

  10. Shabnam says

    July 11, 2018 at 10:56 am

    5 stars
    Hi, that was really Awesome ?. Can we make without confectioners glaze?

    Reply
    • The Sugar Geek Show says

      July 14, 2018 at 8:52 pm

      Yes but you would have to use a gold paint like rainbow dust gold, poppy paint or edible artist decorative paints

      Reply
  11. Gisselle says

    July 11, 2018 at 10:21 am

    Que es glaseado de pasteleria

    Reply
  12. Beryl says

    July 11, 2018 at 9:12 am

    5 stars
    Incredible - thank you so much 🙂

    Reply
  13. Patricia Morales says

    July 10, 2018 at 2:28 pm

    5 stars
    That was awesome!!! Thanks for sharing 🙂

    Reply
    • The Sugar Geek Show says

      July 10, 2018 at 9:02 pm

      5 stars
      Thank you so much! Glad you enjoyed it!

      Reply
  14. Nancy Smith says

    July 10, 2018 at 1:07 pm

    5 stars
    This is so fantastic, what an amazing technique. I can't wait to try it, thank you for sharing your time and talents!

    Reply
    • The Sugar Geek Show says

      July 10, 2018 at 9:02 pm

      5 stars
      Thank you so much! Glad you enjoyed it!

      Reply
  15. gail says

    July 10, 2018 at 8:14 am

    5 stars
    awesome TFS

    Reply
Newer Comments »
4.95 from 20 votes (1 rating without comment)

Leave a Reply Cancel reply

Your email address will not be published. Required fields are marked *

Recipe Rating


All comments are subject to our Terms of Use

Primary Sidebar

Hi, I'm Liz! I'm passionate about creating reliable, foolproof recipes that don't just tell you how to cook, but why things work - so you can skip the guesswork and confidently make the best sweet and savory dishes of your life.

More about me →

Our Cake Greatest Hits

Check out our best cake recipes

👨‍🍼 Celebrate Father's Day

  • Close up of three crispy baked chicken thighs on a plate.
    Crispy Baked Chicken Thighs
    Cook Time50 Minutes
  • close up of a sliced ribeye steak
    How To Cook A Ribeye
    Cook Time24 Hours 14 Minutes
  • close up of creamy mac and cheese on a serving spoon
    Creamy Baked Mac And Cheese
    Cook Time35 Minutes
  • close up of a keto smash burger
    Smash Burgers Recipe
    Cook Time25 Minutes
  • Hawaiian Mac Salad
    Cook Time2 Hours 20 Minutes
  • Smoked Beef Tenderloin
    Cook Time2 Hours 55 Minutes

Popular Recipes

  • close up of ganache drizzling into a bowl
    The Best Chocolate Ganache Recipe
    Cook Time20 Minutes
  • Piping easy buttercream rosettes onto a cake using a 1M star piping tip
    Easy Buttercream Frosting
    Cook Time25 Minutes
  • close up slice of marble cake
    Moist and Fluffy Marble Cake Recipe
    Cook Time40 Minutes
  • Slice of red velvet cake with cream cheese frosting on a white plate.
    Red Velvet Cake Recipe
    Cook Time1 Hours 40 Minutes

Footer

↑ back to top

About

  • Privacy Policy
  • Terms of Service

Newsletter

  • Sign Up! for emails and updates

Contact

  • Contact
  • About Us

Copyright © 2024 Sugar Geek Show, Inc. All Rights Reserved.

59005 shares

Rate This Recipe

Your vote:


A rating is required
A name is required
An email is required

Recipe Ratings without Comment

Something went wrong. Please try again.