
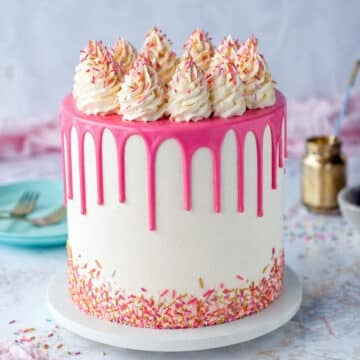
A chocolate drip is one of the easiest ways to make a cake look polished, elegant, and professionally decorated. If you've ever wondered how to get those smooth chocolate drips down the side of a cake without them running to the bottom or looking too thick, this post will show you exactly how to do it.
In this tutorial, you'll learn how to make chocolate drip with dark chocolate, milk chocolate, or white chocolate, how to adjust the cream ratio for each one, and how to apply it so it looks clean and intentional. This is a beginner-friendly technique, and once you understand the consistency and temperature, it becomes one of the easiest cake decorating tricks to master.
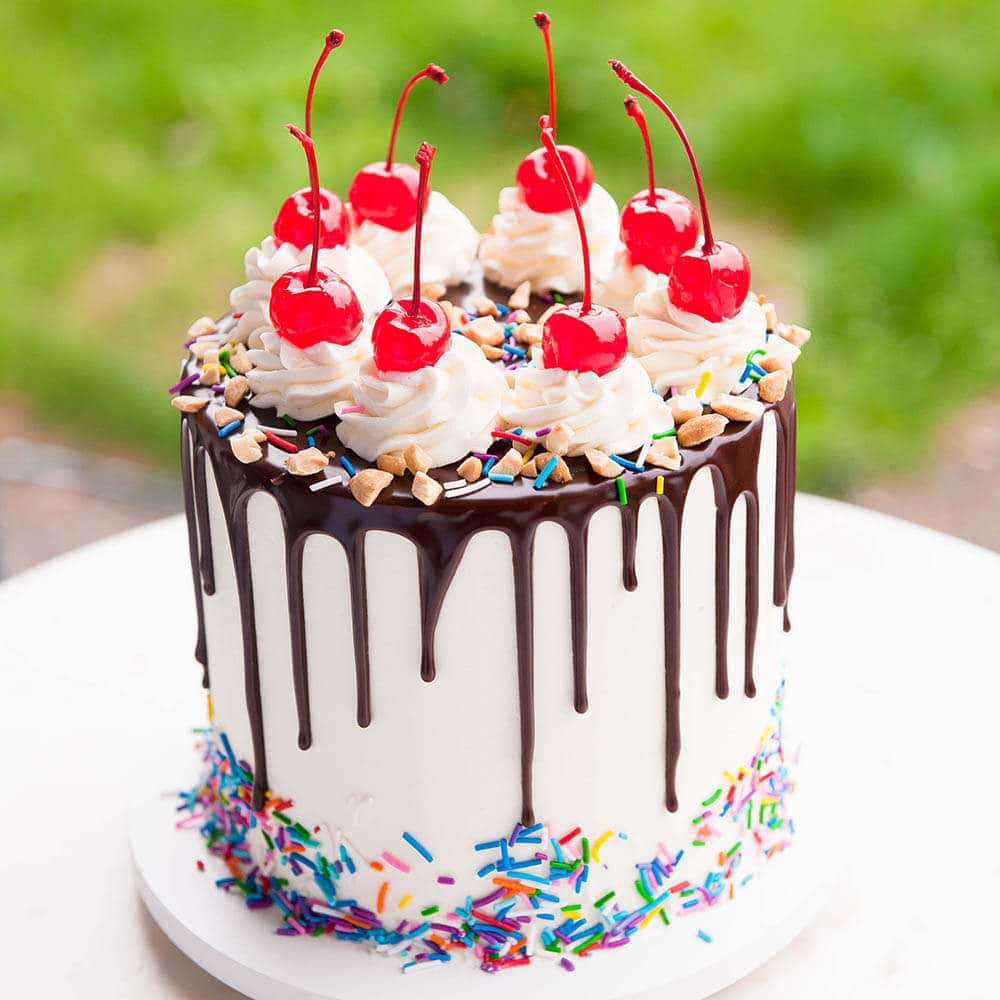
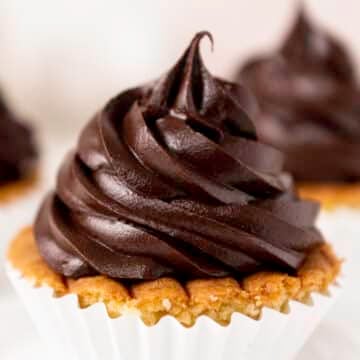
My easy chocolate cake recipe is the perfect base - two layers of fudgy chocolate cake topped with a glossy chocolate drip is hard to beat.
Quick Glance at the Recipe
- Recipe Name: Chocolate Drip
- Why You'll Love It: A simple ganache-based drip that works with dark, milk, or white chocolate and makes any cake look instantly more professional.
- Time and Difficulty: About 10 minutes, beginner-friendly
- Main Ingredients: Chocolate, heavy cream, optional gel food coloring
- Method: Heat the cream, pour it over the chocolate, whisk until smooth, then let it cool slightly before dripping onto a chilled cake
- Texture and Flavor: Smooth, glossy, rich, and soft enough to slice cleanly
- Quick Tip: Always test one drip first before decorating the whole cake
Jump to:
When drip cakes first started getting really popular, I noticed a lot of beginner decorators were running into the exact same issue. Their chocolate drip was either way too thin and sliding all the way down the cake, or it was too thick and just sitting on top like a blob. It felt like one of those decorating techniques that looked easy until you actually tried it.
I started teaching this method a lot more because once you understand what makes a chocolate drip work, it becomes incredibly predictable. It's really just about the ratio of chocolate to cream, the temperature of the ganache, and making sure your cake is properly chilled before you start.
I still use this technique all the time when I want a cake to look a little extra special without spending a ton of time decorating. A good chocolate drip can make even a very simple buttercream cake look finished and elegant.
The same chilled-cake pour technique gives my classic boston cream pie its signature glossy ganache top with clean drips down the side.
Ingredients For Chocolate Drip
The great thing about chocolate drip is that it only needs a few ingredients, but each one matters. The exact amount of cream you use will depend on the type of chocolate, which is why understanding the role of each ingredient makes a big difference.
- Chocolate - Chocolate is the base of the drip and provides the flavor, structure, and shine. You can use dark chocolate, semi-sweet chocolate, milk chocolate, or white chocolate depending on the look and flavor you want. Mini chocolate chips melt easily, but chopped chocolate bars can give you an even smoother finish. You can substitute one kind of chocolate for another, but you'll need to adjust the amount of cream.
- Heavy cream - Heavy cream loosens the chocolate and turns it into ganache so it can drip smoothly over the edge of the cake. This is what gives the drip its silky texture. Do not substitute milk unless you're prepared for a thinner and less stable result. If you don't have heavy cream, water ganache is another option, especially for white chocolate drips.
- Gel food coloring - Gel food coloring is optional, but it's great for tinting white chocolate drip. It helps you create colorful drips without changing the consistency too much. I recommend using gel coloring instead of liquid coloring. If you want a brighter white drip, you can also add a small drop of white food coloring.
Chocolate Drip Ratios
Different chocolates need different amounts of cream because they all melt differently.
| Chocolate Type | Chocolate | Heavy Cream |
|---|---|---|
| Dark or Semi-Sweet Chocolate | 6 oz | 4 oz |
| Milk Chocolate | 6 oz | 3 oz |
| White Chocolate | 6 oz | 2 oz |
Dark Or Semi-Sweet Chocolate
Use 6 ounces of dark or semi-sweet chocolate with 4 ounces of heavy cream. This gives you a rich, shiny drip that works beautifully on most cakes.
Milk Chocolate
Use 6 ounces of milk chocolate with 3 ounces of heavy cream. Milk chocolate is softer and sweeter, so it needs a little less cream.
White Chocolate
Use 6 ounces of white chocolate with 2 ounces of heavy cream. White chocolate is much softer than dark chocolate, so using too much cream will make the drip too thin very quickly.
How to Make a Chocolate Drip Step-By-Step
- Start by choosing your chocolate type and measuring the correct amount of cream based on the ratio chart above. This part is really important because even a small change in ratio can affect how the drip behaves.
If you're making a white chocolate drip, this is also a good time to have your gel food coloring ready.
- Heat the heavy cream in the microwave for about 1 minute, or until you see steam rising off the top. It should be hot, but not boiling.
If the cream gets too hot, it can make the ganache separate or become grainy.
BONUS TIP: If you're heating the cream on the stovetop, remove it as soon as it starts to steam. Don't let it boil.
- Warm the chocolate for about 30 to 60 seconds in the microwave just until it's slightly warm. You're not trying to melt it all the way. This just helps the cream melt the chocolate more evenly.
This is especially helpful when using chocolate chips because they tend to hold their shape longer than chopped chocolate bars.
- Pour the hot cream over the chocolate and let it sit for 2 to 3 minutes without stirring. This gives the chocolate time to soften before you mix it.
Be patient here. Letting it sit first will give you a much smoother ganache.
- Whisk the chocolate and cream together gently until the ganache is smooth, shiny, and fully combined. If you still see unmelted lumps, microwave the ganache for 20 to 30 seconds and whisk again.
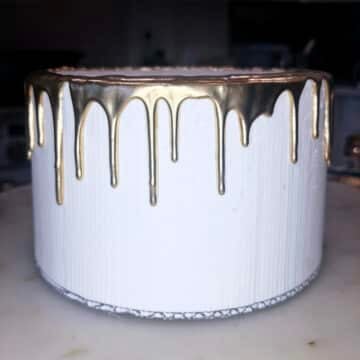
- If you're using white chocolate drip and want to color it, add a small amount of gel food coloring after the ganache is smooth and stir until evenly tinted.
If the drip looks a little transparent, add a tiny bit of white food coloring to make it more opaque.
PRO TIP: Allow your chocolate drip to cool to about 90ºF before applying it to the cake so that the drips don't run all the way down the cake.
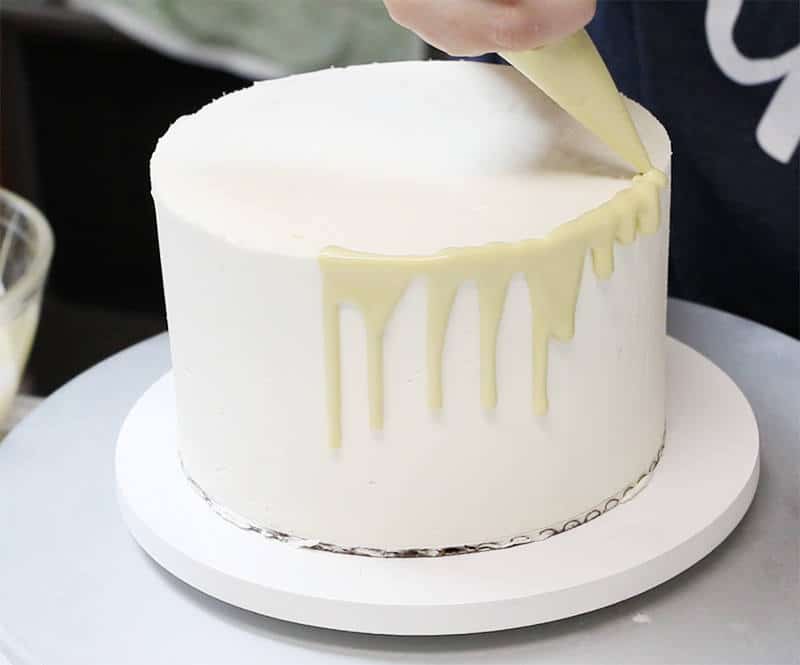
How To Create The Perfect Drip Cake
So now we have our ganache made but we're not ready to drip quite yet! If you put the hot ganache on your cake your drips will run all the way to the bottom of the cake or melt your buttercream.
- Before you drip anything, make sure your cake is chilled in the fridge for about 20 minutes. A cold cake helps the ganache set and keeps the drip from sliding too far down the sides.
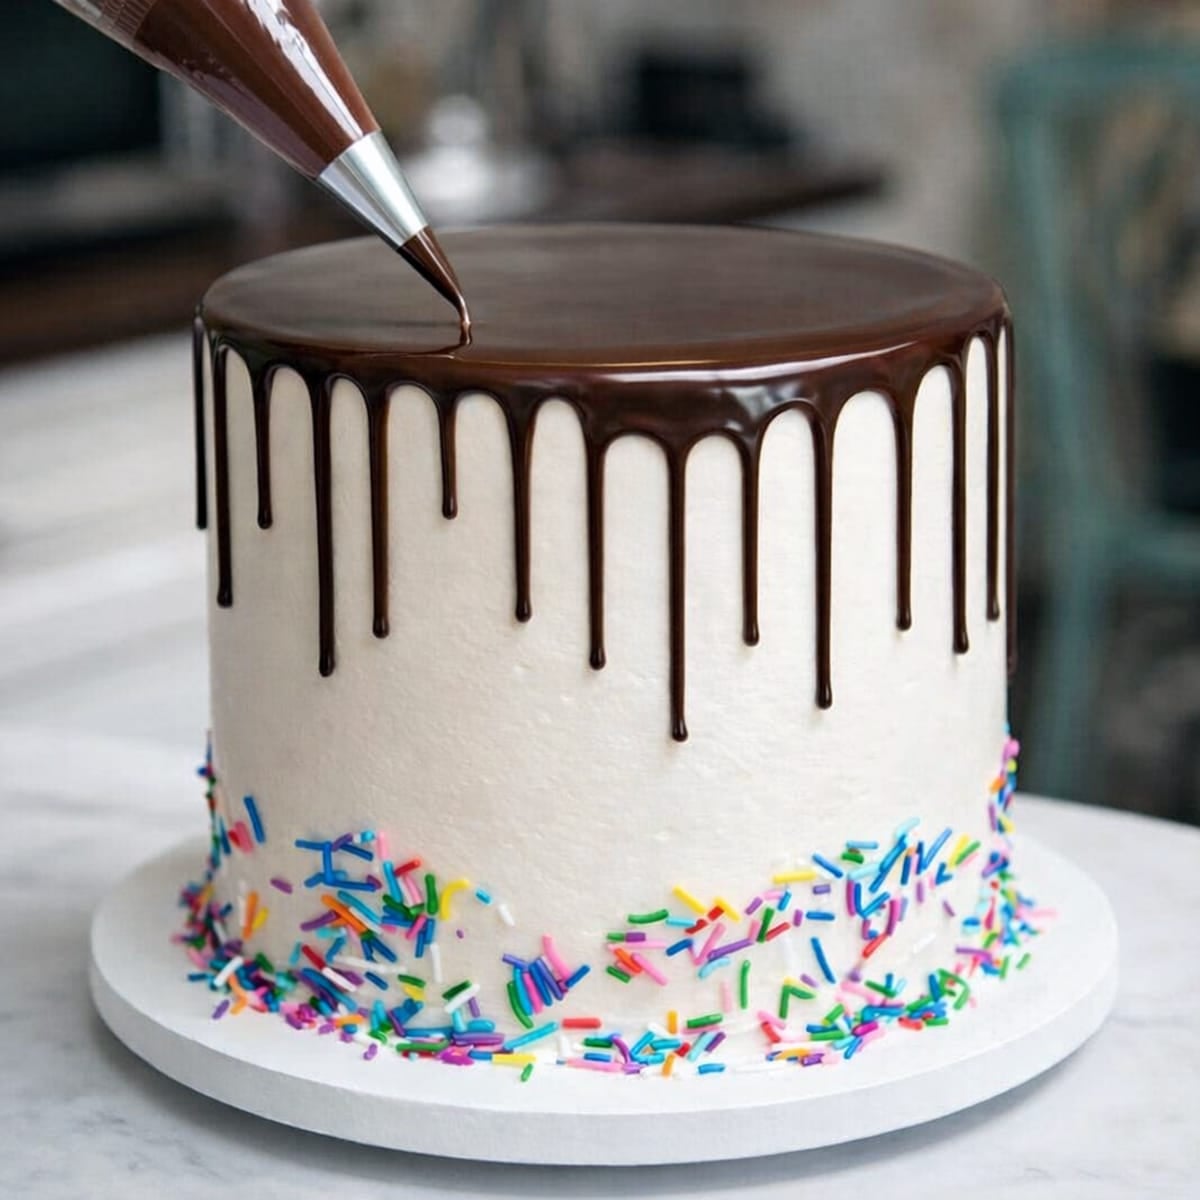
- Transfer the ganache to a piping bag, squeeze bottle, or use a spoon, then do one test drip on the side of the cake. Watch how far it runs.
If it runs too far, let the ganache cool a little longer. If it barely moves, warm it slightly or add a tiny bit more cream.
- Pipe or spoon the ganache around the outside edge of the cake, alternating longer and shorter drips for a natural look. Then spread the remaining ganache across the top of the cake with an offset spatula.
Common Mistakes To Avoid
- Using ganache that is too hot - This is one of the biggest reasons chocolate drip runs all the way to the bottom of the cake.
- Skipping the test drip - Testing one drip first can save you from covering the entire cake with the wrong consistency.
- Not chilling the cake first - A cold cake helps the ganache set quickly and keeps the buttercream from melting.
- Using the wrong ratio for the type of chocolate - White chocolate, milk chocolate, and dark chocolate all need different amounts of cream.
- Overmixing the ganache - Too much whisking can add air bubbles and make the ganache less smooth.
- Boiling the cream - Overheated cream can cause the ganache to become grainy or separate.
Final Thoughts
Chocolate drip is one of those cake decorating techniques that looks fancy but is actually very simple once you understand the basics. If you can measure your ingredients, warm your cream, and test your consistency, you can absolutely make a beautiful drip cake.
The biggest thing to remember is that a perfect chocolate drip comes down to ratio, temperature, and patience. Chill your cake, let the ganache cool slightly, and always test one drip before you commit. Once you do it a couple of times, it becomes second nature.
Chocolate Drip FAQ
Your ganache is probably too warm or has too much cream in it. Let it cool slightly before using it, and make sure you're using the right ratio for the type of chocolate.
It may need a tiny bit more warm cream, or it may have cooled too much before you used it. Add a little warm cream and stir until smooth.
Yes, chocolate chips work well for chocolate drip, especially mini chocolate chips. Chopped chocolate bars can melt a little more smoothly, but either one works.
Yes. White chocolate drip is perfect for coloring with gel food coloring. If it looks slightly translucent, add a tiny drop of white food coloring.
Yes. You can make ganache ahead and store it in the fridge. Rewarm it gently before using, just until it becomes fluid again.
This usually happens when the cream is too hot. Heat it only until steaming and avoid boiling.
More Ways To Get Your Drip On

If you made this recipe or any recipe on Sugar Geek Show, I'd love to hear how it turned out! Leave a rating and comment below - it helps other bakers and it truly makes my day. ⭐⭐⭐⭐⭐
Recipe
Ingredients
Chocolate Drip
- 6 ounces semi-sweet chocolate or dark chocolate
- 4 ounces heavy whipping cream
For Milk Chocolate Drip
- 6 ounces milk chocolate
- 3 ounces heavy whipping cream
White Chocolate Drip
- 7 ounces white chocolate
- 3 ounces heavy whipping cream
Instructions
Chocolate drip recipe
- Add your cream to a medium sized saucepan over medium heat until it just begins to steam. Do not boil.
- Place your chocolate into a heat proof bowl
- Pour the hot cream over chocolate. Make sure the cream is completely covering the chocolate.
- Let sit 5 minutes then whisk until smooth.
- Let the chocolate drip cool until slightly warm to the touch before piping onto your CHILLED cake.
Video
Notes
1. Let the ganache cool before dripping
If the ganache is too hot, the chocolate drip will run all the way down the cake or melt your buttercream. Let it cool until it feels slightly warm but not hot before applying it.2. Always drip onto a chilled cake
Place your frosted cake in the refrigerator for 20 minutes before applying the drip. A cold cake helps the chocolate set quickly and keeps the drips from running too far.3. Test one drip first
Before decorating the entire cake, pipe one test drip on the side. If it runs too far, let the ganache cool longer. If it barely moves, warm it slightly or add a tiny bit more cream.4. Use the correct chocolate ratio
Different chocolates require different amounts of cream.- Dark or semi-sweet chocolate: 6 oz chocolate + 4 oz cream
- Milk chocolate: 6 oz chocolate + 3 oz cream
- White chocolate: 6 oz chocolate + 2 oz cream
5. Fixing ganache consistency
If your chocolate drip is too thick, add a teaspoon of warm cream and stir until smooth.If it is too thin, allow it to cool longer before using.
6. Best chocolate to use
Mini chocolate chips melt easily and work well for chocolate drip. Chopped chocolate bars will produce the smoothest and glossiest ganache.7. Coloring white chocolate drip
White chocolate drip can be colored with gel food coloring. If the drip looks slightly transparent, add a tiny drop of white food coloring to make it more opaque.Nutrition
Cassandra says
This looks amazing! I can’t wait to try it on my fathers retirement cake. For this recipe how big of a cake would you say it will cover? I am making a round 12inch cake. Would this be enough? Thanks!
Elizabeth Marek says
It should be 🙂
Shiri says
After dripping I put the cake in the freezer for 20 minutes. The drips were excellent before entering the freezer. But when I opened the door
I saw that they broke off the surface of the cake and slipped down.
Has this ever happened to you? Why can this happen?
Thanks, Shiri
Elizabeth Marek says
You don't need to put the cake in the freezer. The cake should be chilled, then add the drip. They will harden all on their own.
Carm says
How do I thin out a ganache. I think i left it too long to cool and now it won't drip down the cake
Elizabeth Marek says
Warm it up again.
Amazing says
I wanted to know if I can melt dark choco bites and use it for my drips...
Elizabeth Marek says
Yes you can use any kind of chocolate.
Rachael says
Can i use whipped cream instead of heavy cream
Elizabeth Marek says
If you mean whipping cream then yes 🙂
Sar says
Can I use it on stabilized whipped cream icing or it would cause melt on whipped cream
Elizabeth Marek says
Yes you can use stabilized whipped cream. I would freeze the cake for 20 minutes before doing the drip just in case.
Liz says
Could I replace half and half for the heavy cream?
Elizabeth Marek says
I have not tried that so I'm not sure. It would probably be ok I think
Lilly says
Hi, can you make the drip then put it in the fridge and then put it on the cake or do you have to do it all at the same time?
Elizabeth Marek says
If you put the drip in the fridge it would get hard and you wouldn't be able to use it.
Ifeanyi says
After dripping can the cake still go back to the fridge and the dripping would get Frozen or damage..
Elizabeth Marek says
Yes it can go back in the fridge
Shawndey says
How long should I let the drips and the top of the cake set up before I do a border?
The Sugar Geek Show says
The drip will be set within ten minutes on a chilled cake
Lilliana says
What should I do if my ganache sets before I’m able to use it?
Elizabeth Marek says
You can warm it gently for 5 seconds
Shiran Dhillon says
What consistency is best and how do you know?? X
The Sugar Geek Show says
I have lots of tips in the blog post regarding doing a test to make sure the drip is correct 🙂
Monique says
This recipe legit saved my butt tonight! I tried another recipe and sat for two hours waiting for my ganache to set. Your recipe was quick, easy, and resulted in beautiful drips. Thank you for sharing your recipe and techniques.
The Sugar Geek Show says
Thank you so much, so glad it worked for you
Mia says
I would like to make my own chocolate drip instead of buying candy melts. But I have one question, can you use food coloring on it? I'd like for my drip to be orange for a Halloween cake I plan to make.
Thanks!!
The Sugar Geek Show says
You will need some sort of chocolate to make the drip. I used candy melts because they are cheap. Yes you can add food coloring.
Christine says
Hi do you weigh both cream and chocolate please
The Sugar Geek Show says
By weight with a scale
Mrs Douglas says
Wow I like your video and I want to learn more. Thanks
Kelsey says
This is the perfect ratio for a drip! Thanks!