

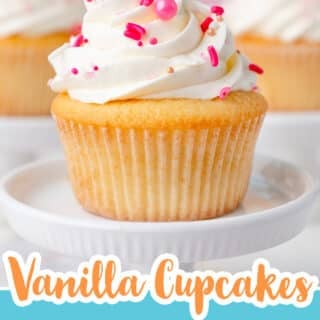
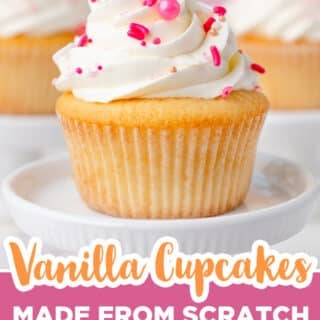
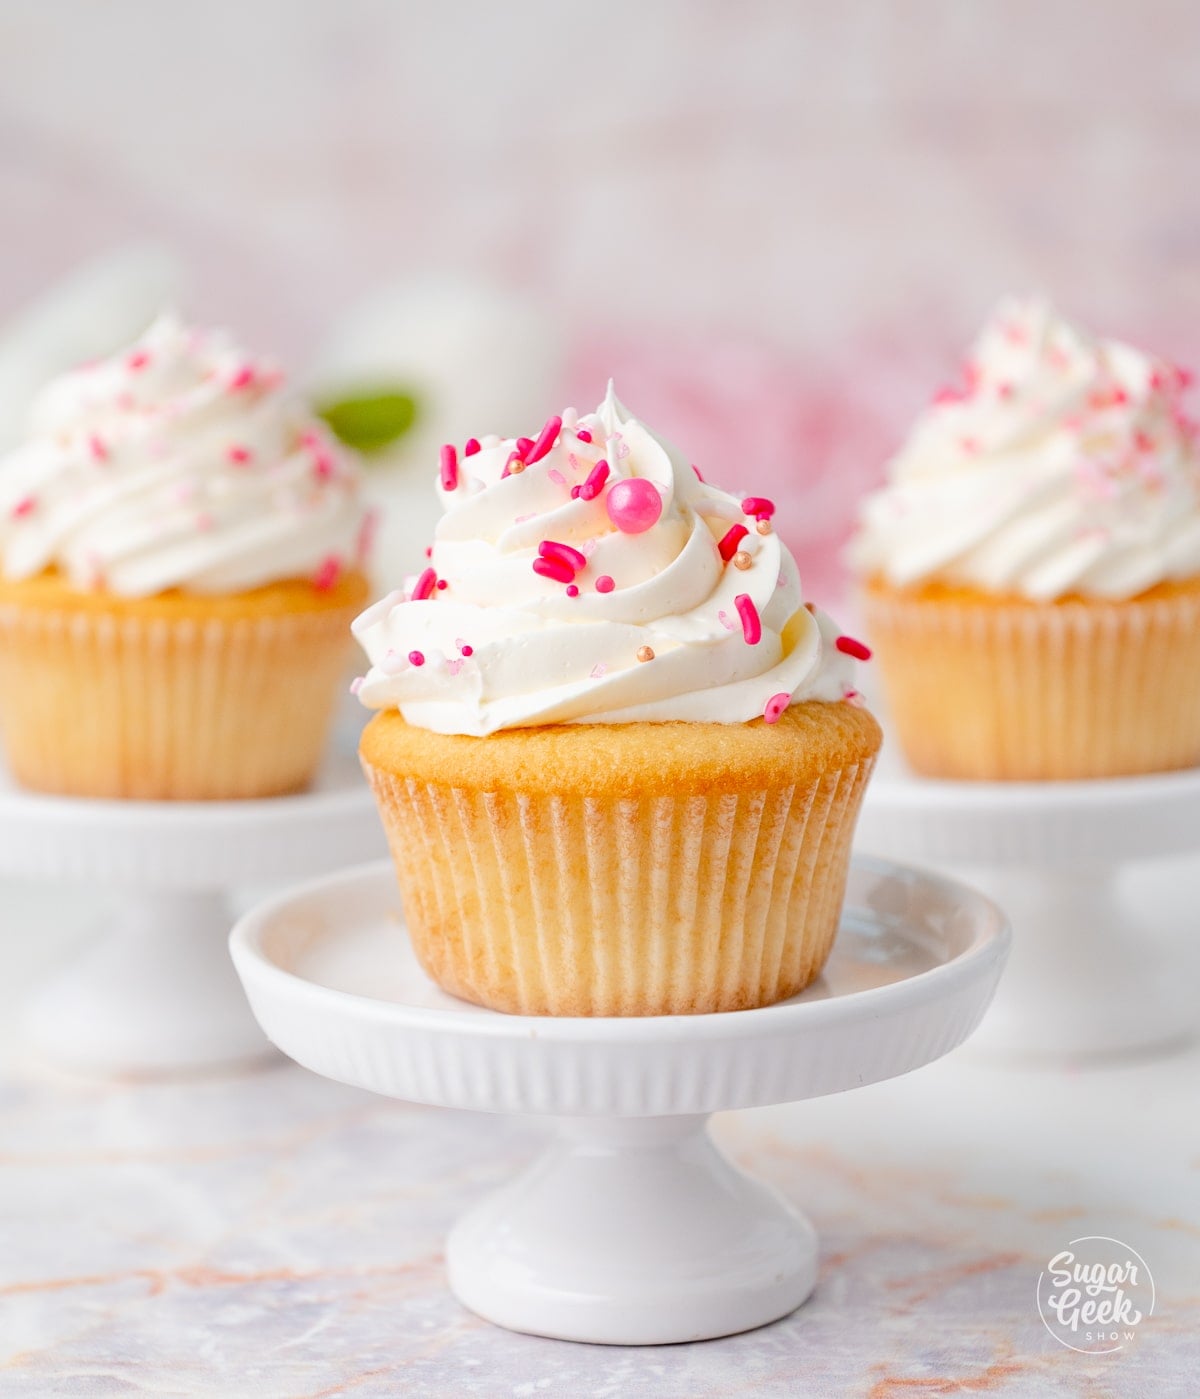
Moist vanilla cupcakes that actually taste like they came from a bakery are surprisingly hard to find, and this is the recipe I have been using professionally for over ten years for weddings, birthdays, and special events. The reverse creaming method and buttermilk give these cupcakes a tender crumb and reliable dome that holds up every single time. If you love these, try my white velvet buttermilk cake next, which uses the same method for a stunning full-size layer cake.
Quick Glance at this Moist Vanilla Cupcake Recipe
- Recipe Name: Moist Vanilla Cupcakes
- Why You'll Love It: Bakery-quality vanilla cupcakes with a soft, tender crumb and reliable rise using the reverse creaming method.
- Time and Difficulty: Prep time 10 minutes, baking time 18 minutes, Difficulty: easy
- Main Ingredients: Cake flour, buttermilk, butter, oil, sugar, eggs, vanilla extract, and baking powder.
- Method: Reverse creaming method for a finer crumb and evenly domed cupcakes.
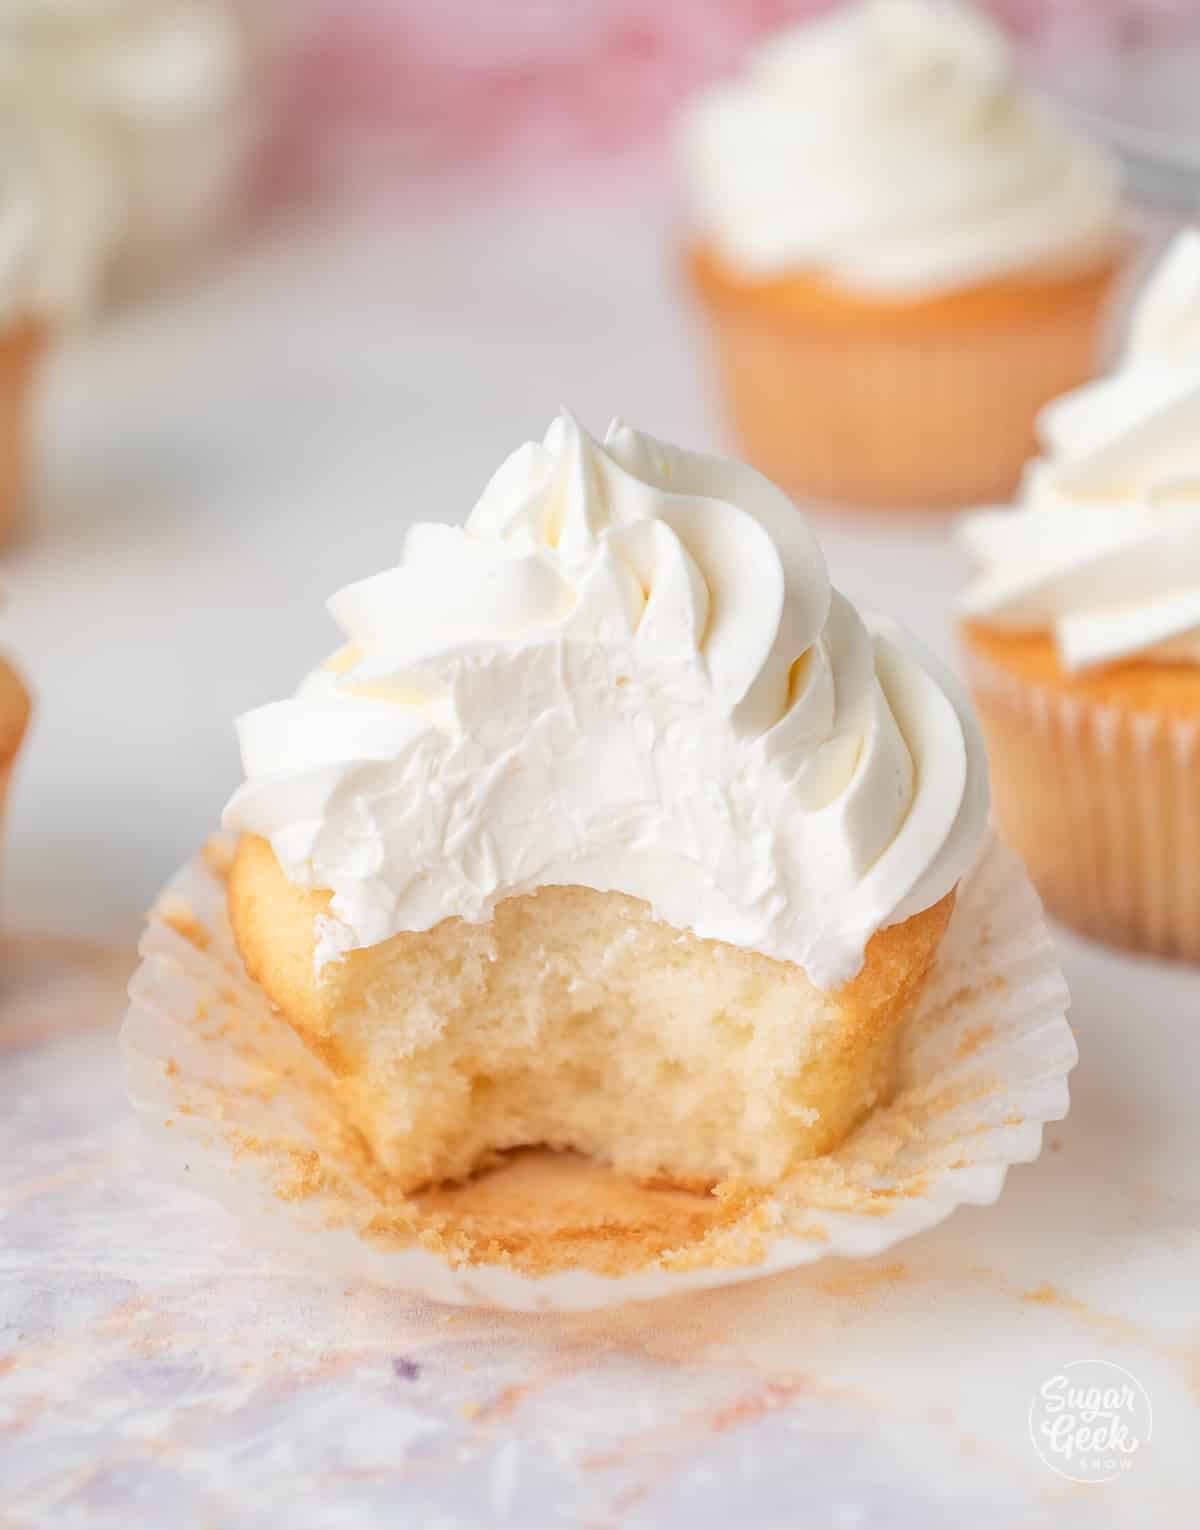
- Texture and Flavor: Light, fluffy, and moist with a delicate vanilla flavor and subtle tang from the buttermilk.
- Quick Tip: Measure all your ingredients before you start mixing. This ensures the process goes smoothly and you don't forget to add an ingredient.
Jump to:
- Quick Glance at this Moist Vanilla Cupcake Recipe
- Why This Recipe Works
- ⭐️⭐️⭐️⭐️⭐️ Reader Review
- Vanilla Cupcake Ingredients
- Cupcake Variations
- How to Make a Vanilla Cupcake Recipe
- Batter & Frosting Calculator
- Cake Batter and Frosting Calculator
- Cups of Batter Needed
- Cups of Frosting Needed
- Expert Tips
- Storing Cupcakes
- Common Mistakes To Avoid
- Moist Vanilla Cupcake Recipe FAQs
- More Easy Cupcake and Cake Recipes
- Watch: How To Decorate A Cake Step-by-Step
- Recipe
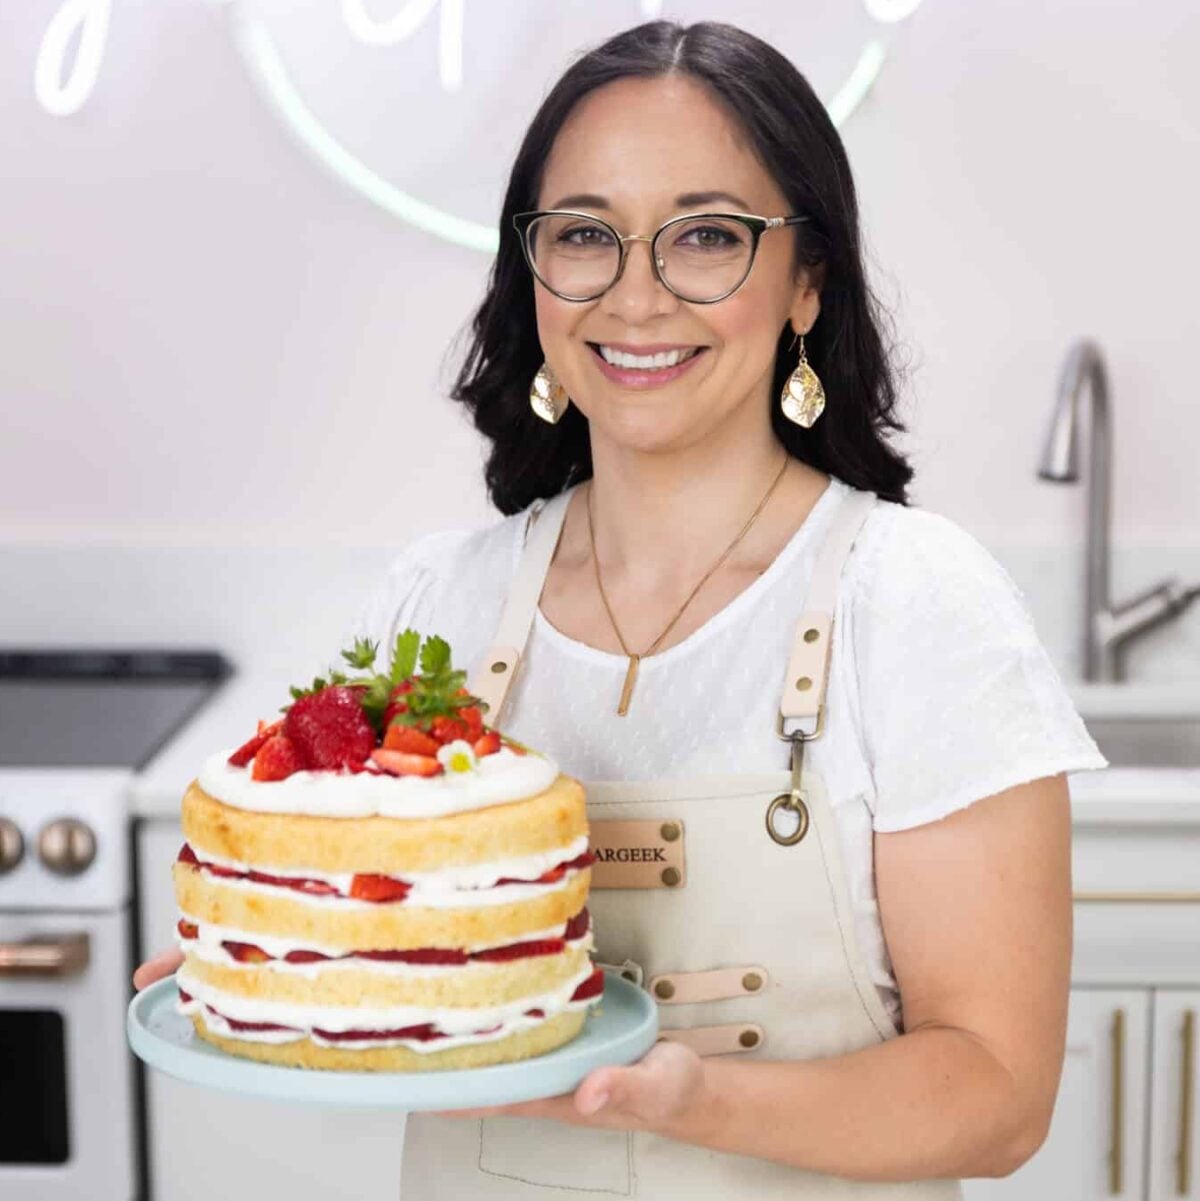
As a cake decorator, I've baked thousands of cakes and cupcakes for weddings, birthdays, and special events. This vanilla cupcake recipe is adapted from the same formula I use for my professional wedding and celebration cakes, so it's designed to deliver a soft crumb, reliable rise, and consistent results every time.
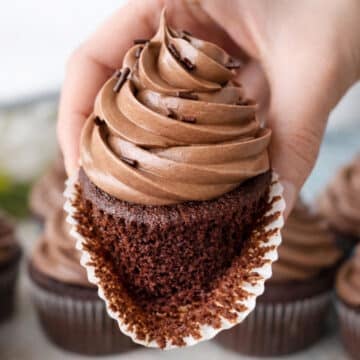
I love pairing these cupcakes with my rich chocolate buttercream frosting, but they're versatile enough to work with almost any frosting you like.
Just like my vanilla cake recipe, These cupcakes are best the day they're baked, but they'll stay fresh for up to 2 days at room temperature if stored in an airtight container. If you want to get ahead, you can bake and freeze the unfrosted cupcakes for up to 6 months. Just thaw them and frost on the day you plan to serve them for the best flavor and texture.
If you want a less sweet, breakfast-friendly cousin, try my bakery-style muffin recipe, which uses a similar creaming method with cake flour and buttermilk.
Why This Recipe Works
These cupcakes use the reverse creaming method, which means the butter gets mixed with the dry ingredients before any liquid is added. This coats the flour in fat before the gluten has a chance to develop, which is what gives you that fine, tender crumb and evenly domed top. Traditional creaming develops more gluten, which is great for denser cakes but works against you when you want something light and delicate.
Buttermilk does two things in this recipe. The acidity breaks down gluten strands for a softer texture, and it activates the baking soda for a stronger, more reliable rise. I use the same trick in my chocolate cupcake recipe for the same reason.
Using both butter and oil is intentional. Butter gives you flavor and structure, but it firms up when chilled and can make cupcakes taste dry after a day in the fridge. Oil stays liquid at any temperature, which keeps the crumb moist and tender for days. Together they give you the best of both.
Cake flour has significantly less protein than all-purpose flour, which means less gluten forms during mixing. Less gluten means a lighter, more delicate crumb. This is not a recipe where all-purpose flour works as a swap since the lower protein content of cake flour is central to the texture.
⭐️⭐️⭐️⭐️⭐️ Reader Review
"I will never visit one Michigan's top bakeries again for cupcakes! Simply the best I have ever eaten or made in my whole entire life! Thank you for blessing the world with this phenomenal recipe. These cupcakes were beyond moist, flavorful, with a buttery, but not greasy delicate crumb! Amazing!"
- Melinda
Vanilla Cupcake Ingredients
Here is everything you need to make these cupcakes. A few of these ingredients are non-negotiable for the texture and rise, so read through the notes before making any substitutions.
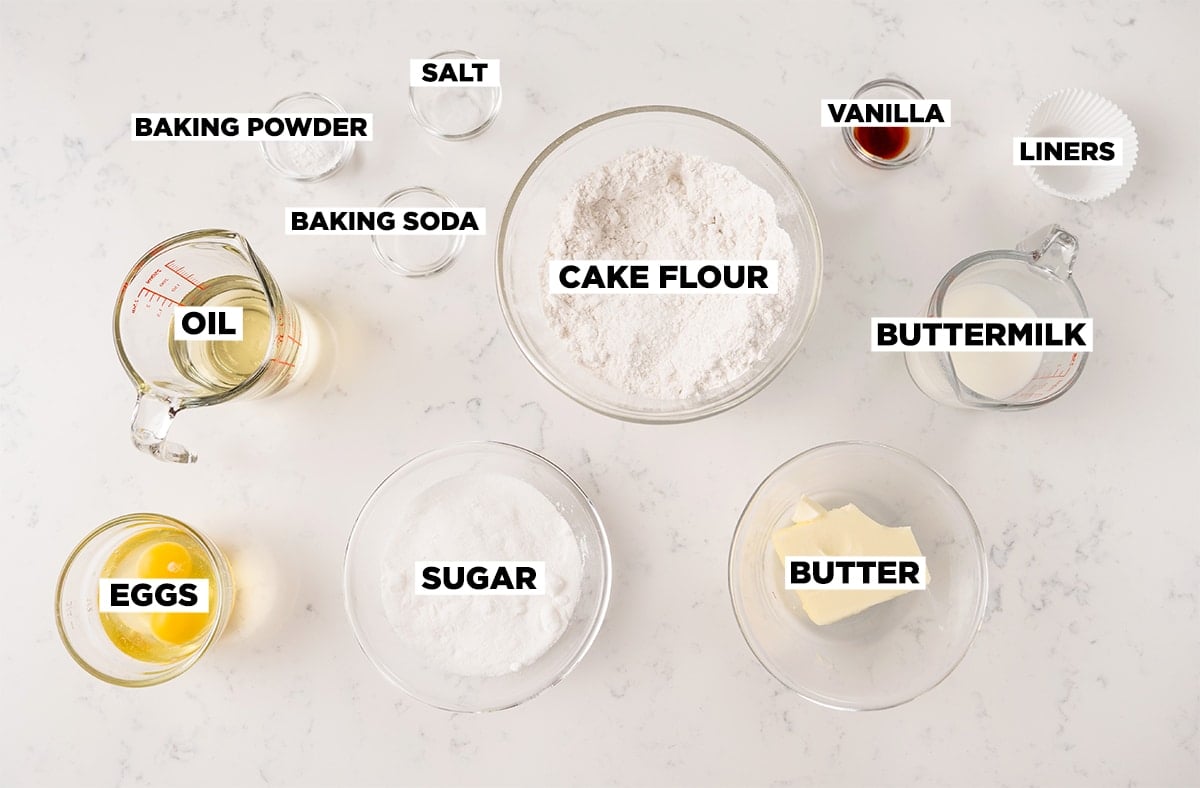
- Buttermilk: Adds flavor and moisture. Buttermilk is acidic and actually breaks down the gluten in the flour, making a more tender cupcake as well. If you have whole milk and white vinegar or lemons, you can make your own buttermilk substitute.
- Oil: This keeps the cupcakes moist, but too much oil in a recipe will cause the wrappers to peel away from the cupcake, so measure carefully.
- Cake flour: The secret to this soft and fluffy vanilla cupcake recipe. This recipe uses the reverse creaming method, which coats the flour in a layer of butter and then whips in the air. Cake flour has a lower protein content than all-purpose flour, so it's important to use it to get the right texture. If you don't have cake flour, you can use my cake flour substitute recipe, or buy a brand such as, "Shipton Mills soft cake and pastry flour." Cake flour is specific to the method used in this recipe, and using all-purpose flour will not work at all.
- Vanilla Extract: Use a good-quality vanilla extract, vanilla bean paste, or even a vanilla bean for true vanilla flavor. One vanilla bean = 2 teaspoons vanilla extract. For that "classic grocery store cake" flavor, use clear vanilla extract. It's a bit sweeter, almost candy-like, and keeps vanilla cupcakes light in color since it doesn't tint the batter like regular vanilla extract.
- Sugar: Sugar adds sweetness, moisture, and structure to the cupcake. It also helps create a tender crumb by interfering with gluten development. Reducing the sugar will affect the texture and how well the cupcakes rise.
- Eggs: Eggs provide structure, moisture, and richness. They also help emulsify the batter, which is what gives the cupcakes a smooth, even crumb. Make sure they are at room temperature before mixing so the batter doesn't curdle.
- Baking Powder and Baking Soda: These leavening agents work together to give the cupcakes lift and help set the dome. Baking soda reacts immediately when it hits the acidic buttermilk, while baking powder continues to react during baking for a reliable, even rise.
- Salt: Salt balances the sweetness and enhances all the other flavors in the cupcake. Without it, the cupcakes can taste flat even if everything else is right.
See the recipe card for the full list of ingredients with quantities.
Cupcake Variations
- Strawberry Shortcake Cupcakes: Top your vanilla cupcakes with strawberry buttercream and a fresh strawberry.
- Chocolate Vanilla Cupcakes: Frost your moist vanilla cupcakes with a homemade chocolate ganache or chocolate fudge frosting.
- Filled Cupcakes: Fill your cupcakes with some homemade lemon curd or fresh raspberry filling, and top them with fresh stabilized whipped cream for a lighter finish.
- Add to the Batter: If you love funfetti cake or chocolate chips, you can add rainbow sprinkles or chocolate chips to the batter at the end of mixing. You can also add in some citrus zest, chopped fruit, or even crushed Oreos to the batter before baking.
- Gluten-Free: You can swap the cake flour for your favorite brand of 1-to-1 gluten-free flour.
How to Make a Vanilla Cupcake Recipe
To get started, preheat the oven to 350ºF for at least 30 minutes prior to baking the cupcakes. This ensures that your oven is hot so you get a good rise and set the dome. You also want to line two cupcake pans (or a muffin pan will do) with paper liners at this time. You can also bake one pan at a time if you only have one cupcake pan. This vanilla cupcake recipe will make about 24 cupcakes.
Pro Tip: Use the photos as your guide for each step instead of relying strictly on mixing times, since visual cues are the best way to know when the batter is mixed correctly.
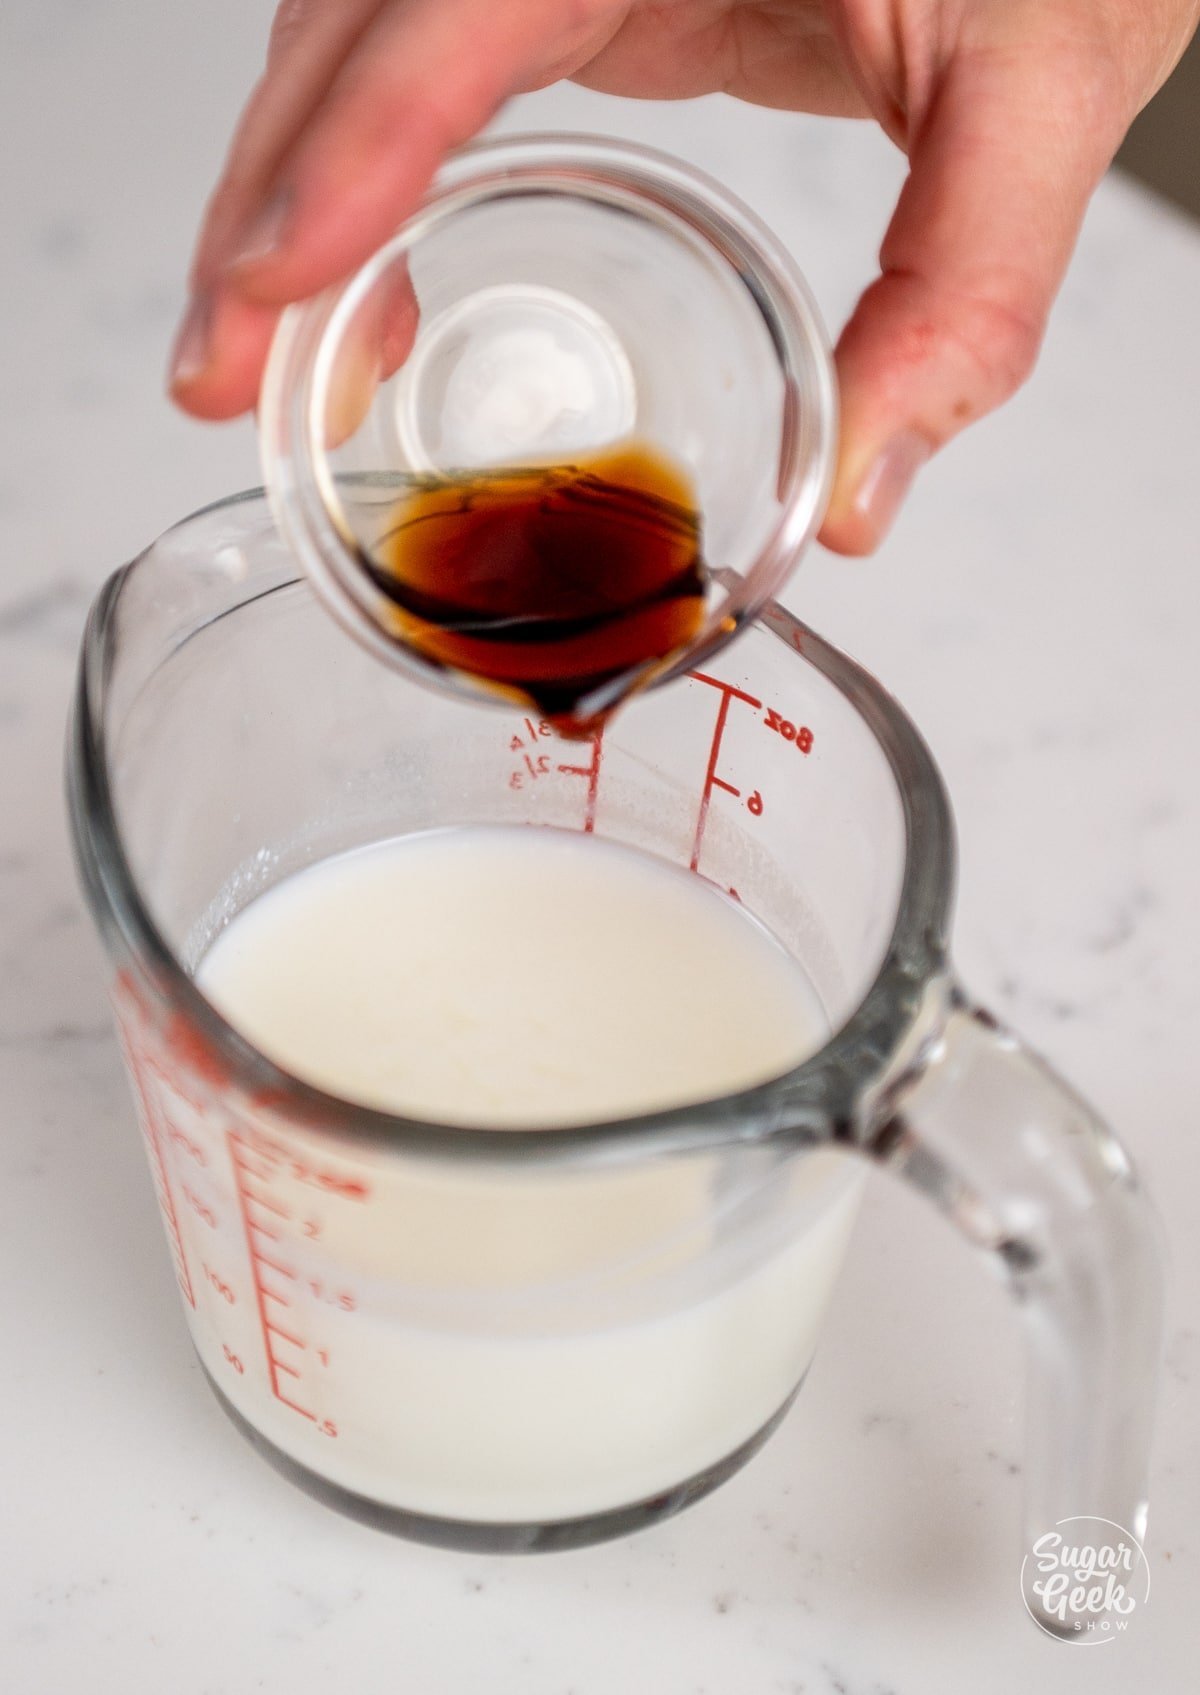
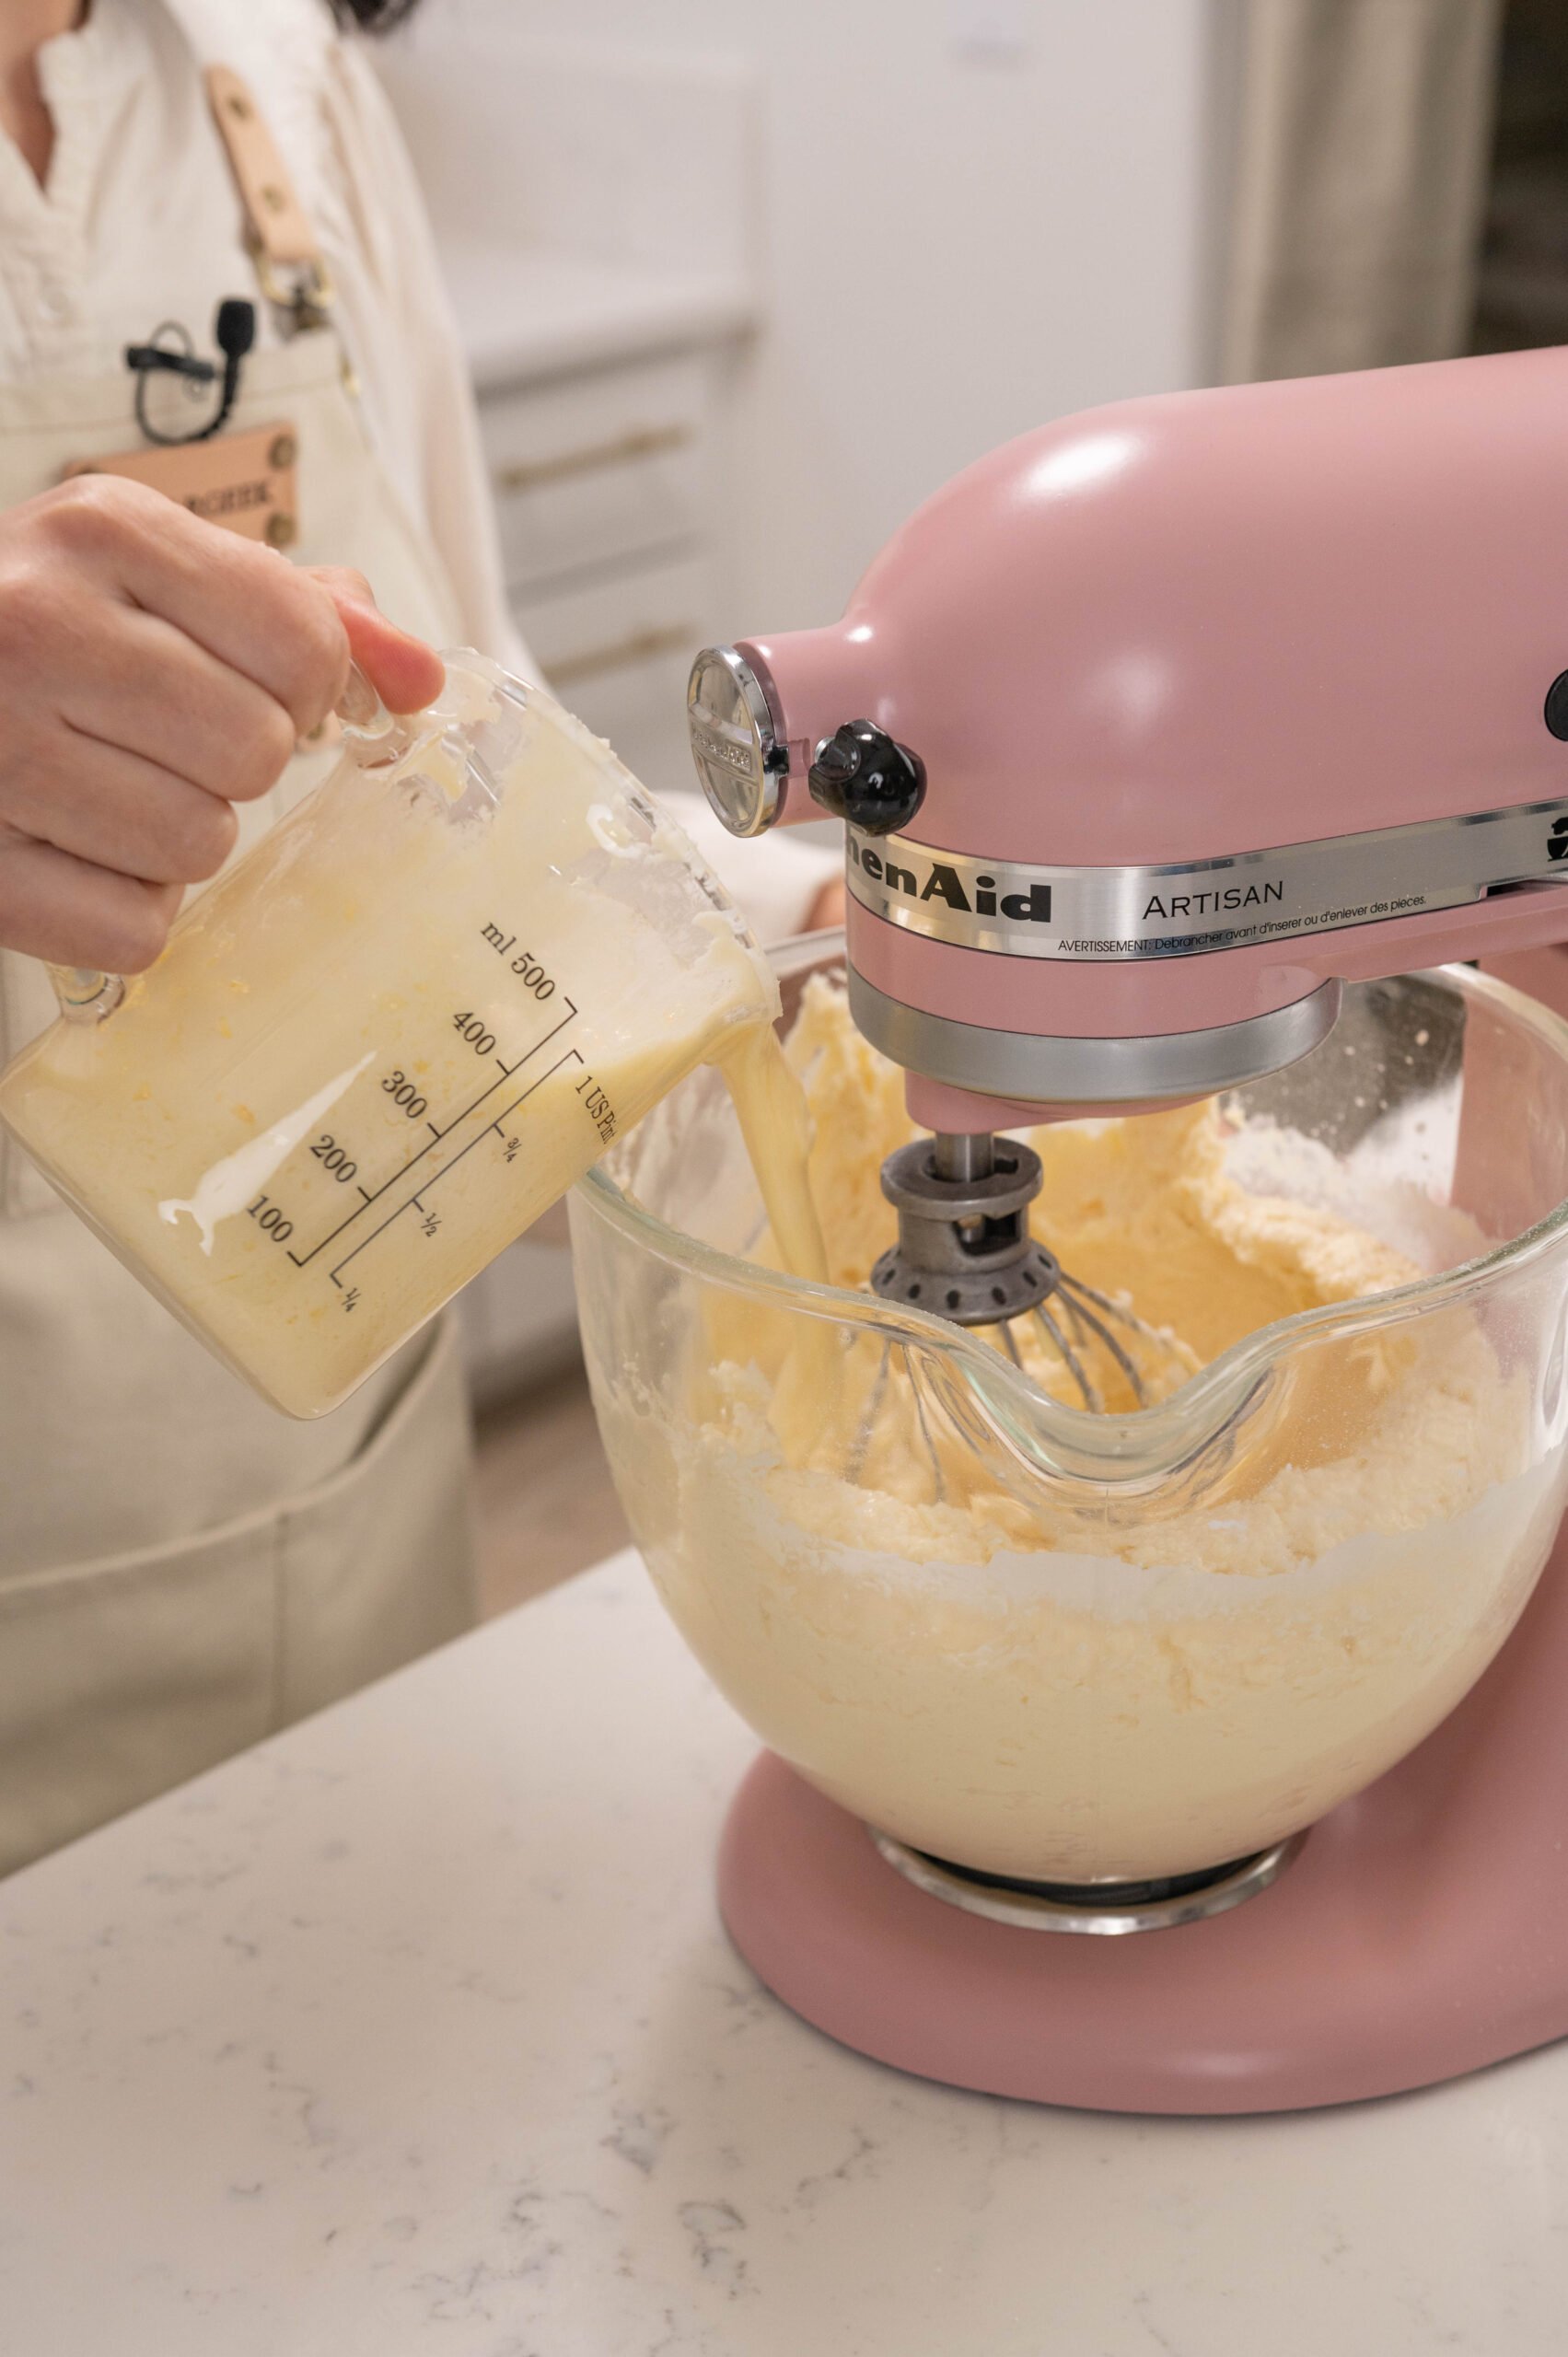
- Combine the vanilla and buttermilk in a separate measuring cup and set it aside.
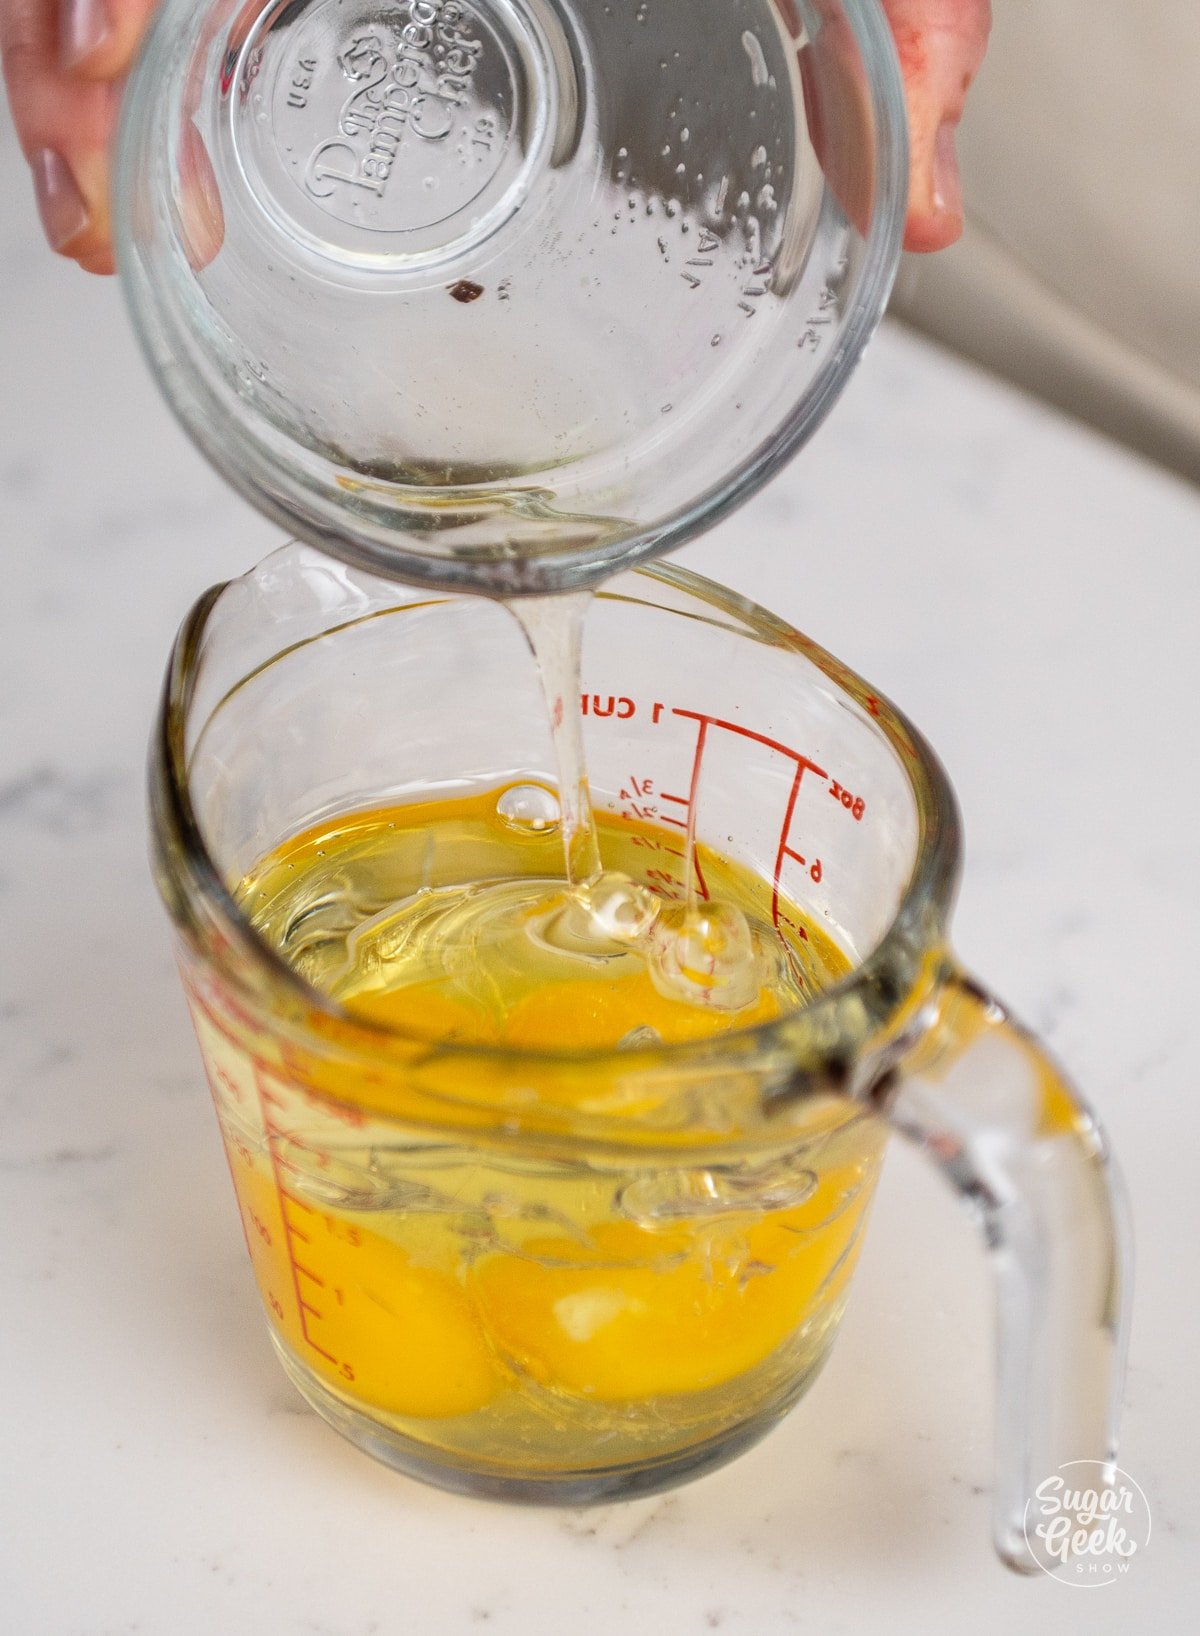
- Add the eggs and oil to a separate bowl. Whisk and set them aside.
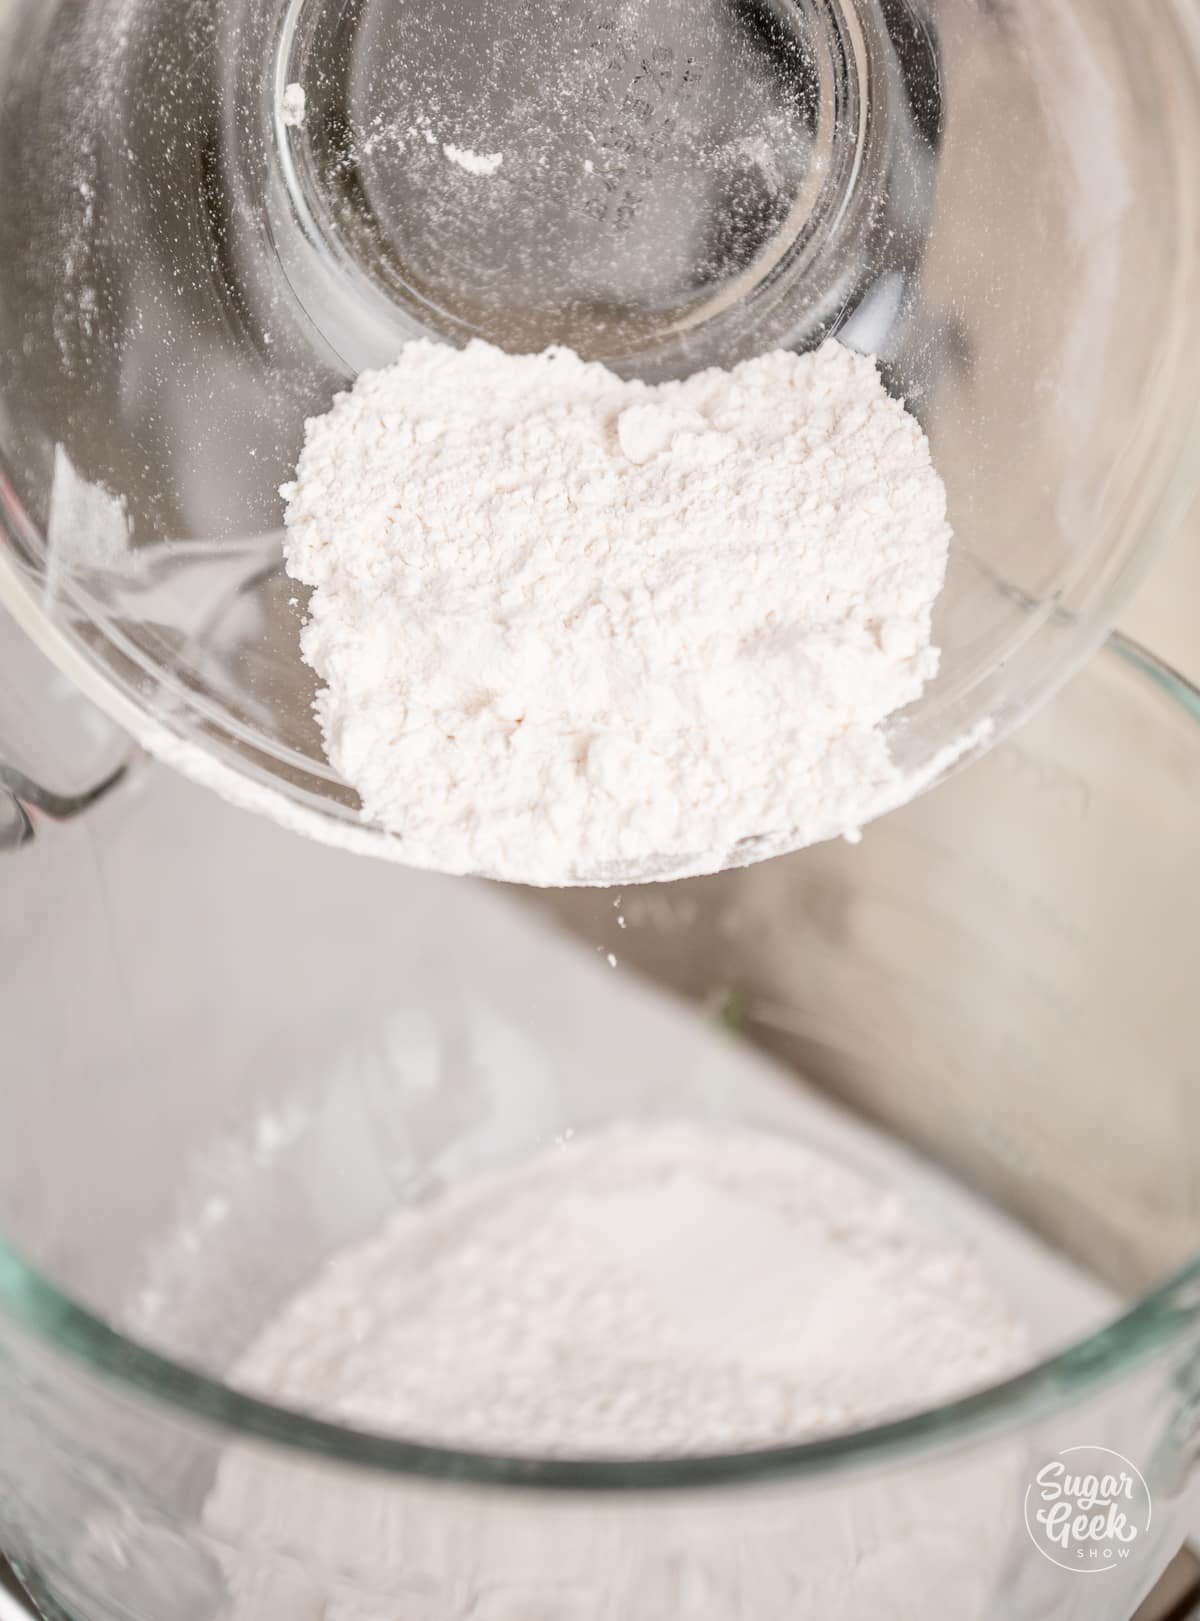
- Add the cake flour, sugar, salt, baking powder, and baking soda to the bowl of your stand mixer with the paddle attachment. No stand mixer? You can use a large bowl and an electric mixer but you may need to mix for longer to reach the same consistency.
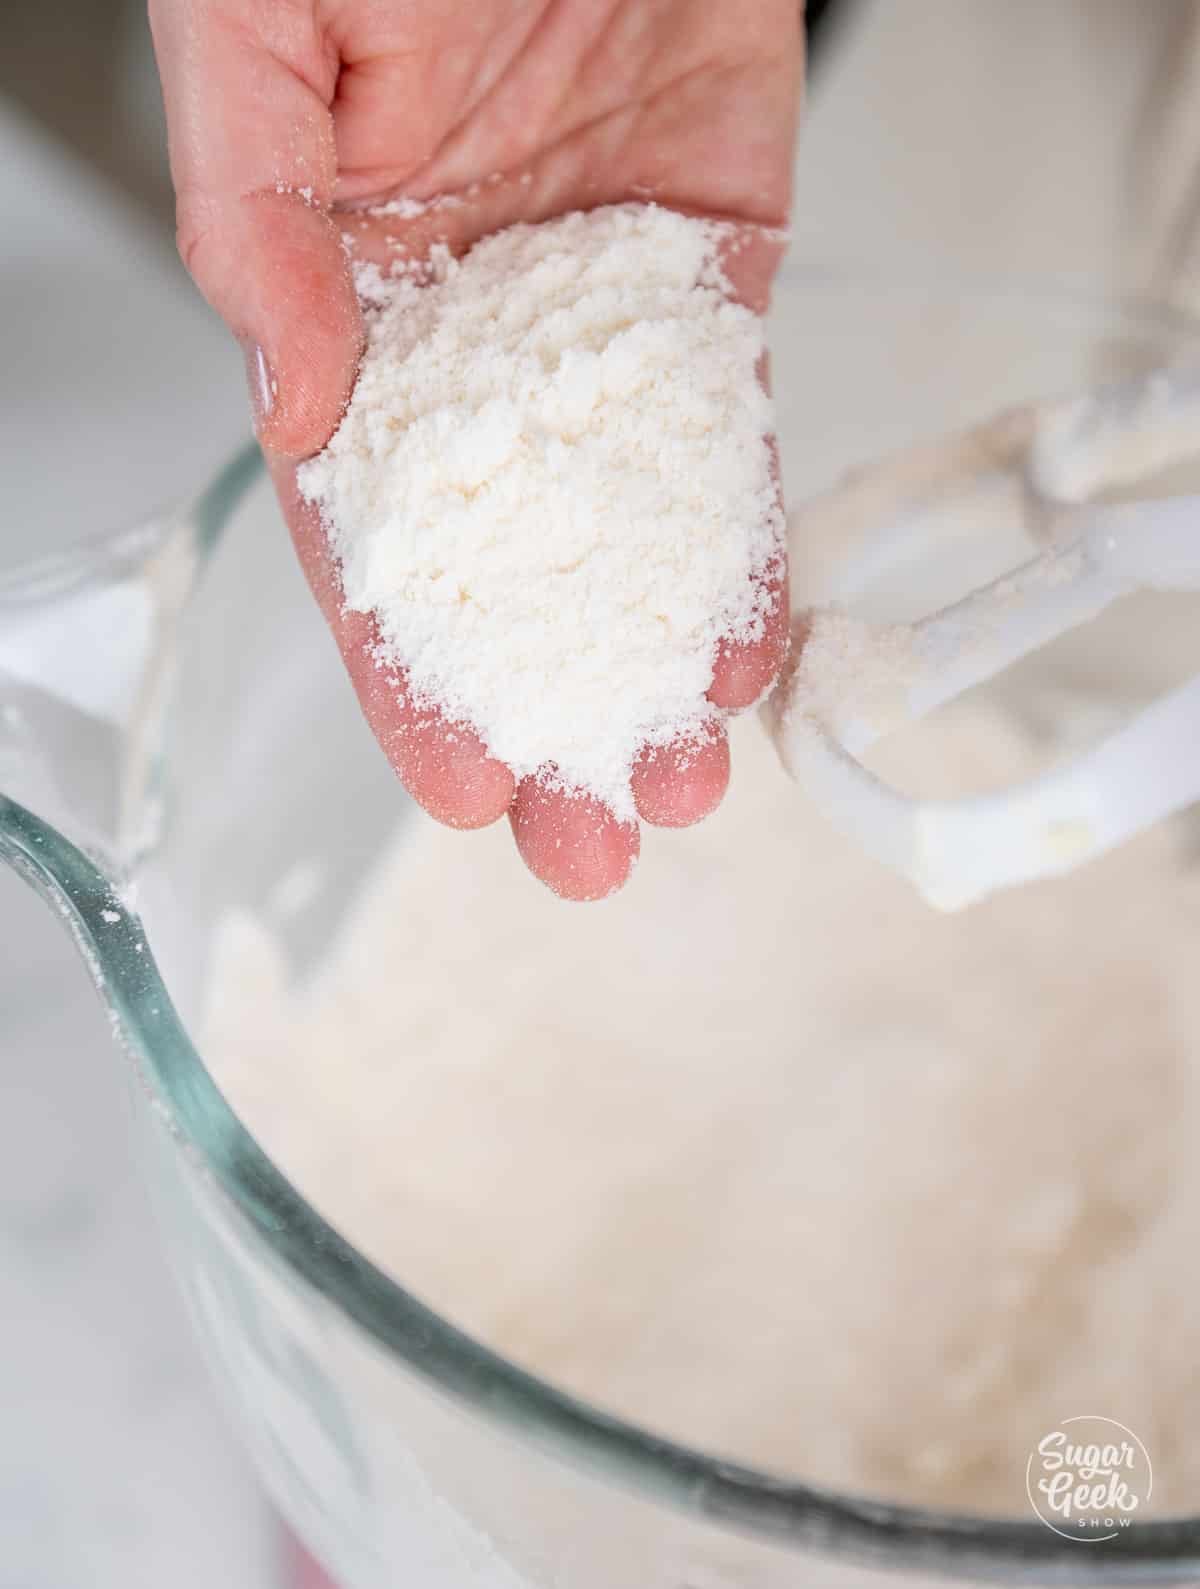
- Add the softened butter to the dry ingredients and mix on low until the mixture resembles a sandy texture but isn't clumping or dough-like, as shown in the image above. Depending on how soft your butter is, this might take a minute or two.
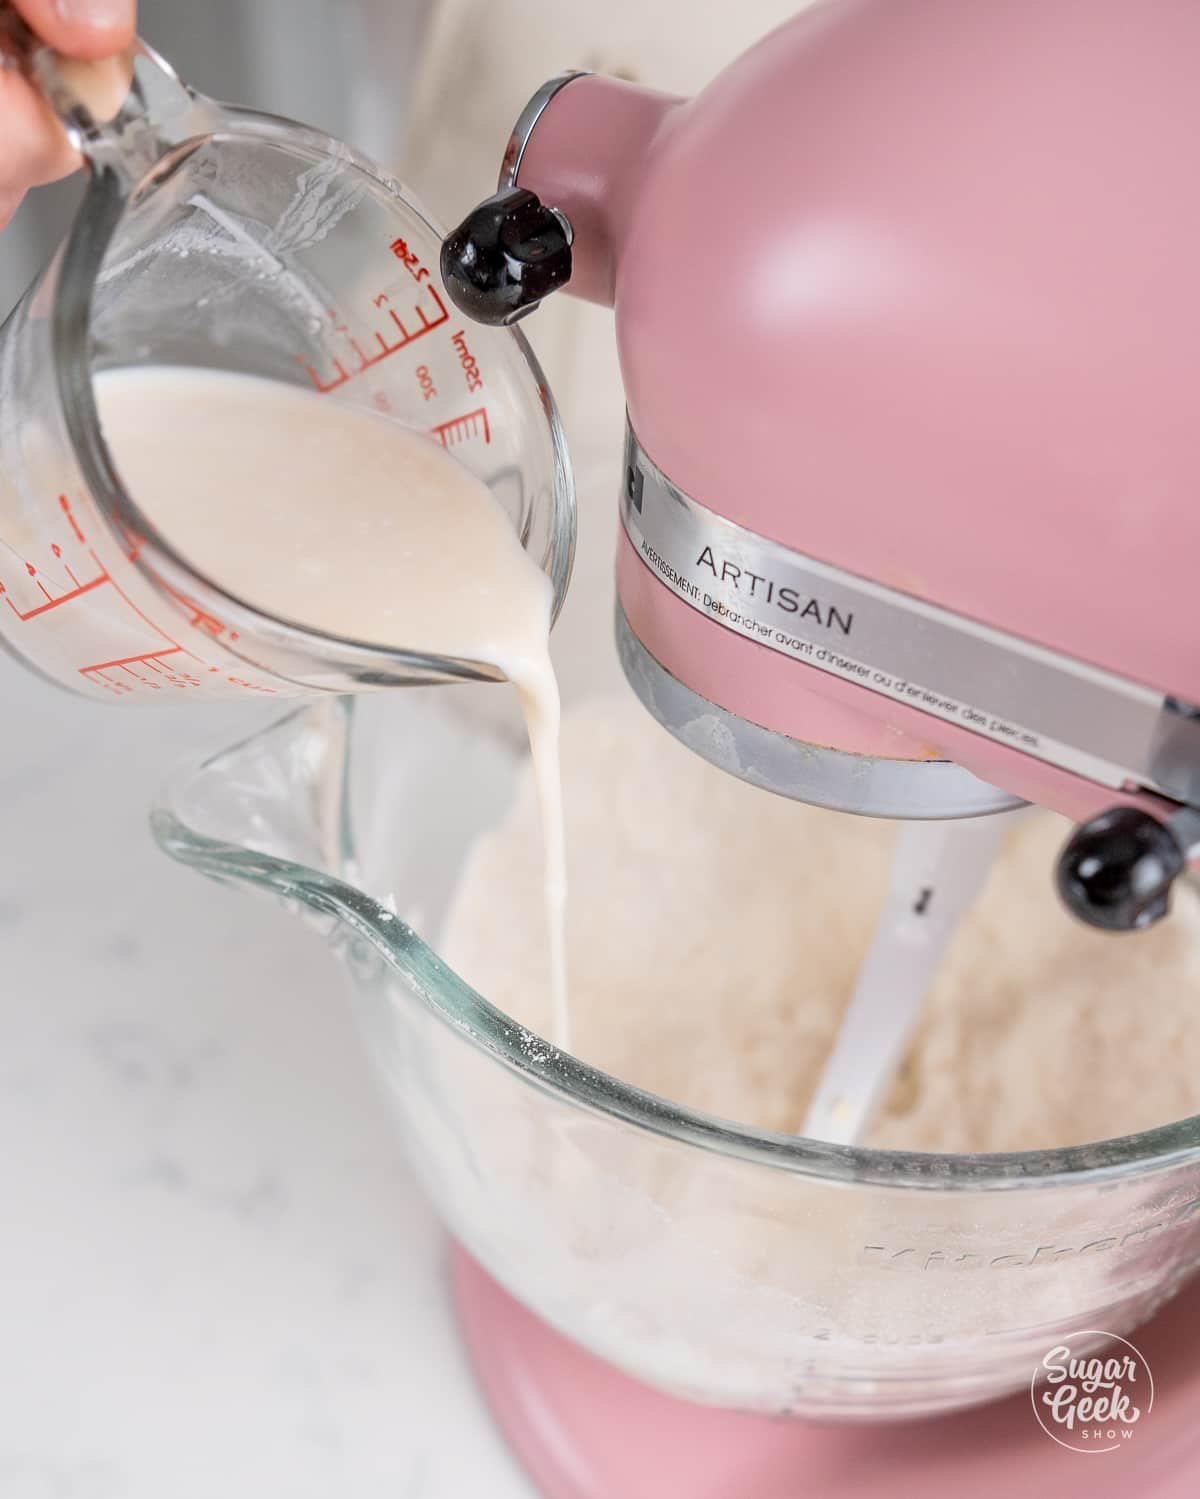
- Pour the milk mixture into your dry ingredients and increase the speed to medium (speed 4 on a KitchenAid, speed 2 on a Bosch). Mix for 1 ½ minutes to develop the fluffy structure of the cupcake. The batter will go from being yellow to a fluffy white.

- Slowly add your egg mixture in three parts and mix on low until it's fully combined.
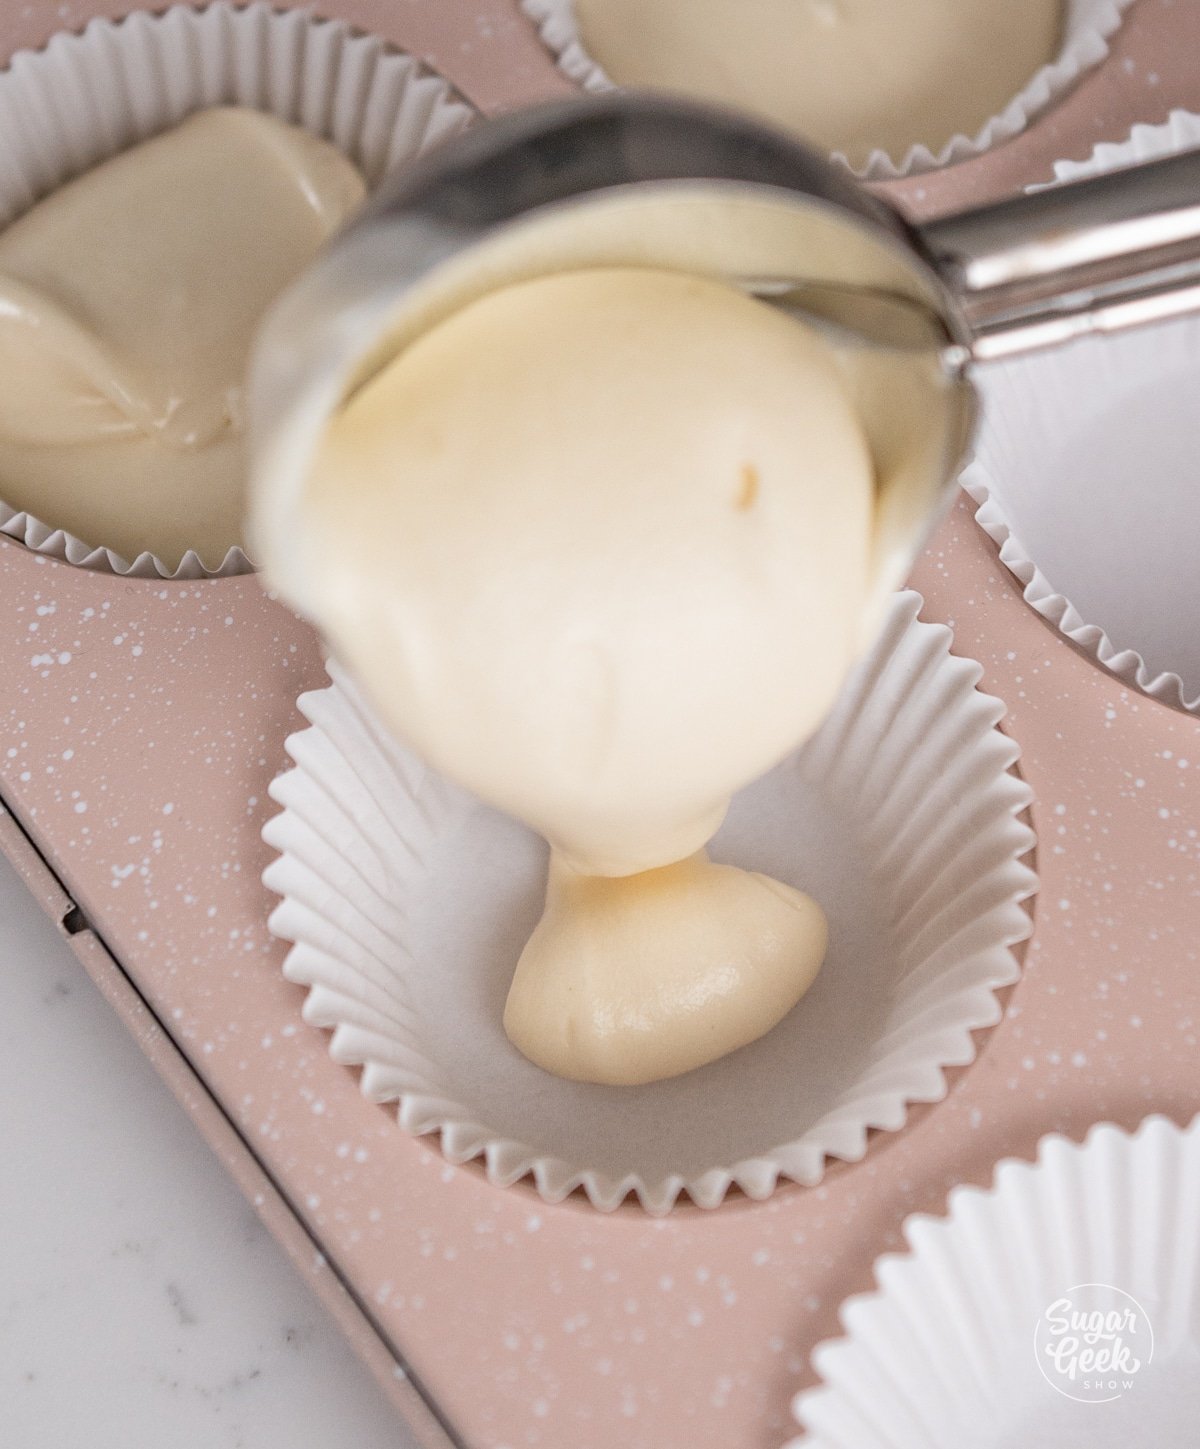
- Fill your liners ⅔ of the way full with the cupcake batter. I use my kitchen scale to measure out 1.5 ounces of batter per cupcake to ensure the cupcakes are all the same size.

- Bake the cupcakes for 15-20 minutes or until they are just starting to turn golden brown and the center of the cupcake springs back when you lightly touch it. I rotate my cupcakes halfway through baking for even browning. Let your cupcakes cool in the pans for five minutes, then move them to a cooling rack to cool completely.
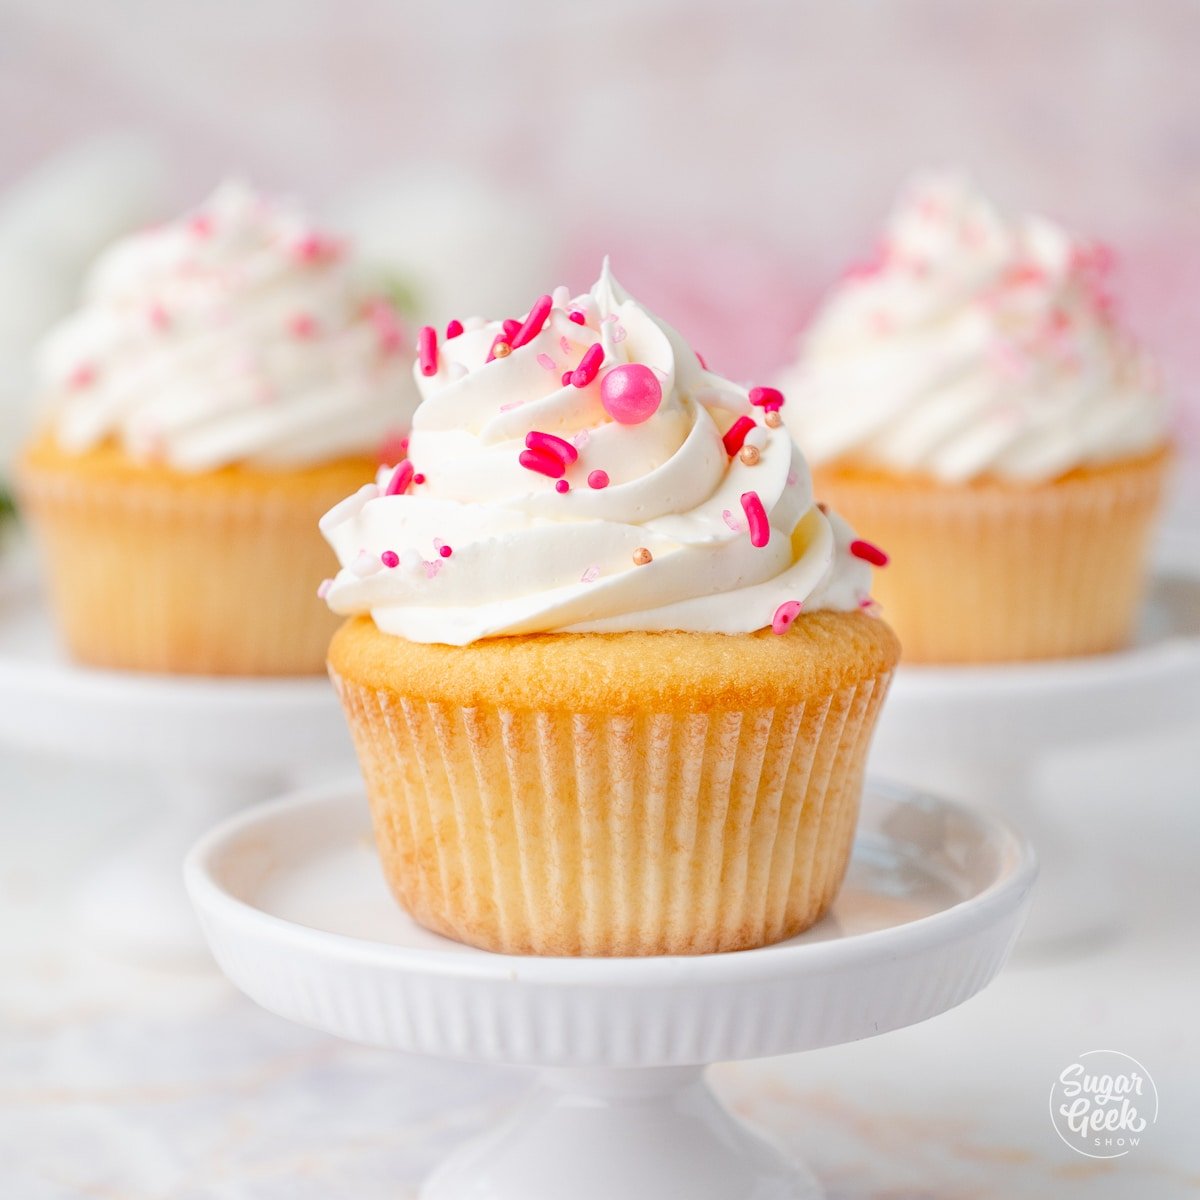
Frosting Tip: I love using my easy vanilla buttercream and topping them with a few sprinkles or this Swiss meringue buttercream.
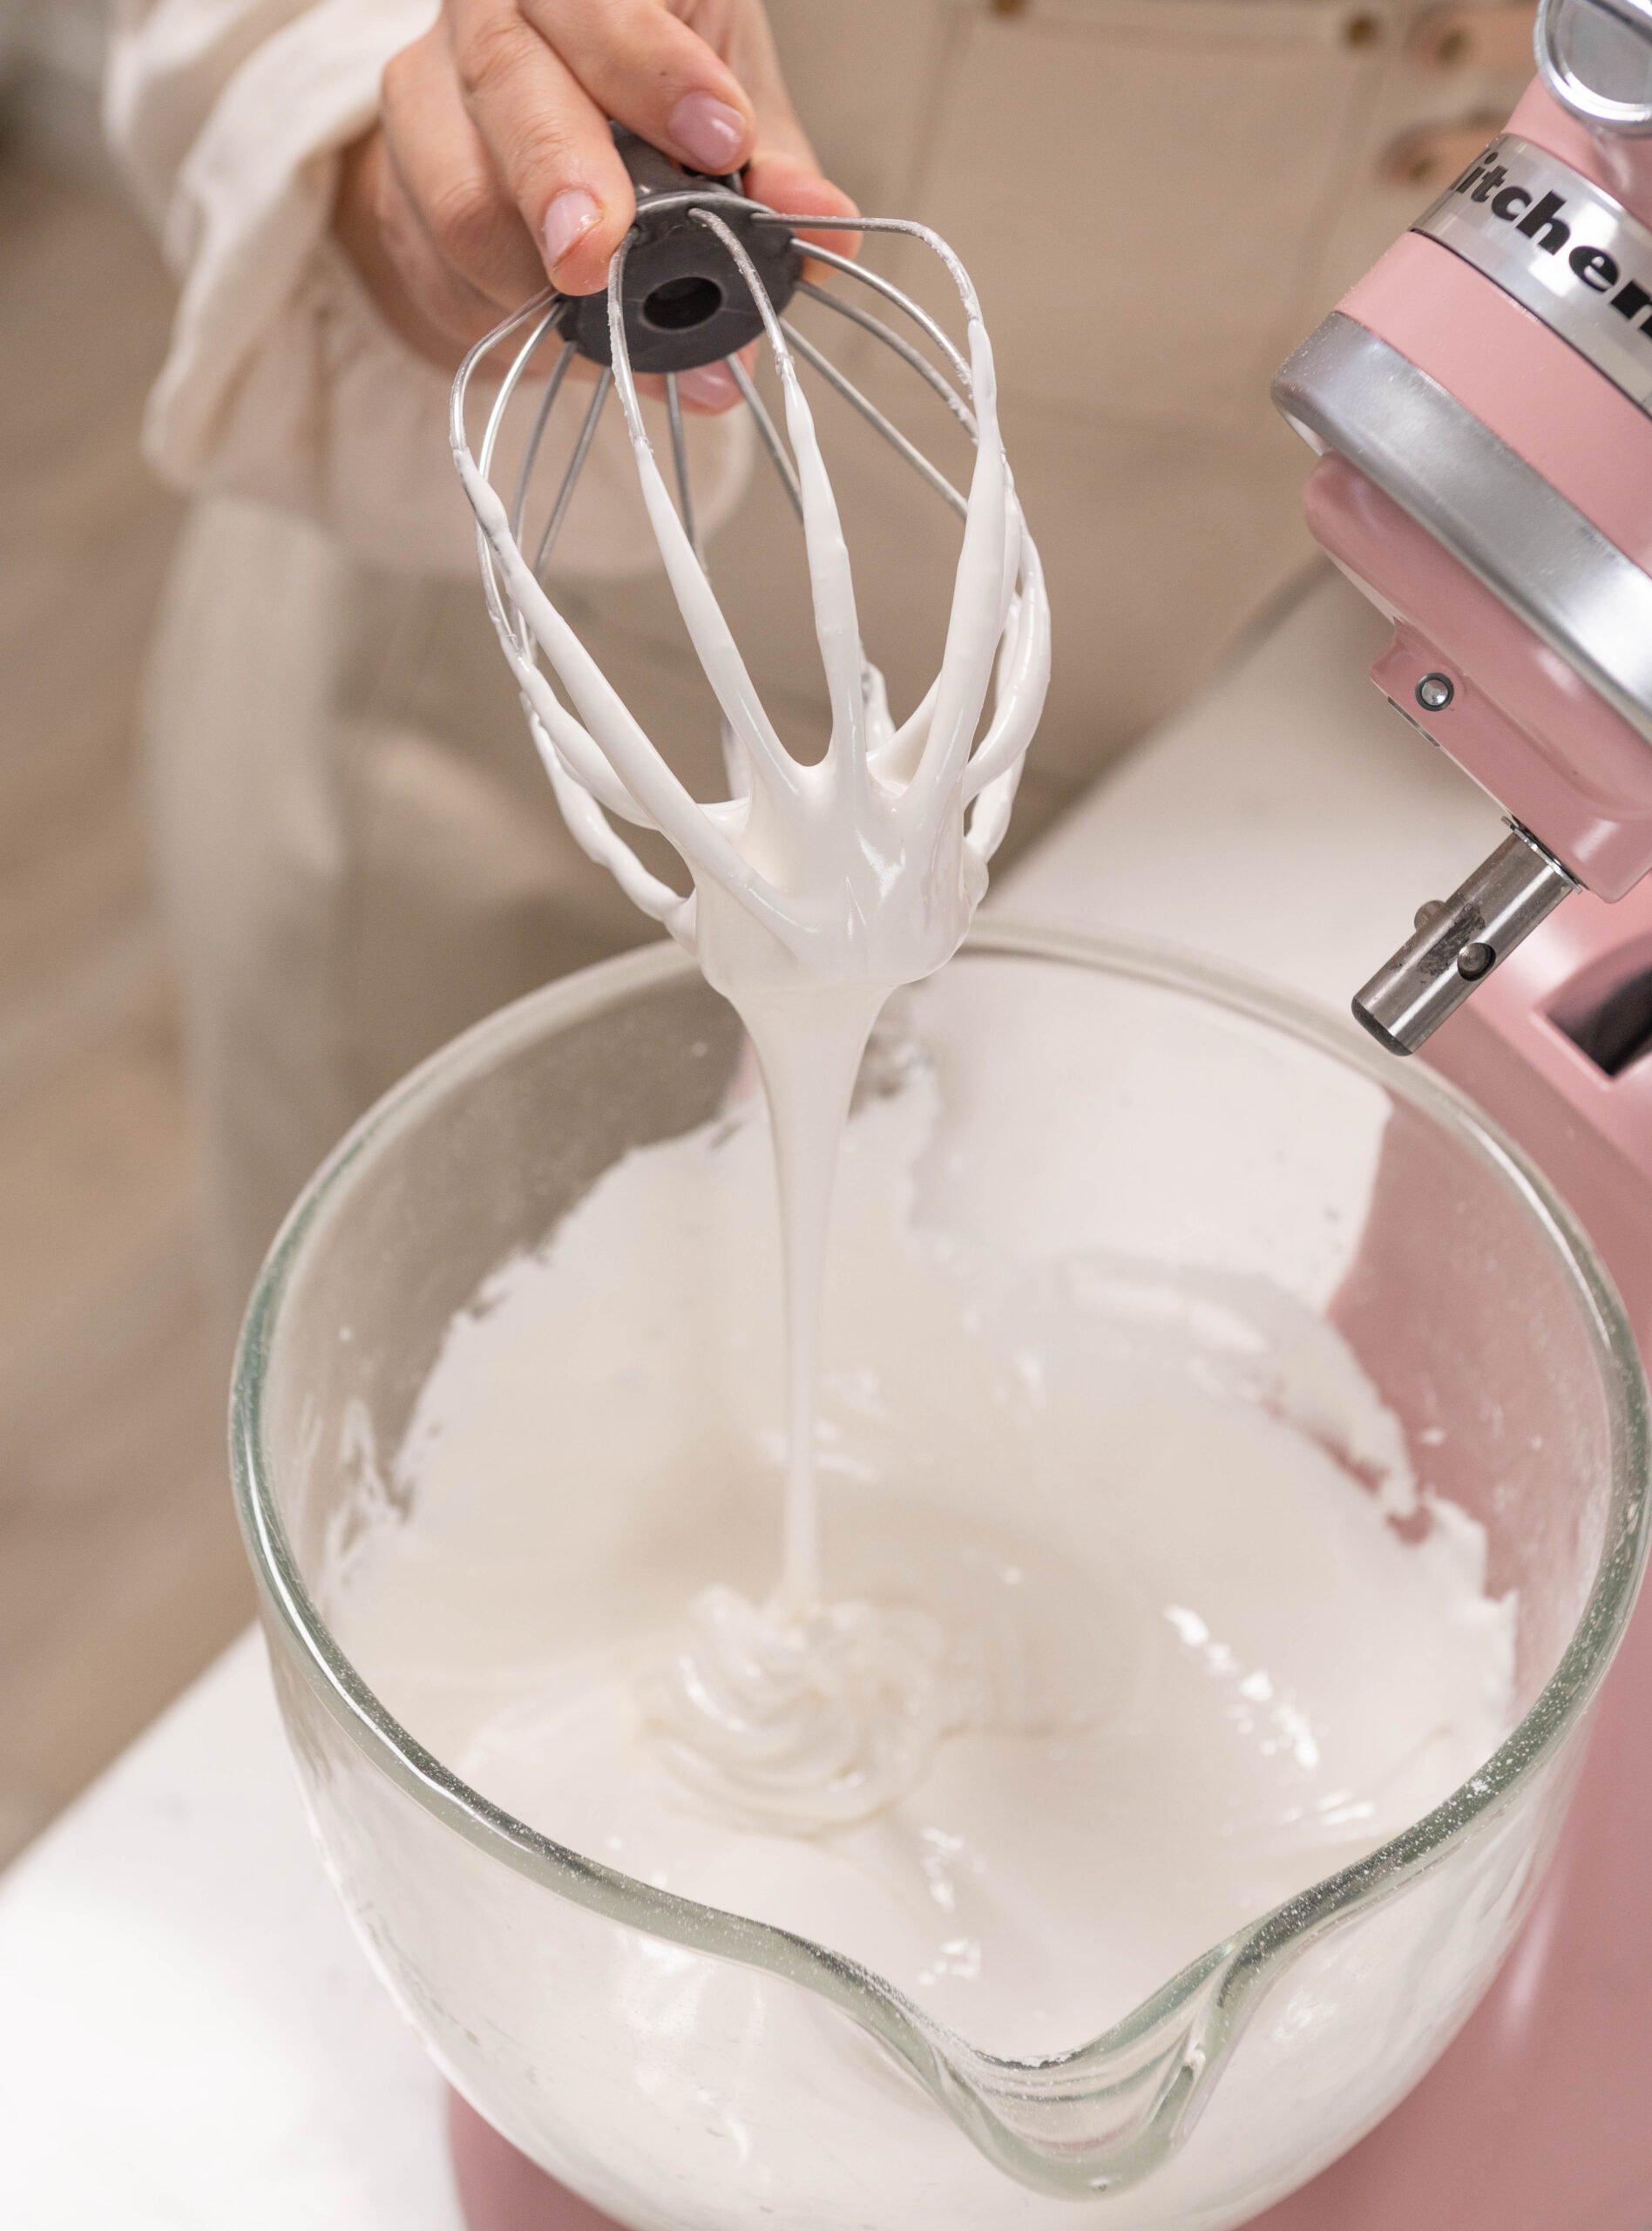
- While the cupcakes bake, make the frosting. Place the pasteurized egg whites and powdered sugar in the bowl of your stand mixer with the whisk attachment. Combine the ingredients on low and then whip them on high for 4-5 minutes (until shiny) to dissolve the powdered sugar.

- Add the salt and vanilla extract. If you want to add any food coloring, you can do it now.
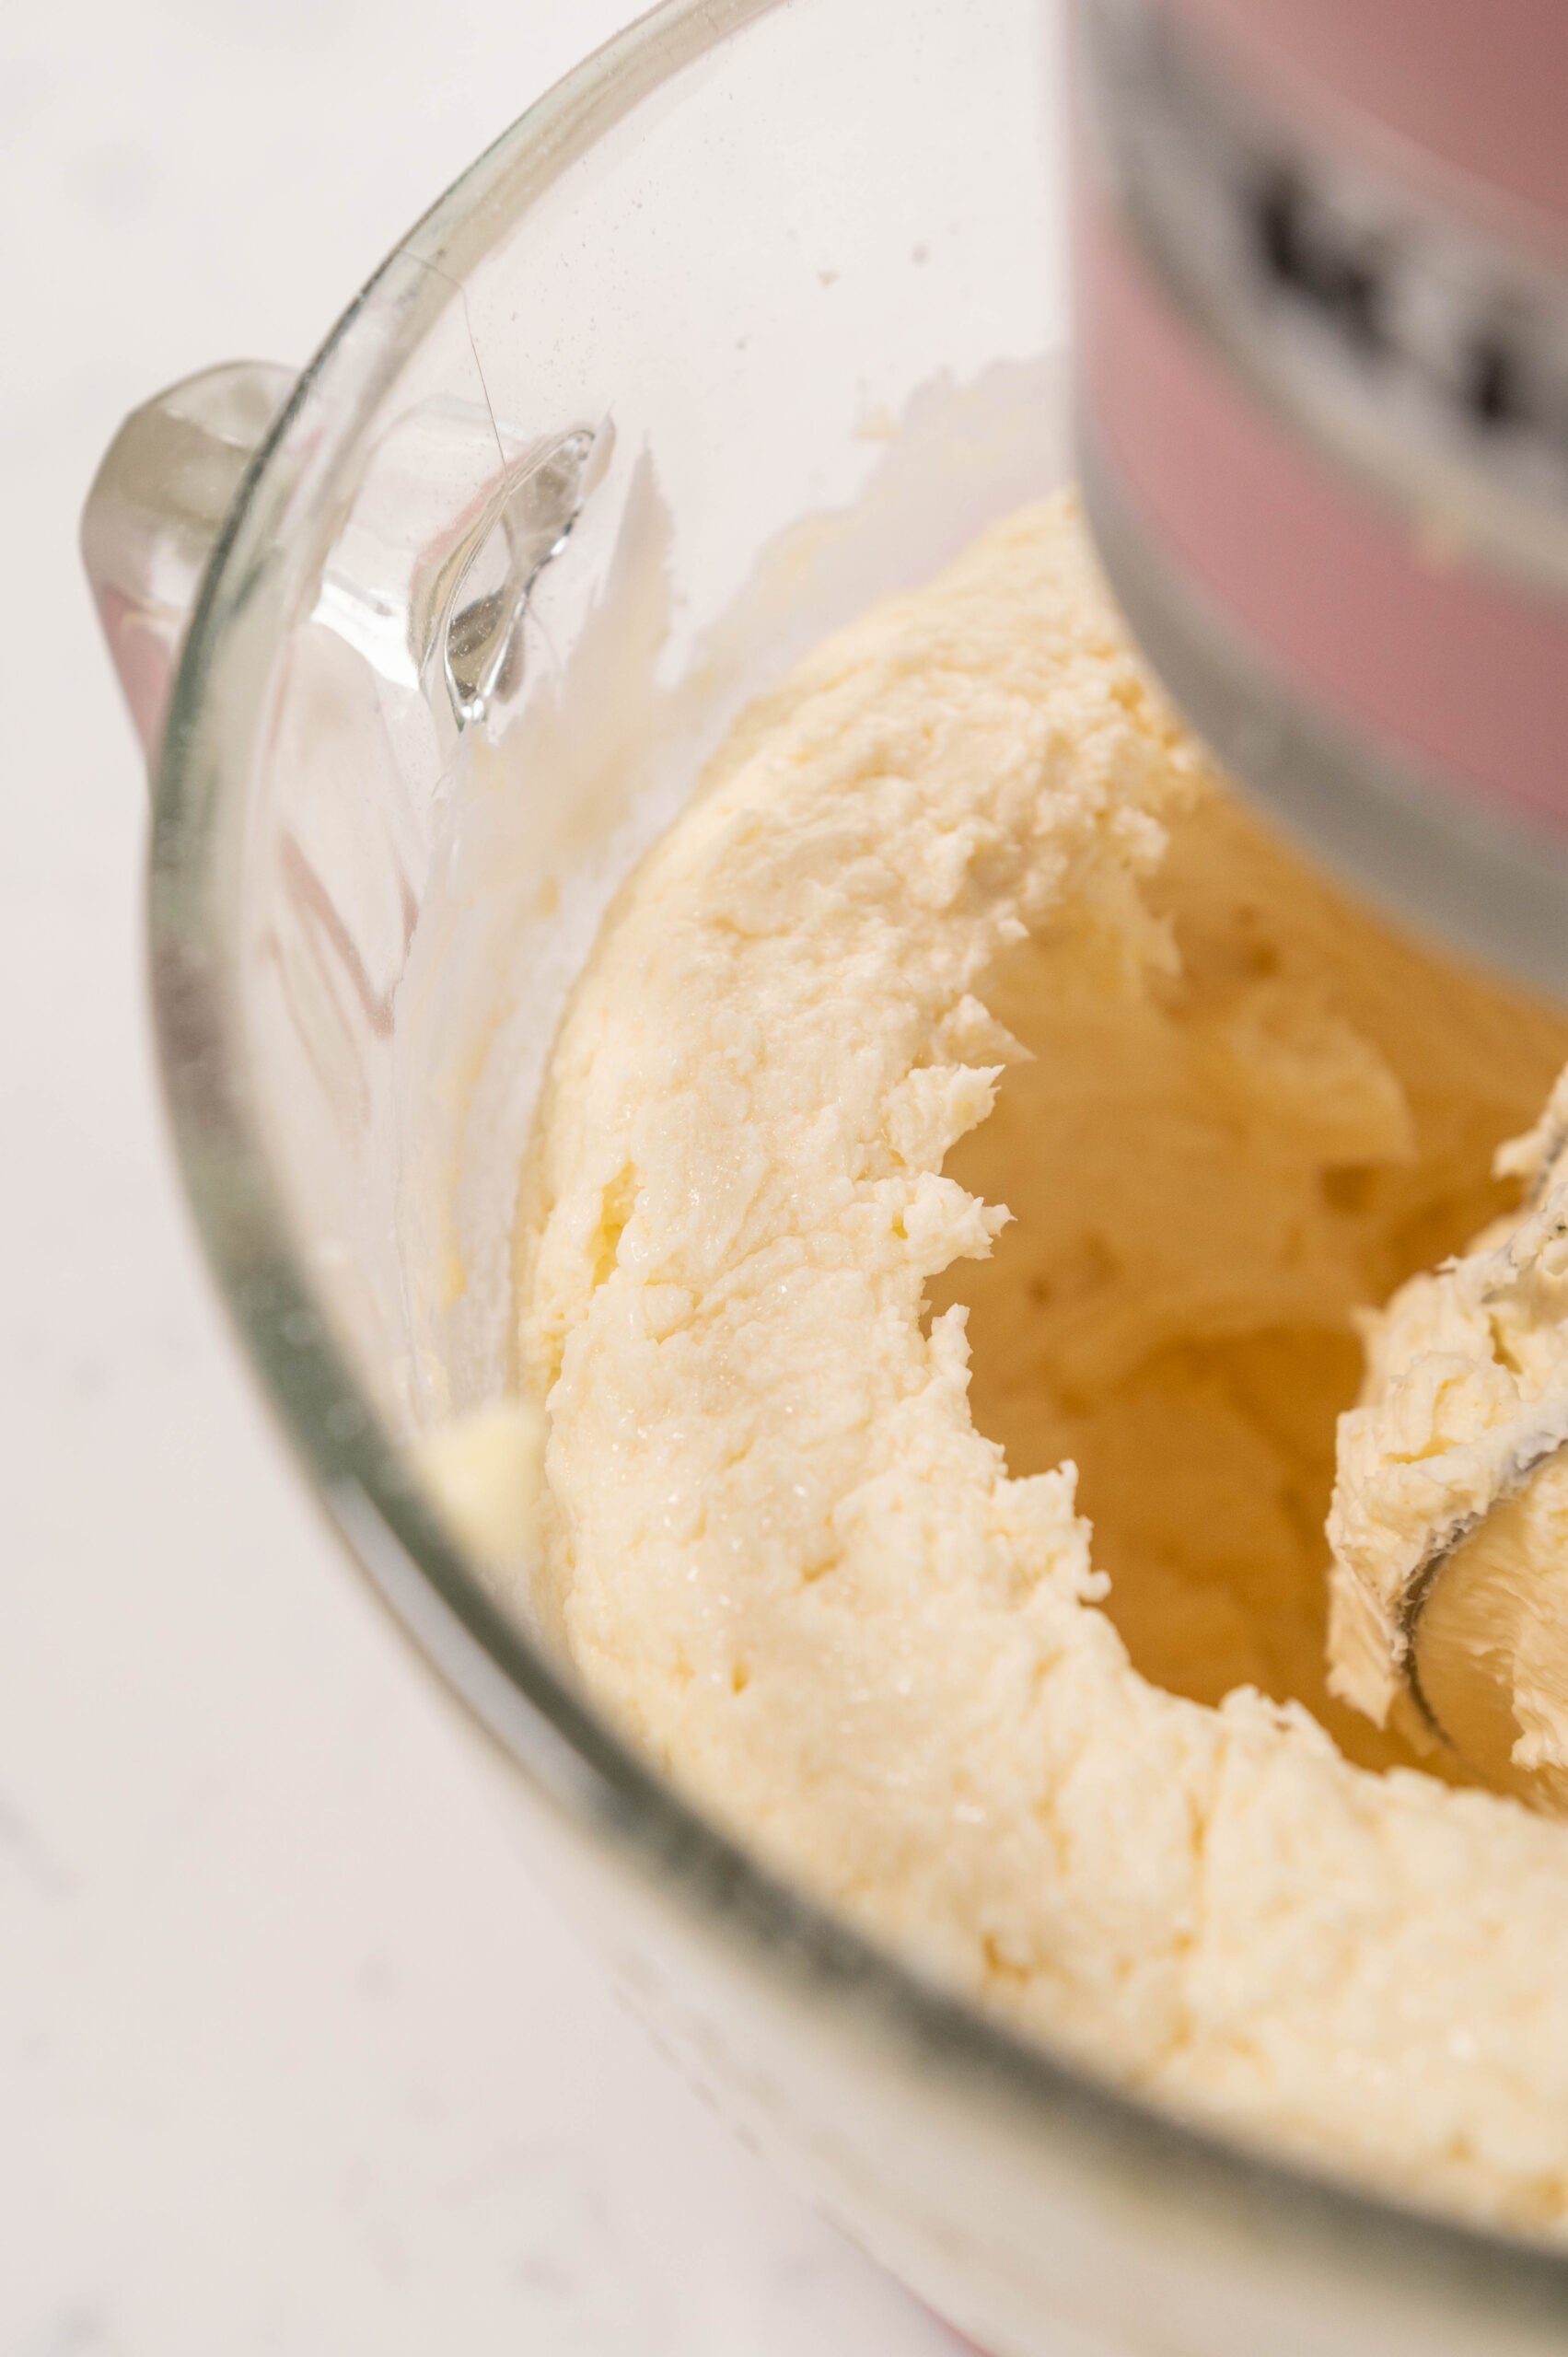
- Add in your softened butter piece-by-piece and then whip it on high. It will look curdled and pretty yellow at first. This is definitely normal, just keep whipping. After your buttercream looks similar to the consistency above, remove about 1 cup of buttercream and melt it in the microwave for 10-15 seconds.
- Pour it back into the whipping buttercream.
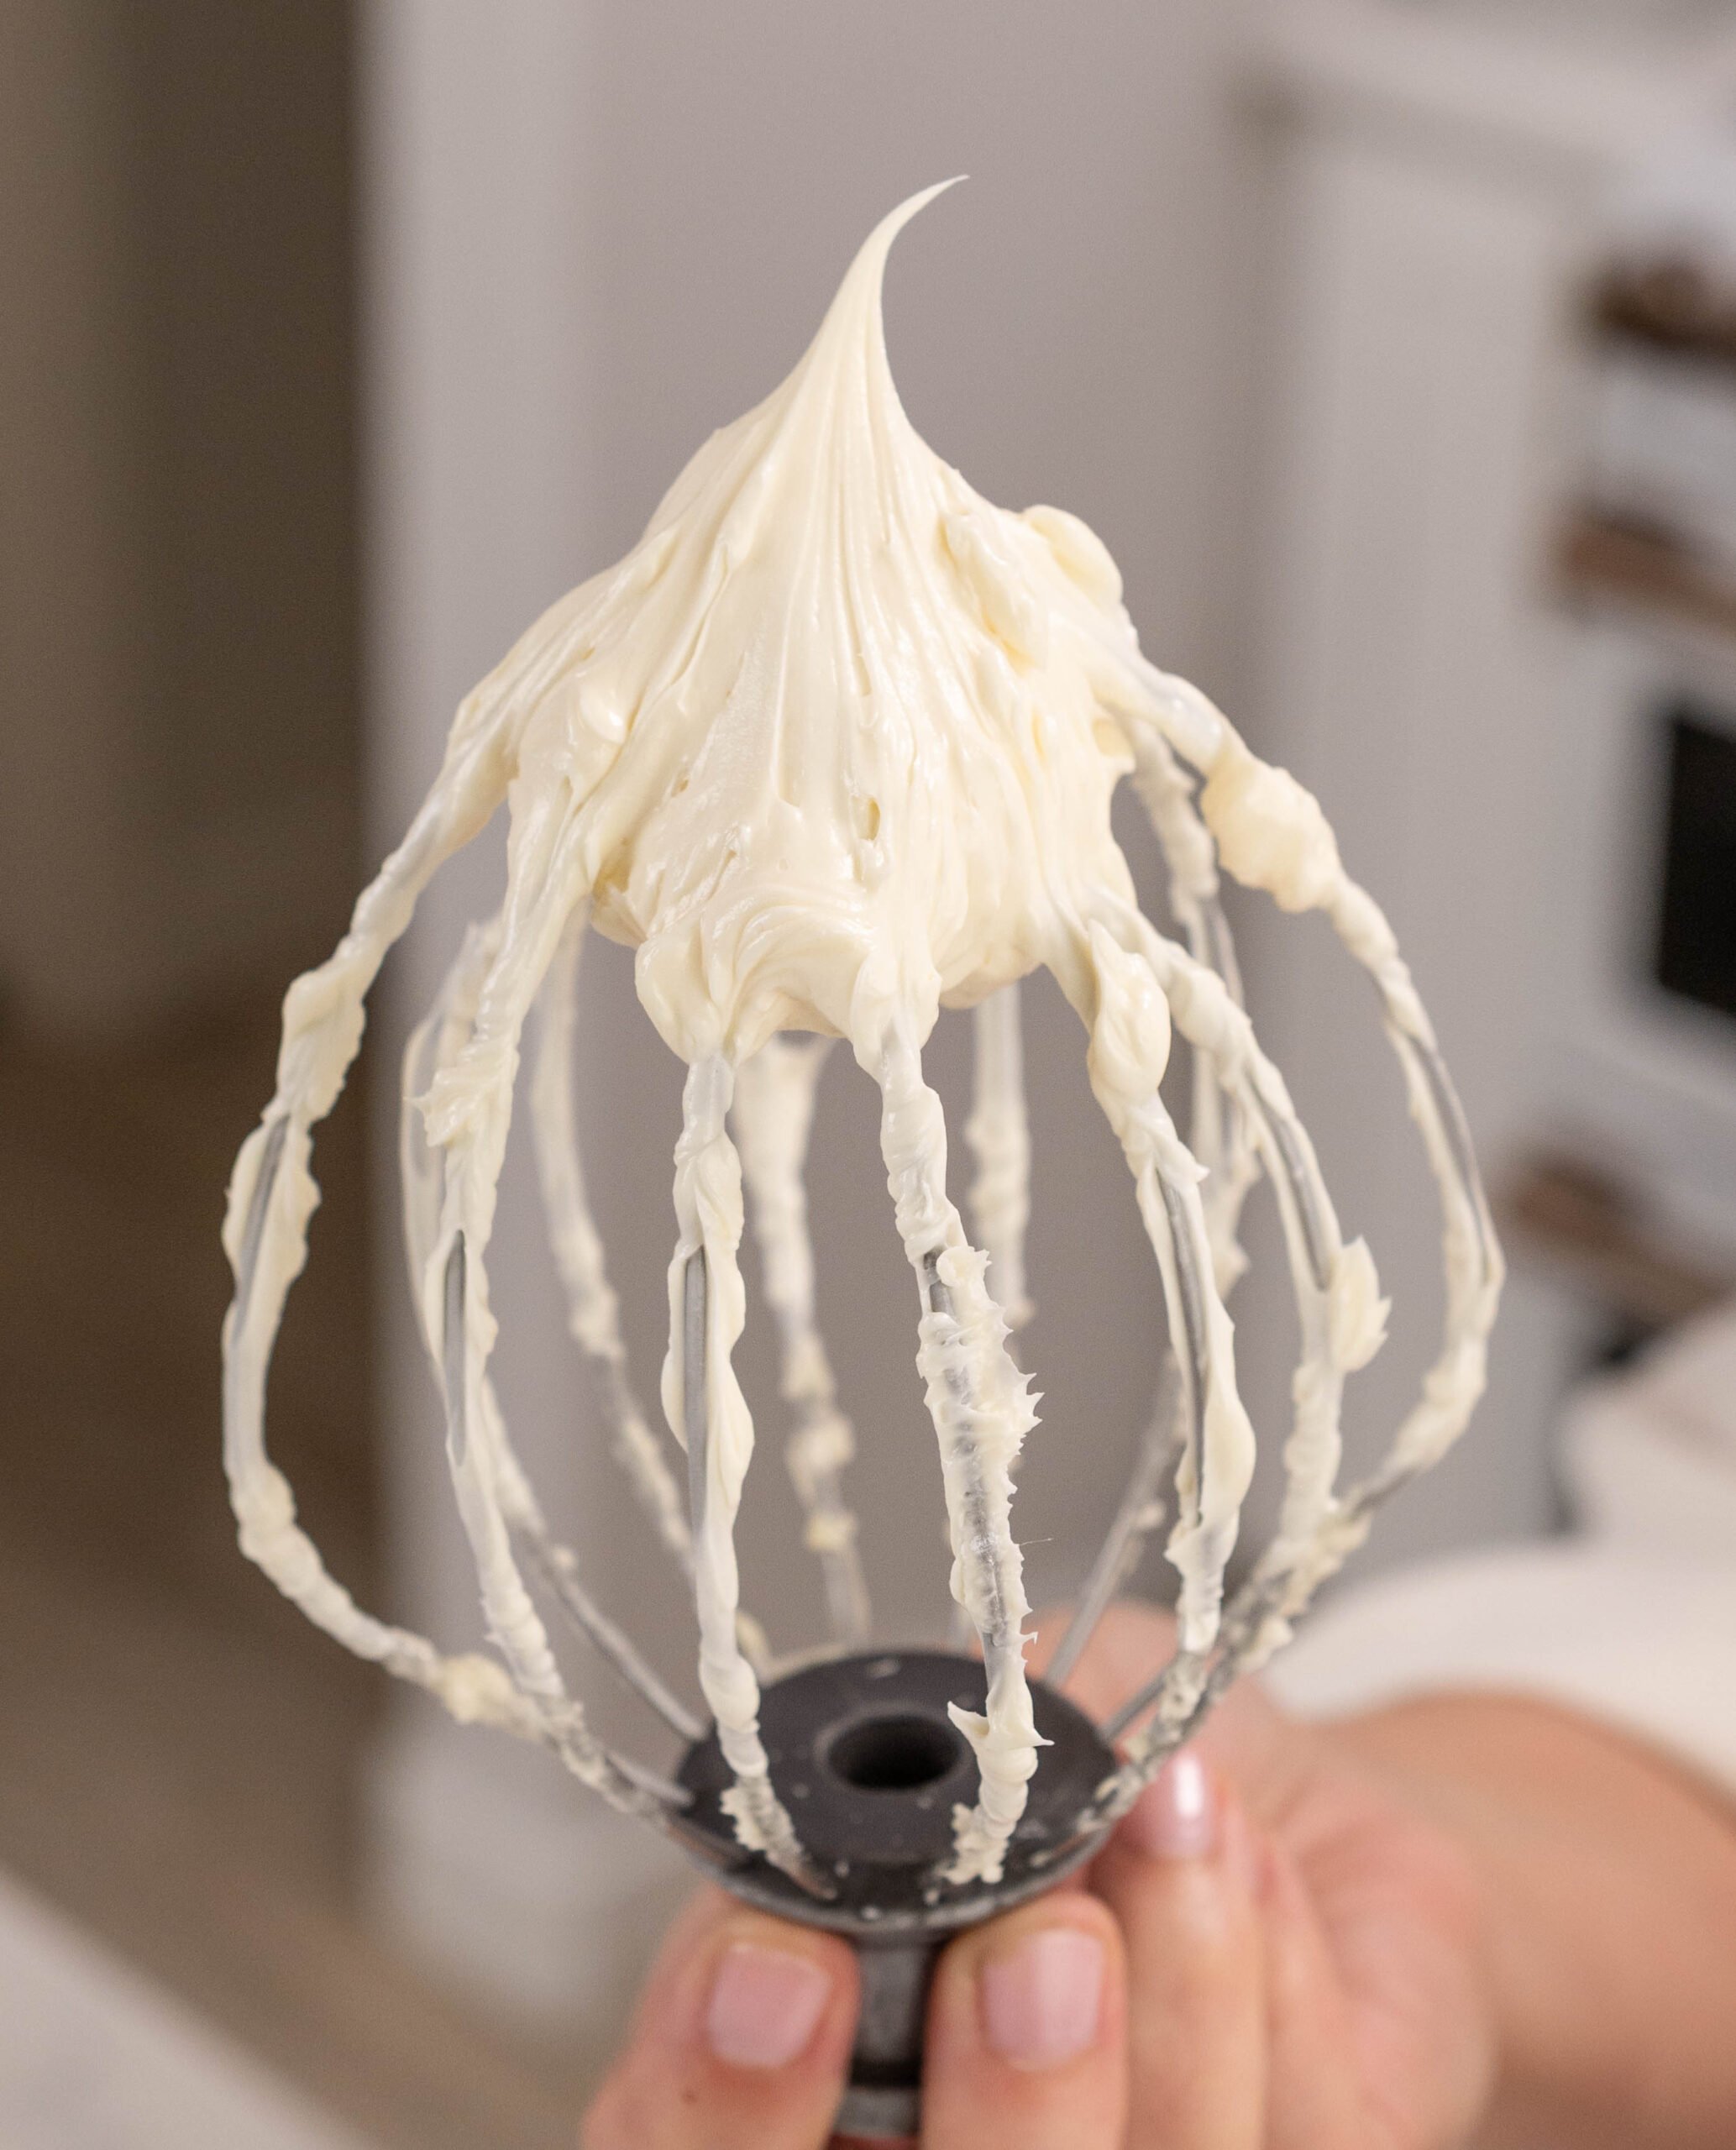
- Whip the frosting on high for 8-10 minutes until the buttercream is white, light, and shiny. If it tastes like sweet ice cream, then it's ready!
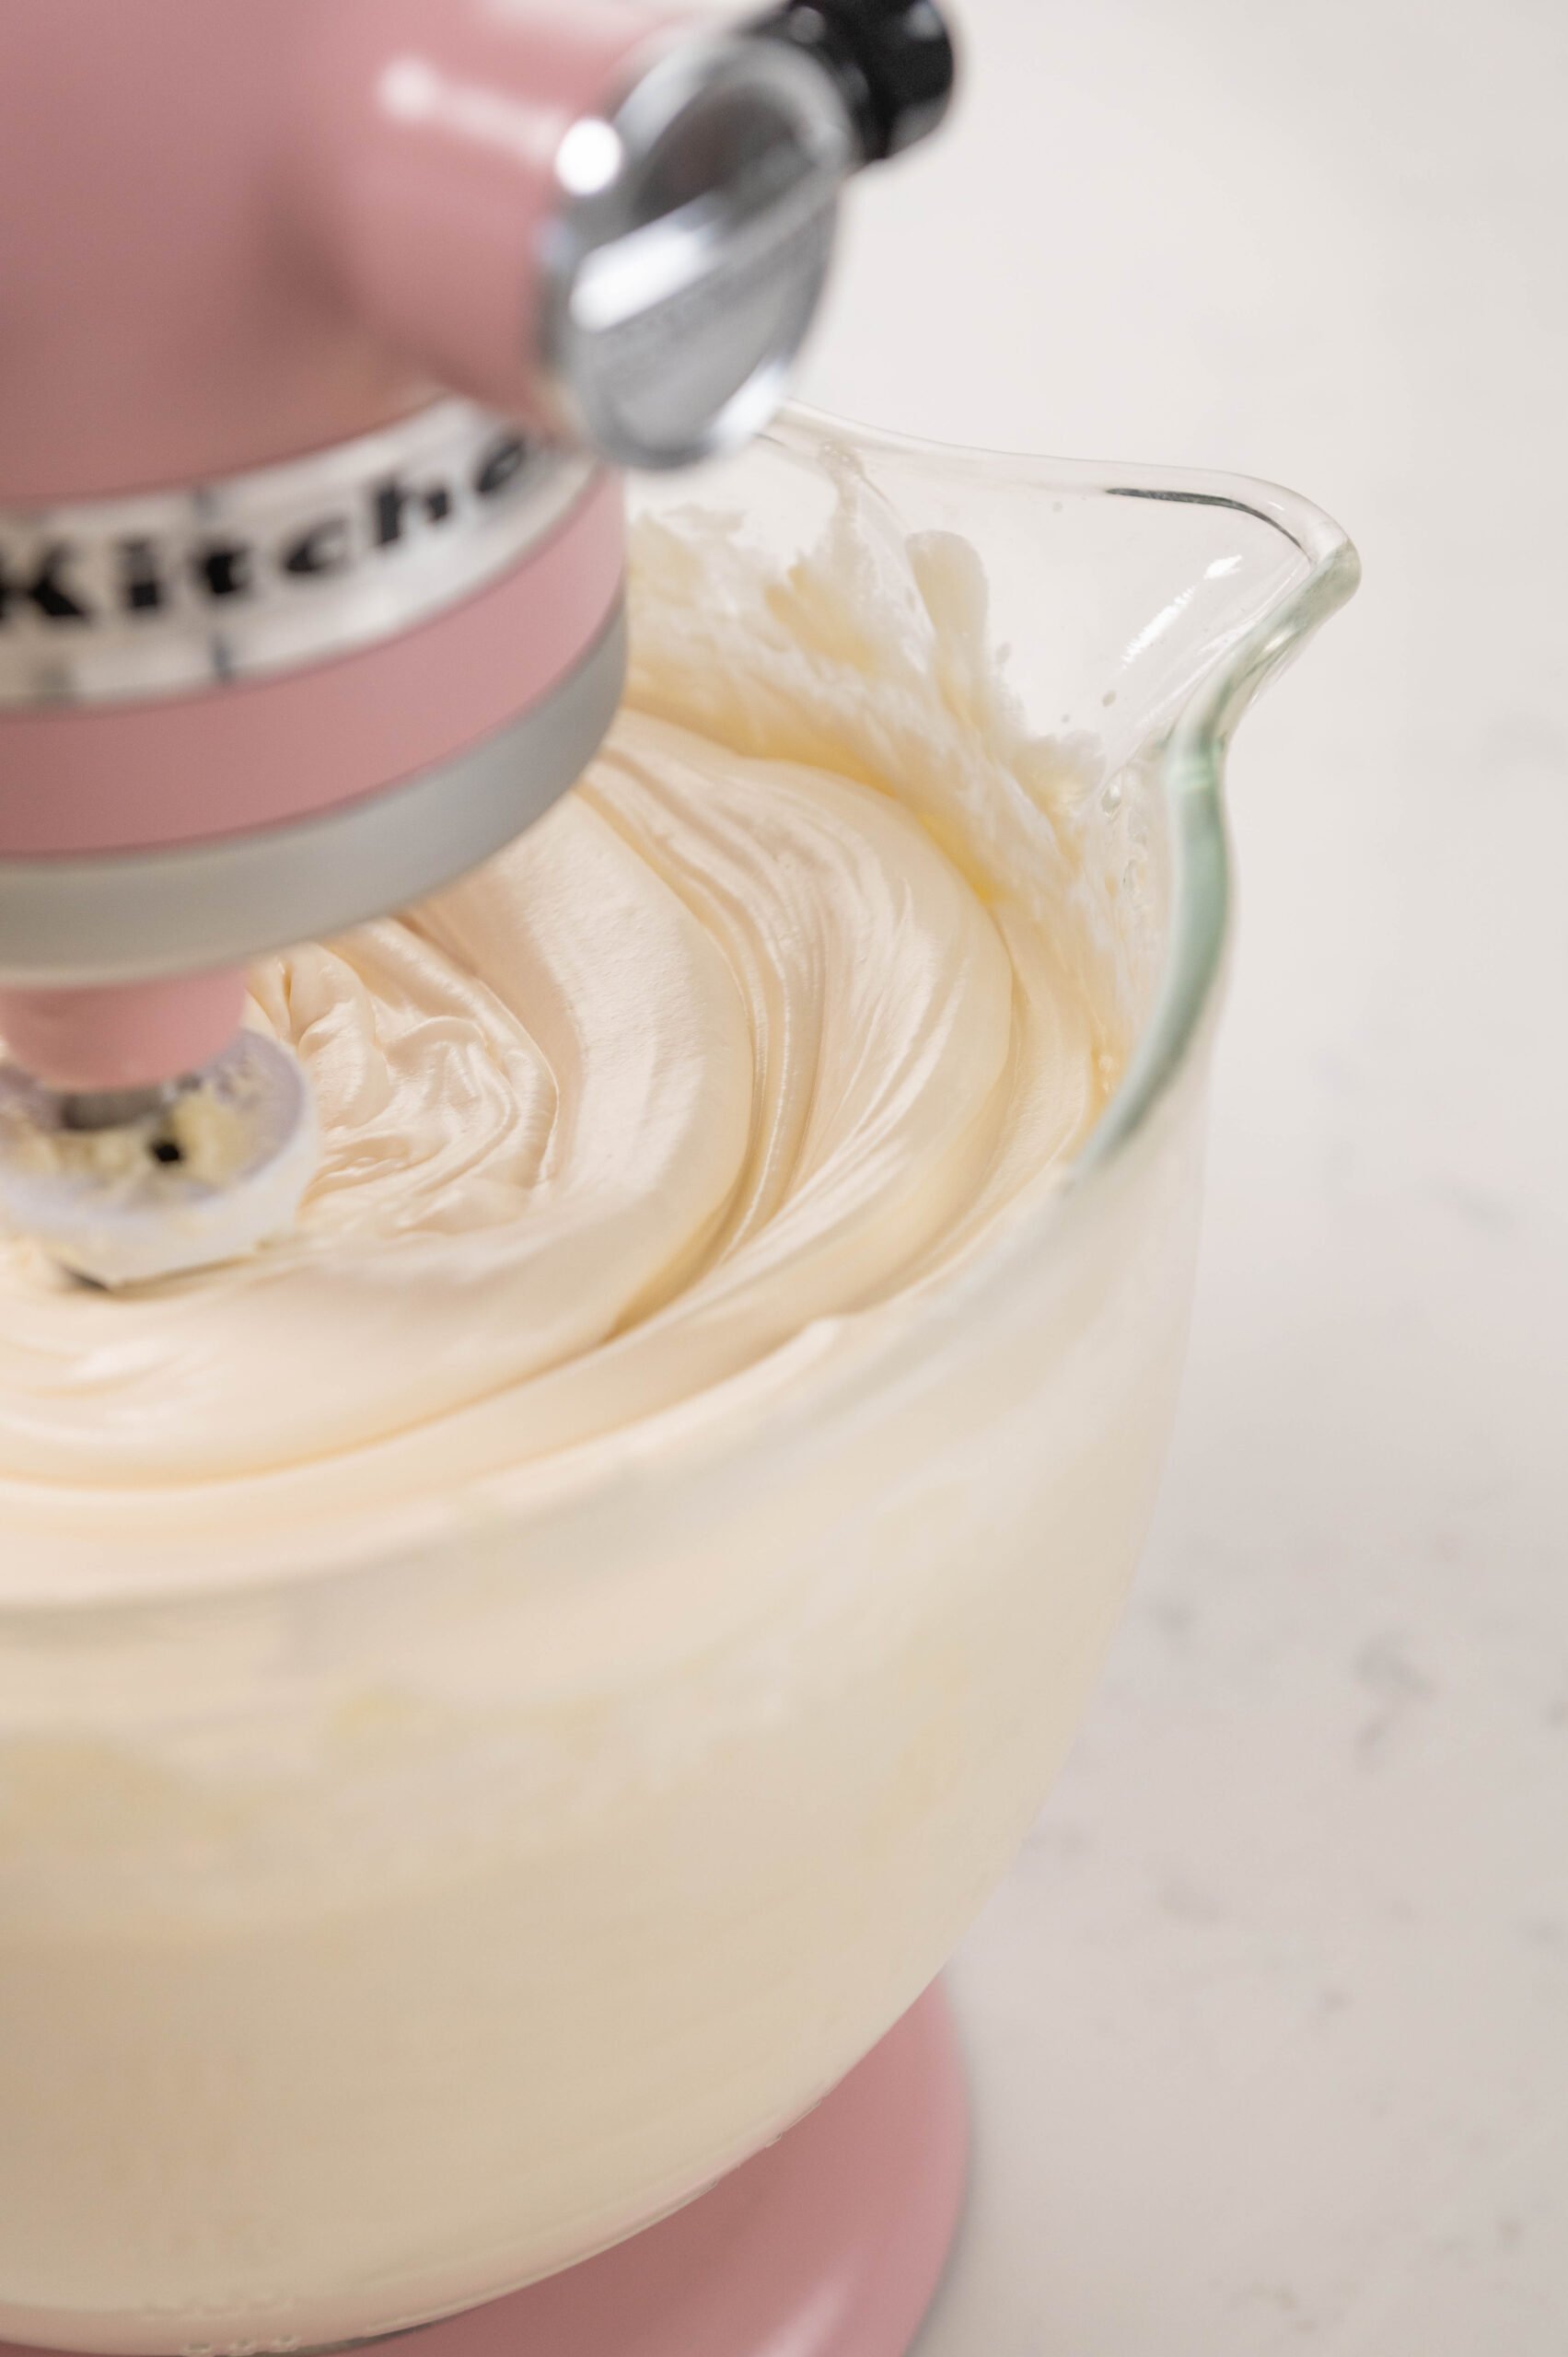
- Switch to a paddle attachment and mix the buttercream on low speed for up to 15-20 minutes to make the buttercream ultra smooth and remove any air bubbles. This step is optional, but if you want really creamy frosting, you don't want to skip this final step.
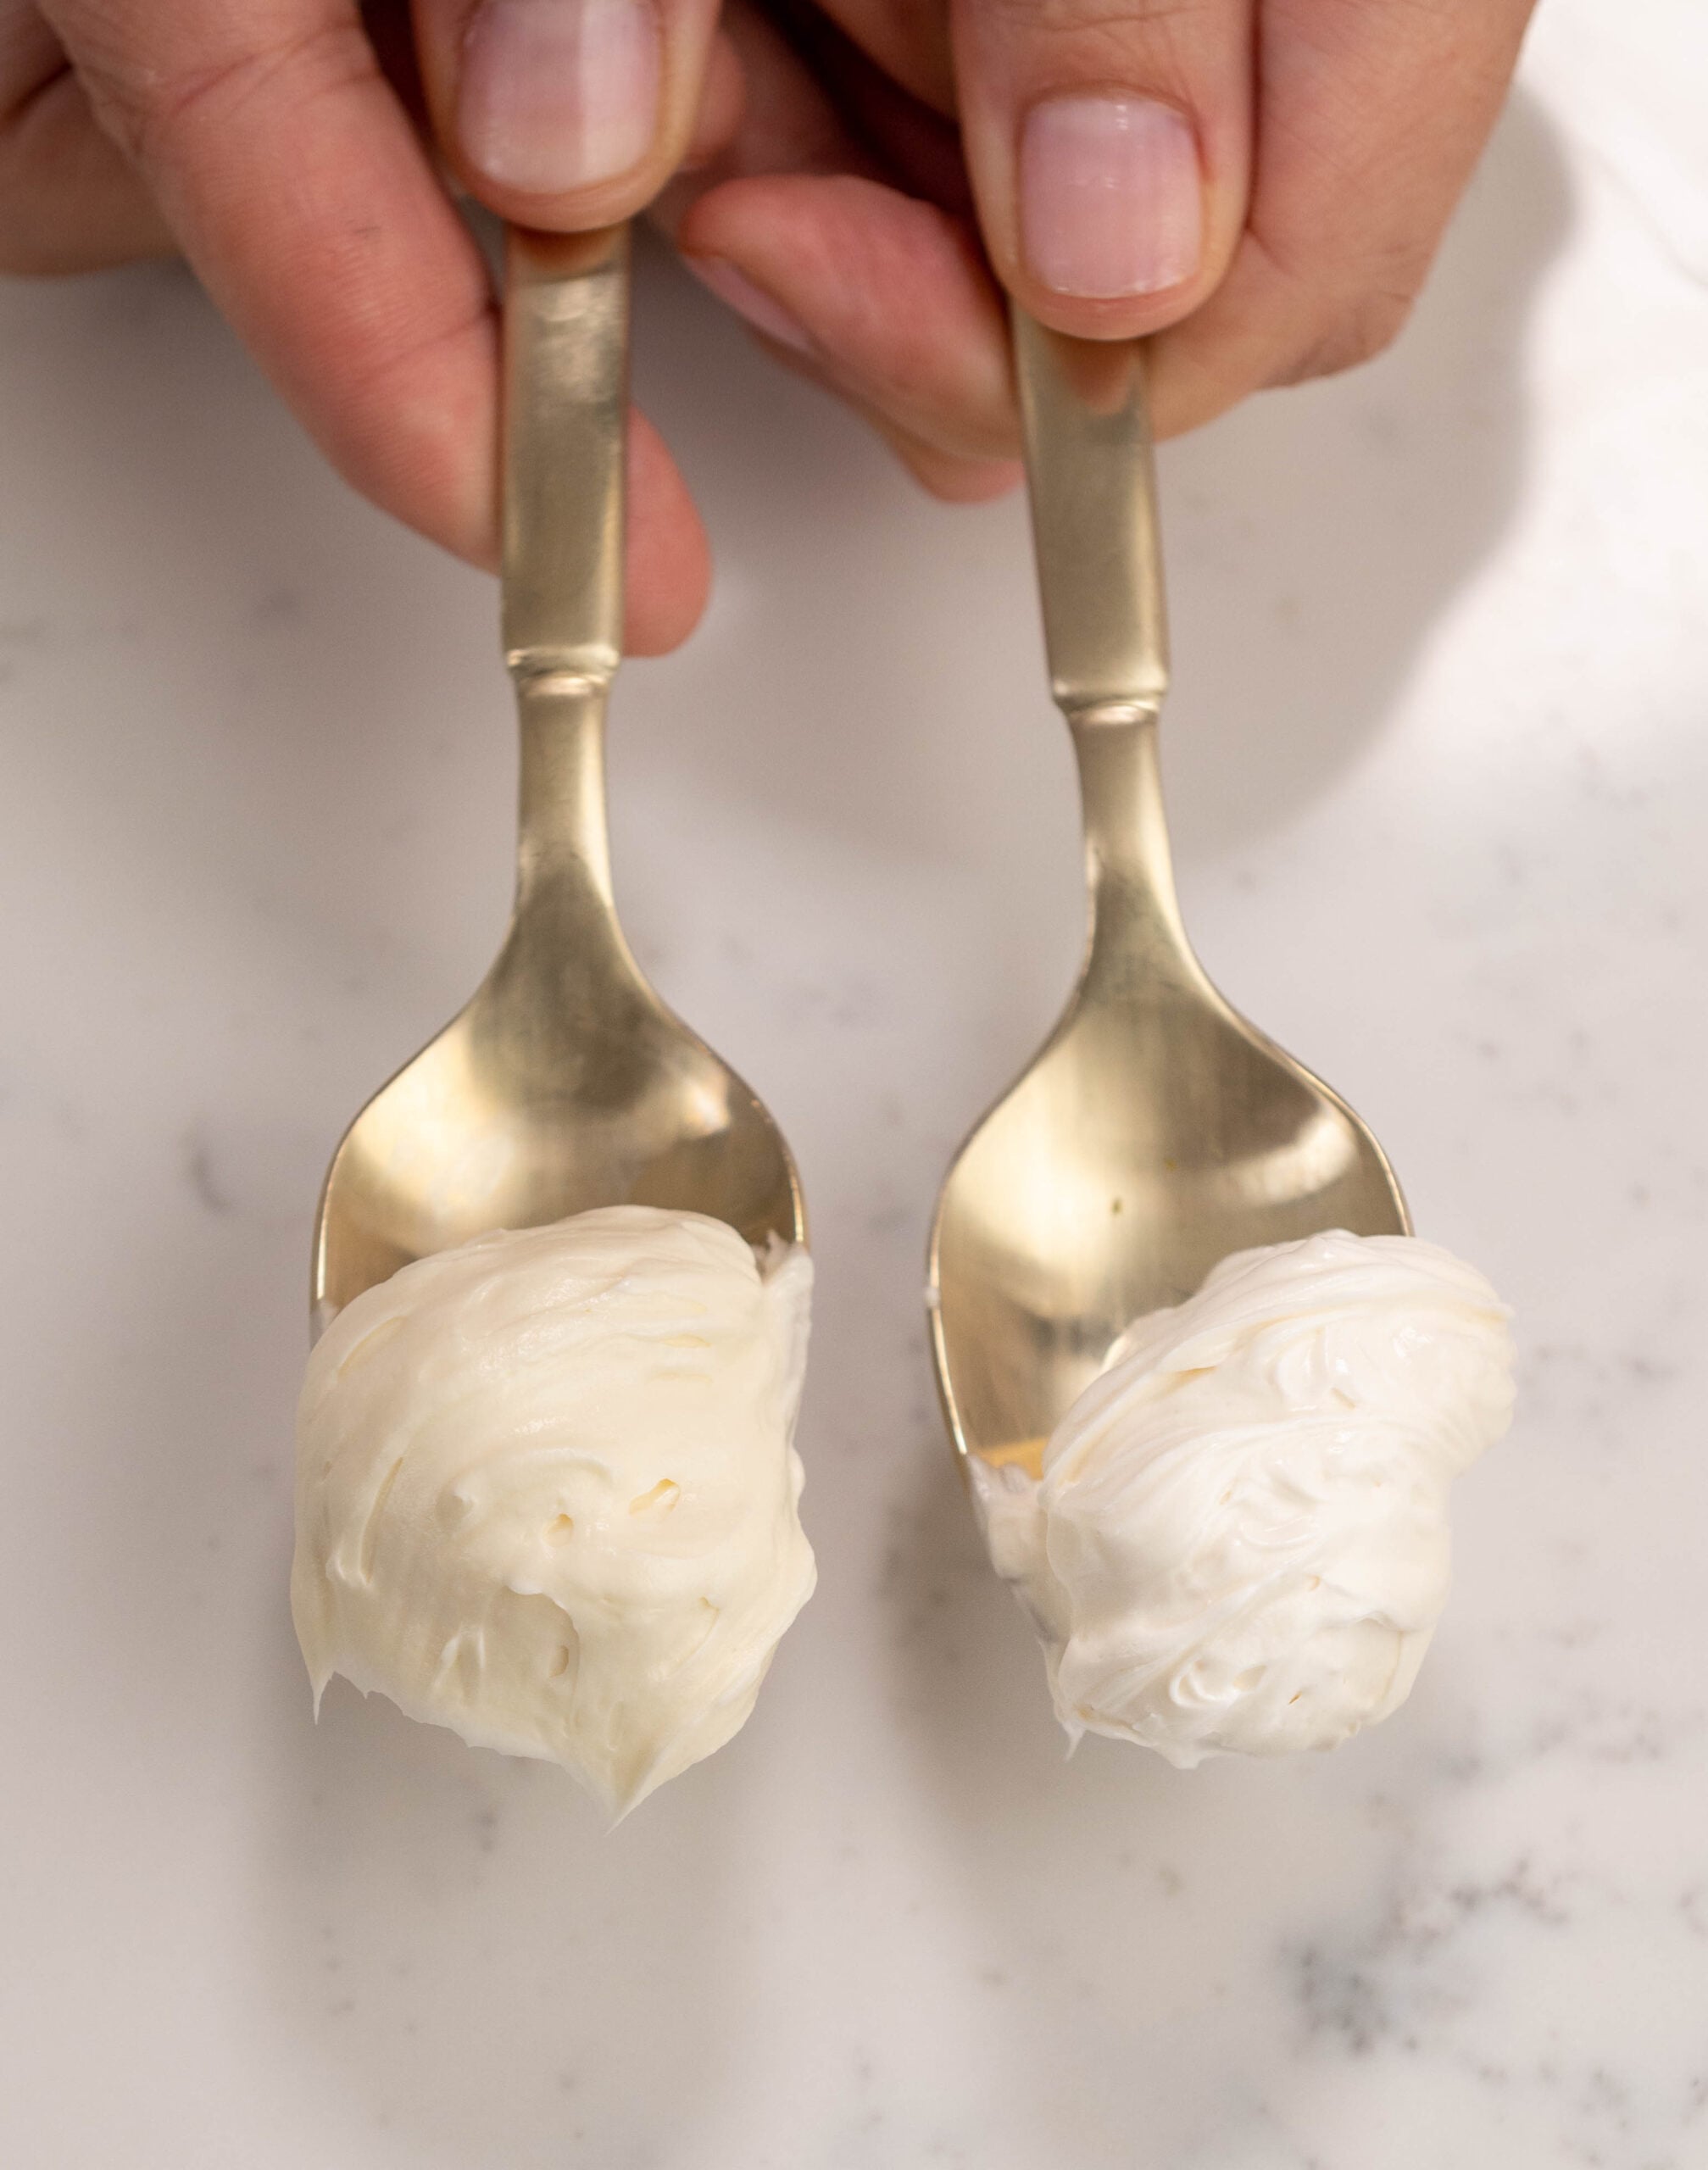
- For extra white buttercream, add a drop of purple food coloring to the frosting. The purple counteracts the yellow in the butter, toning the buttercream to make it white.
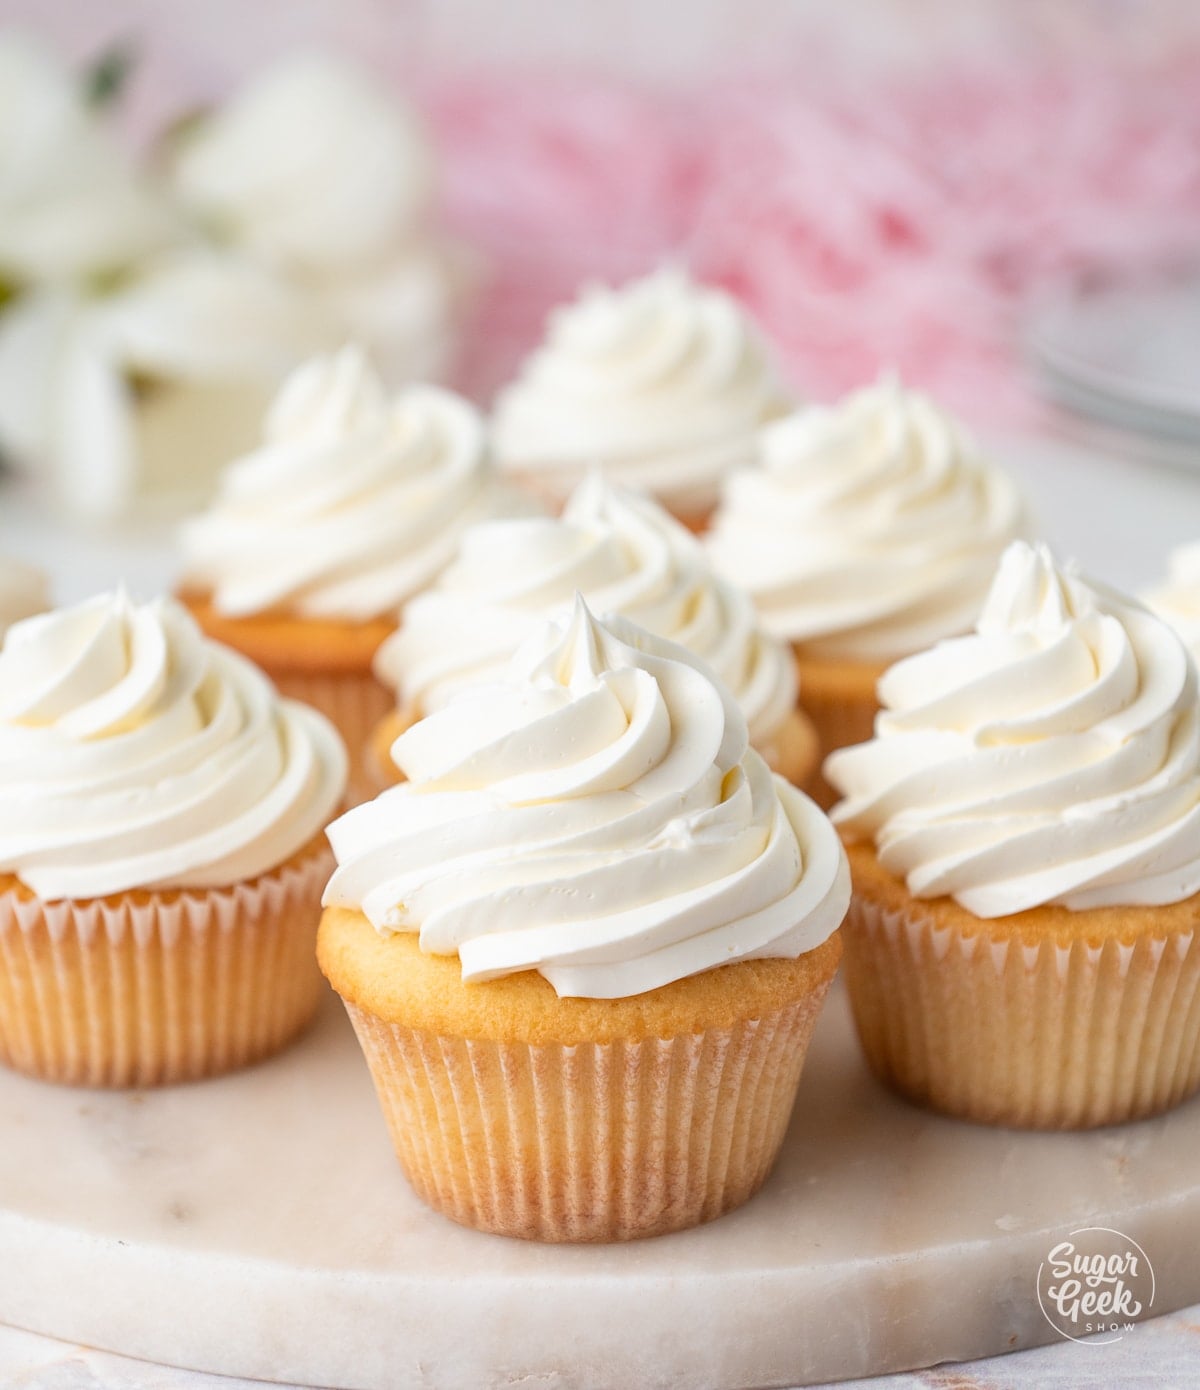
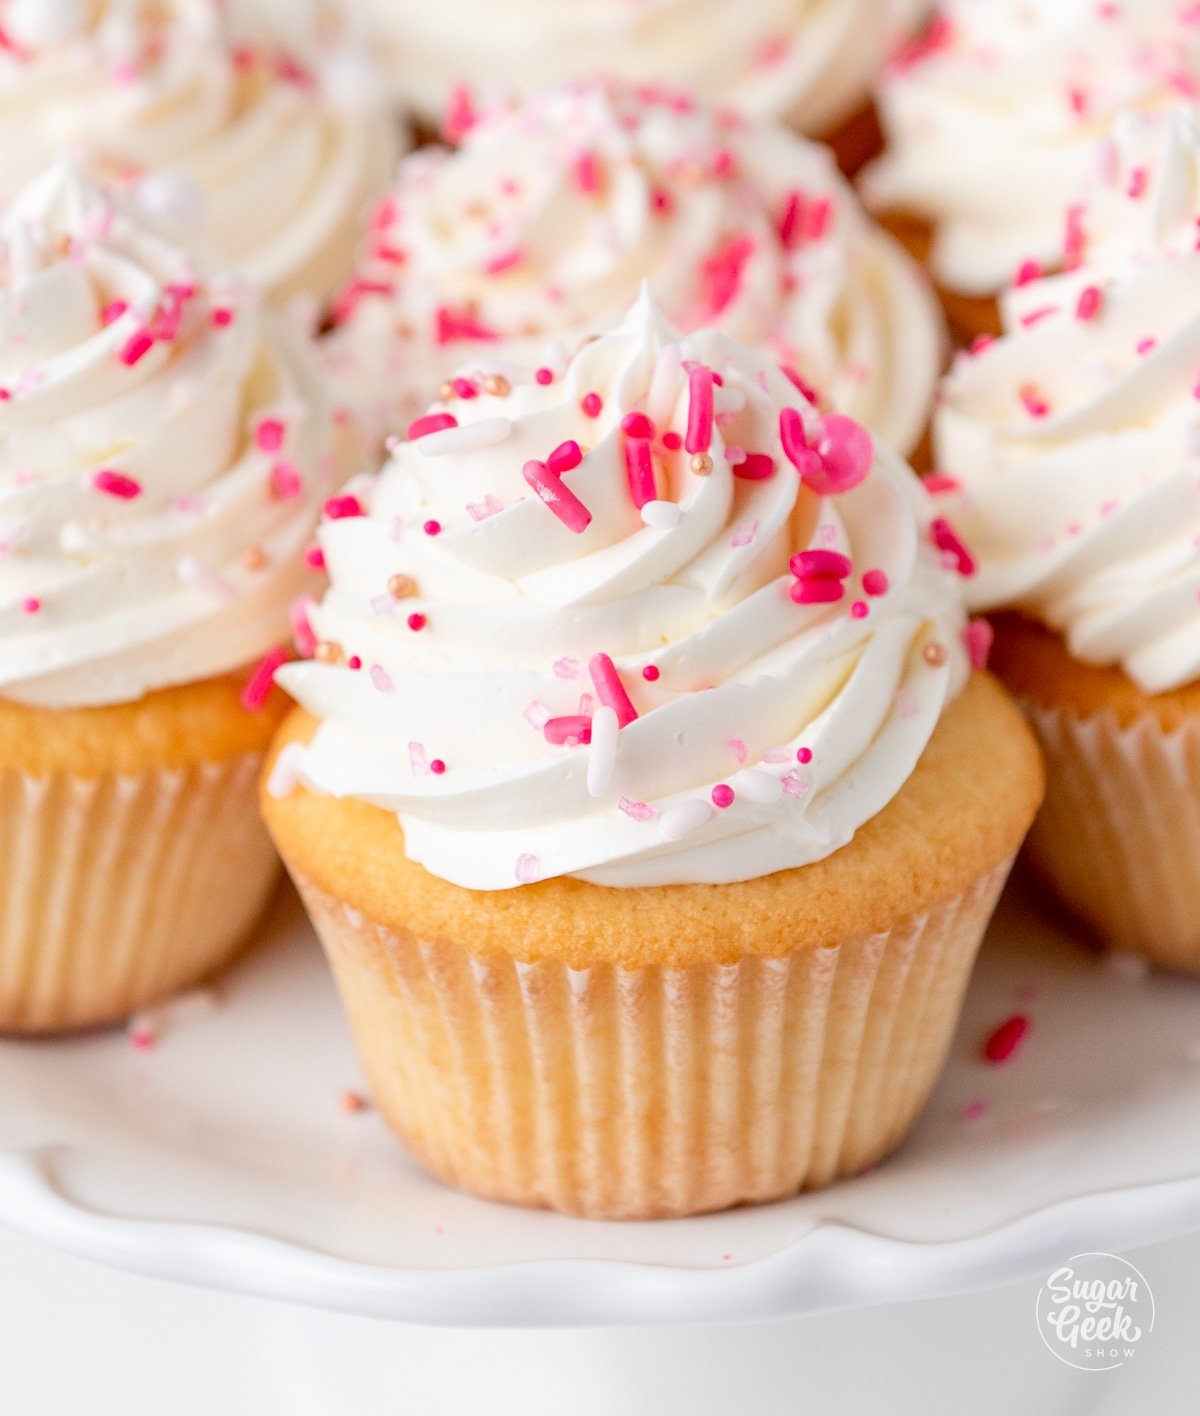
- Now you're ready to decorate your cupcakes. Place your favorite frosting like my American buttercream into a piping bag with a tip (I like a 1M or a 2F), and pipe a swirl on top.
Batter & Frosting Calculator
Cake Batter and Frosting Calculator
Select an option below to calculate how much batter or frosting you need. Adjust the servings slider on the recipe card to change the amounts the recipe makes.
Choose a pan type
Choose a cake pan size
(based on 2" tall cake pan)
Choose a cake pan size
(based on 2" tall cake pan)
Cupcake Tin Size
Choose number of pans
Cups of Batter Needed
8 cups
Cups of Frosting Needed
5 cups
Note: measurements are estimated based off the vanilla cake recipe using standard US cake pans and sizes. Measurements used are for 2" tall cake pans only. Your results may vary. Do not overfill cake pans above manufacturer's recommended guidelines.
This recipe makes about 24 cupcakes. The easy buttercream recipe included makes enough to generously frost all 24 cupcakes. Store leftover frosting in the fridge for up to 1 week or freeze for up to 6 months. Bring to room temperature and rewhip before using.
Expert Tips
- Weigh Your Ingredients. I suggest purchasing a kitchen scale if you don't already have one when baking from scratch. One cup of flour can vary from scoop to scoop depending on how packed the flour is and the humidity in your area. Too little or too much flour can ruin your recipe, so all of my cake recipes (except doctored box mixes) use a scale.
- Practice Mise en Place: Measure everything before you start mixing so you don't accidentally forget something or add any ingredients out of order. I use a set of medium and small Pyrex glass bowls I got from Goodwill for this, and it makes things SO much easier.
- Room Temperature Ingredients: Make sure all your ingredients are at room temperature or even a tiny bit on the warm side. The butter should be soft enough to leave an indent in it when you press it, but firm enough that it's still holding its shape. If you want to speed things up, place your eggs in a bowl of warm water for 5 minutes to warm them up. You can also warm the milk in the microwave for 30 seconds.
- Fully Cool Before Frosting: The cupcakes will need time to cool after baking, so don't pipe frosting onto a warm cupcake.
- Make Ahead Tip: You can bake the cupcakes and make the frosting a day ahead, but it's best to frost and/or fill them on the same day that you're going to deliver or serve them.
Storing Cupcakes
- Store at Room Temperature: These cupcakes are best eaten within 24 hours of baking, and can sometimes dry out in the fridge. If you're using a buttercream that is shelf-stable, store the cupcakes in an airtight container at room temperature for up to 2 days.
- Freezing Cupcakes: Baked cupcakes without frosting can be frozen in ziplock bags for up to 6 months.
- Storing Frosting: You can store the buttercream frosting in the fridge for up to 7 days. When you're ready to use it, I recommend bringing the frosting back to room temperature and re-whipping it until smooth before you use it.
- When to Refrigerate: If you're using a fruit filling or a frosting that isn't shelf-stable, it's best to refrigerate the cupcakes after 4 hours. If refrigerated, allow the cupcakes to warm up to room temperature before serving.
Common Mistakes To Avoid
- Over-filling the liners. Fill each liner no more than two-thirds full, or 1.5 ounces per cupcake measured on a kitchen scale. Too much batter causes the tops to overflow and spread flat instead of forming a dome.
- Using cold ingredients. Cold butter will not mix properly into the dry ingredients during reverse creaming, and cold eggs can cause the batter to curdle. Everything should be at room temperature or slightly warm before you start.
- Skipping the 1.5-minute mixing stage. This is the step where the structure of the cupcake develops. After adding the buttermilk mixture, the batter needs the full 1.5 minutes on medium speed to build that fluffy, airy texture. Cutting it short results in a denser, less domed cupcake.
- Overbaking. These cupcakes go from perfectly done to dry very quickly. Pull them out as soon as the center springs back when lightly touched. If you press and it leaves an indent, they need another minute or two. If the edges are pulling away from the liner and the tops are deeply golden, you have gone too far.
- Frosting before fully cooled. Piping frosting onto a warm cupcake will melt it immediately. Let the cupcakes cool completely on a wire rack before frosting, at least 30 to 45 minutes.
For a fun twist using a similar fluffy batter, my baked donut recipe comes together in under 20 minutes
Moist Vanilla Cupcake Recipe FAQs
Flat cupcakes are often caused by baking at too low of a temperature. Baking at 350°F helps the cupcakes rise quickly and set the dome, while lower temperatures can cause them to spread and bake up flat. If this keeps happening, check your oven with an oven thermometer, as many ovens run cooler than the dial indicates.
Cupcakes usually collapse when the batter doesn't have enough structure to hold the rise. This can happen if there's too much liquid, not enough baking powder, or the liners are overfilled. Baking at the proper temperature (350°F) is also important because the heat helps the cupcakes rise quickly and set the dome before the structure falls. Fill liners about ⅔ full so the batter has room to rise without collapsing.
Cupcake liners can pull away if the batter contains a lot of moisture or oil, which can cause the paper to separate as the cupcakes cool. It can also happen if the liners aren't grease-proof, or if the cupcakes are stored in a sealed container while still warm, trapping steam and moisture. For best results, use high-quality grease-proof liners and let the cupcakes cool completely before storing them.
If you cover your cupcakes with plastic wrap or put them in a container before they are completely cooled, condensation will collect on top of the cupcake and make it soggy.
Cupcakes can shrink from over-mixing your batter, over-baking, or too much fat/liquid in the recipe
No, it's not recommended as a straight swap. All-purpose flour has a higher protein content, which develops more gluten and can make the cupcakes denser and slightly chewy instead of soft and tender.
More Easy Cupcake and Cake Recipes


Watch: How To Decorate A Cake Step-by-Step
Before you start decorating, watch the video below where I show you every step of decorating a cake from start to finish. Seeing the process in action makes it much easier to follow along
- Liz Marek.
Recipe
Equipment
- Stand Mixer
- Paddle Attachment
- Whisk Attachment
Ingredients
Vanilla Cupcake Recipe
- 10 ounces cake flour
- 9 ounces granulated sugar
- ½ teaspoon salt
- 2 teaspoons baking powder
- ¼ teaspoon baking soda
- 2 large eggs room temperature
- 4 ounces vegetable oil
- 5 ounces buttermilk room temperature or slightly warm
- 4 ounces unsalted butter softened
- 2 teaspoons vanilla extract
Easy Buttercream Frosting Recipe
- 6 ounces pasteurized egg whites
- 24 ounces powdered sugar
- 24 ounces unsalted butter softened
- 2 teaspoons vanilla extract
- ½ teaspoon salt
- 1 tiny drop purple food coloring optional for whiter frosting
Instructions
Making Vanilla Cupcakes
- Preheat the oven to 350ºF and line two cupcake pans (or a muffin pan will do) with paper liners. You can also bake one pan at a time if you only have one cupcake pan. This recipe will make about 24 cupcakes.
- Combine the vanilla and buttermilk in a separate measuring cup and set it aside.
- Next, add the eggs and oil to a separate bowl then whisk and set them aside.
- Add the cake flour, sugar, salt, baking powder, and baking soda to the bowl of your stand mixer with the paddle attachment. You can use a large bowl and an electric mixer if you don't have a stand mixer, just mix for longer. Use these photos as a guide instead of mixing by time.
- Then add the softened butter to the rest of the dry ingredients and mix on low until the mixture resembles a sandy texture. Depending on how soft your butter is, this might take a minute or two.
- Pour the milk mixture into your dry ingredients and increase the speed to medium (speed 4 on a KitchenAid, speed 2 on a Bosch). Mix for 1 ½ minutes to develop the fluffy structure of the cupcake. The batter will go from being yellow to a fluffy white.
- Slowly add your egg mixture in three parts and mix on low until it's fully combined.
- Fill your liners ⅔ of the way full with the cupcake batter. I use my kitchen scale to measure out 1.5 ounces of batter per cupcake.
- Bake the cupcakes for 15-20 minutes or until they are just starting to turn golden brown and the center of the cupcake springs back when you lightly touch it. I rotate my cupcakes halfway through baking for even browning. If you're making mini cupcakes, bake for less time.
- Let your cupcakes cool in the pans for five minutes, then move them to a cooling rack to cool completely.
- Place your favorite frosting into a piping bag with a tip, I like a 1M or a 2F, and pipe a swirl on top. I love using my easy vanilla buttercream and topping them with a few sprinkles. Swiss meringue buttercream or strawberry buttercream would also be delicious.
Making Easy Buttercream
- Place the pasteurized egg whites and powdered sugar in the bowl of your stand mixer with the whisk attachment. Combine the ingredients on low and then whip them on high for 4-5 minutes (until shiny) to dissolve the powdered sugar.
- Now add in the salt and vanilla extract. If you want to add in any food coloring, now is the time.
- Add in your softened butter piece-by-piece, then whip it on high. It will look curdled at first. This is definitely normal. It will also look pretty yellow, just keep whipping.
- After your buttercream looks like this, remove about 1 cup of buttercream and melt it in the microwave for 10-15 seconds.
- Pour it back into the whipping buttercream to bring it all together.
- Whip it on high for 8-10 minutes until the buttercream is white, light, and shiny. If it tastes like sweet ice cream, then it's ready!
- Finally, switch to a paddle attachment and mix the buttercream on low speed for up to 15-20 minutes to make the buttercream ultra smooth and remove any air bubbles. This step is optional, but if you want really creamy frosting, you don't want to skip this final step.
- For extra white buttercream, add a drop of purple food coloring. The purple counteracts the yellow in the butter, toning the buttercream to make it white.
Video
Notes
- For the best rise, fill your liners ⅔ with cupcake batter or 1 ½ ounces per cupcake.
- Make sure all your ingredients are at room temperature before mixing your batter (milk, butter, eggs).
- Use good-quality vanilla extract, vanilla bean paste, or even a vanilla bean for true vanilla flavor. One vanilla bean = 2 teaspoons vanilla extract. You can also use clear vanilla extract for that "classic grocery store cake" flavor.
- Preheat your oven to 350ºF for 30 minutes before baking to give your cupcakes a good rise and set the dome.
- Buttermilk is essential to this recipe because it adds flavor and moisture. If you have whole milk and white vinegar or lemons, you can make your own buttermilk substitute.
- Cake flour is what makes these cupcakes extra soft and fluffy. If you don't have cake flour, use my cake flour substitute recipe, or try searching for "Shipton Mills soft cake and pastry flour."

Val says
Getting ready to make this recipe, and I’m very excited! Can you half the Best Buttermilk Vanilla Cupcakes recipe without tweaking ratios of ingredients?
Elizabeth Marek says
Yes you can cut the recipe in half
Nattito Sandy says
I’ve tried many different recipe saying the bast cupcakes and they were all totally disgusting but these were incredibly delicious and moist
A says
Hi there!,
if i wanted to turn this into a "chai" flavour cake I wanted to infuse the milk with the chai tea and add a few spices to it. What stage would I add the spices and will anything happen to the buttermilk by using the tea bag would you suggest just using whole milk instead of buttermilk?
Elizabeth Marek says
Steeping chai tea in buttermilk will not hurt the buttermilk but it might curdle. Thats ok, you can still use it. Add the spice in with the dry ingredients.
Aarti says
Hi i tried the vanilla cake and it was a hit. Thks for sharing your personal Receipe
Joy says
Question...can you substitute Hotel & Restaurant Flour for the cake flour?
Elizabeth Marek says
I'm not familiar with that type of flour. Cake flour is a low protein flour of 9% or less
Cindy says
Will low/reduced fat buttermilk in place of whole buttermilk change the texture of the cake?
Elizabeth Marek says
No it wont change it
Katherine says
What piping tip did you use?
The Sugar Geek Show says
1M piping tip 🙂
Dara says
I made these and they were delicious and perfect in every way. Hands down my fav recipe! I put them in the freezer In a ziplock baggy and took them out a few days later, thawed them and then ate one again. The only problem was that it was a little dry coming out of the freezer. How can I get this cupcake to stay moist After freezing? Will a simple syrup moisten it up?
The Sugar Geek Show says
Cake is always better when it's completely unfrozen. You can leave cupcakes at room temperature in a container for a few days.
Erin says
First of all... THANK YOU!!! This is the FIRST from-scratch vanilla cupcake recipe I have ever baked (and I've tried a lot) that has not made me want to go back to the boxed stuff. I followed your recipe & instructions exactly and these are the best-tasting cupcakes I have ever had. SERIOUSLY. Even my husband, who is not usually a cupcake fan, ate TWO!!! I love all of your instructional videos and how you explain your recipes. I especially loved your tip about adding a drop of purple food coloring to buttercream to make it white... genius. Your site is now my go-to site for everything baking.
The Sugar Geek Show says
Thank you so much! Im so glad you liked the recipe 🙂
Dara says
Can I substitute olive oil or avocado oil for the vegetable oil. Or just add more butter?
The Sugar Geek Show says
Either of those oils will leave a taste in the cake. You would need to use a neutral-tasting oil or you can leave it out but the cupcake will be a little drier tasting.
Britney Good says
How long do these cupcakes stay good?
The Sugar Geek Show says
All baked goods are best the day of or the day after they are baked. If you're not going to eat them then they should be frozen
Carie says
Hello, I love this recipe. It is my "go to". In fact, most of my go to cake recipes, are yours. I have been baking as a hobby for over 25 years, so it's not very often that I learn something new. But, when it comes to the science of baking, you've given me several lightbulb moments. I wanted to take a minute to thank you for being so awesome and sharing your gifts.
The Sugar Geek Show says
Awww thank you so much Carie <3 The best part of baking is that you never stop learning 😀
Tin-Tin says
Help! I just made this and it didn’t have the dome instead had dimple in the middle, what did I do wrong? I weighed everything and followed the steps. Texture wise it is good and very yummy.
The Sugar Geek Show says
Probably over-filled the liners a bit too much so they collapsed
Sara says
Hi there!
I’m currently baking my way through your recipes for fun! I love the way you explain your methods.
The texture of this cupcake was lovely but I thought it tasted like cornbread. You have mentioned before that using AP flour could cause this issue but I used KA Unbleached Unenriched Cake Flour and still had “conbready” results. I have used your reverse mixing method several times with good results as well.
Any ideas on what could be causing this issue?
Thank you!
The Sugar Geek Show says
Hi Sara, the reason your cupcakes taste like cornbread is because you are using unbleached cake flour which has a much higher protein level than bleached cake flour. It's very similar in protein level to all-purpose flour. Bleached cake flour has a protein level of around 6 or 7%.
Sara says
Yay! This makes so much sense. I’ve read so much conflicting information about bleached vs unbleached cake flour. Thank you for your response. I’m going to try again!!
Jennifer Janis says
Hi there! I just wanted to let you know that I made these cupcakes and after adjusting the recipe 3 different times for altitude, I finally got a nicely domed tasty cupcake!!!! In case anyone out there needs the high altitude adjustments here is what I did (I am at 7,000 ft in North Colorado Springs). I reduced the baking powder and baking soda by half, removed 2 T sugar, added 2T All-Purpose flour, added an extra egg. When I just tried to reduce only the leavening, the cupcakes still sank in the middle and the structure of the cupcakes seemed less than sturdy. These adjustments made the perfect cupcake!!!! I had the same exact issue with the red velvet cupcakes, so I am excited to try these adjustments for that as well. Funny enough, I didn't have this issue with the lemon blueberry cake. Only reducing the leavening for that was enough to produce the best cake I've ever eaten. 🙂
The Sugar Geek Show says
Thank you so much for your helpful feedback. I really appreciate it.