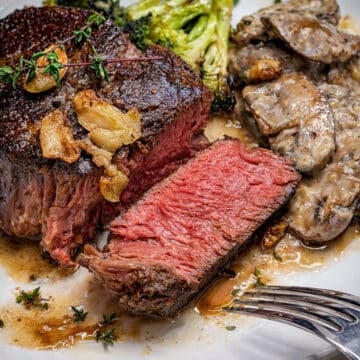
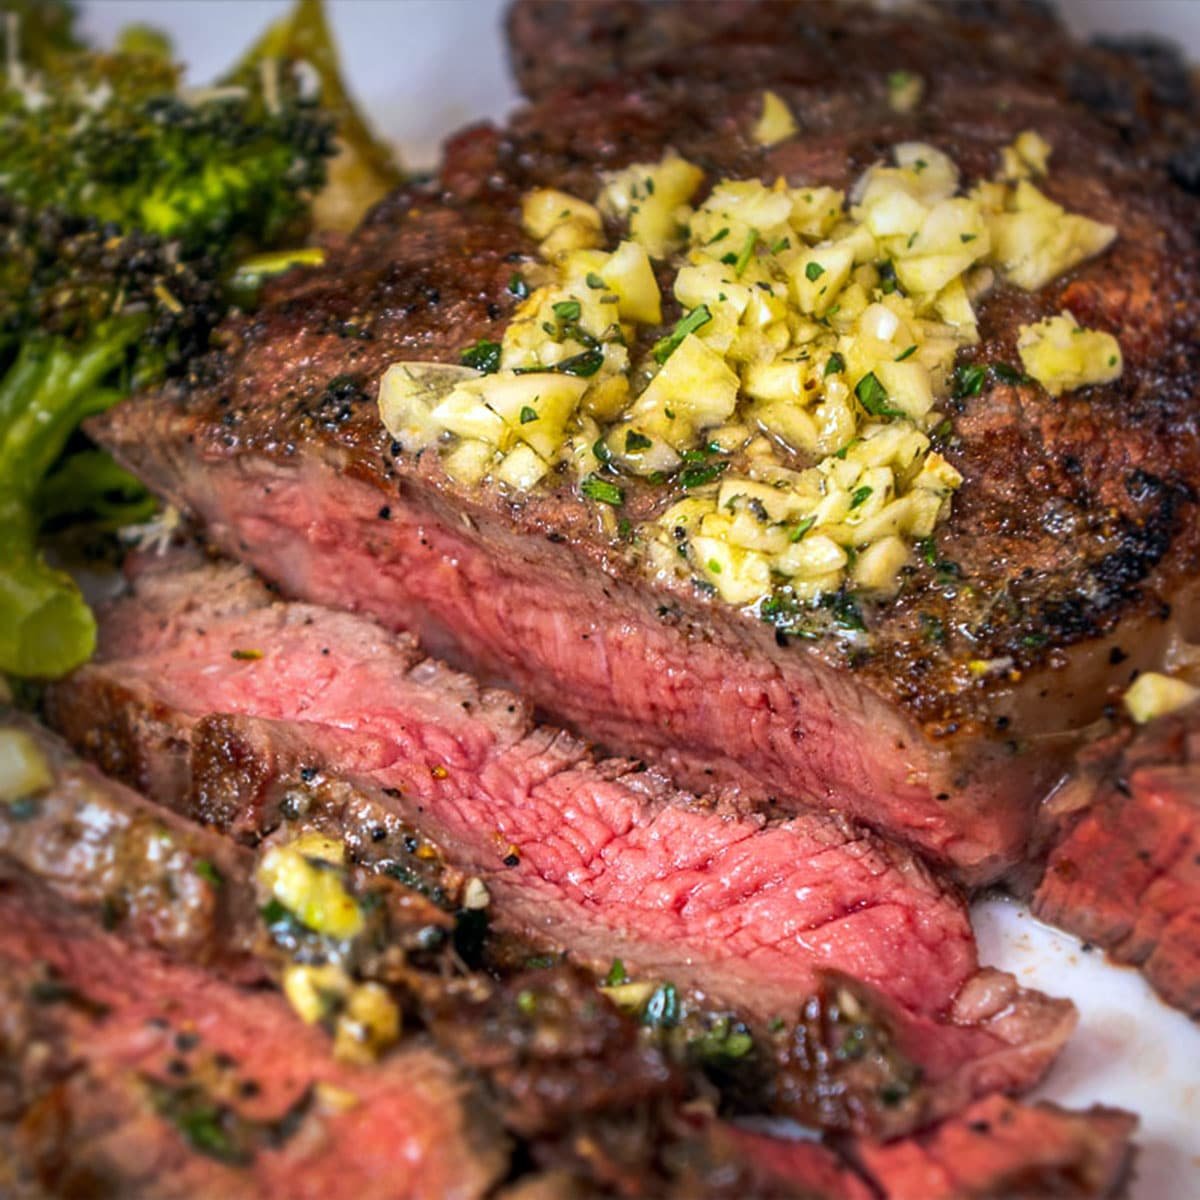
If you want a ribeye steak with a deep brown crust, juicy center, and that restaurant-quality flavor without overthinking it, the 3-3-3 method is it. Perfectly cooked ribeye every single time. Paired with some mushroom cream sauce and oven roasted broccoli, and I'm in heaven.
🔍 Quick Look: How to Cook a Ribeye
- ⏱️ Prep Time: 5 minutes
- 🍳 Cook Time: 9 minutes (plus 1+ day of aging)
- 🕒 Total Time: 1 day, 30 minutes (includes 15 min of resting)
- 👥 Servings: 2-3
- 📊 Calories: ~578 kcal per serving (based on nutrition panel)
- 🔥 Cook Method: Dry aging for 24 hrs. Searing for 3 minutes per side. Basting 30 secs. Then resting for 15 minutes.
- 👩🍳 Flavor Profile: Moist & tender with caramelized crust.
- ⭐ Difficulty: Easy, making it great for a heightened weekly or weekend meal.
SUMMARIZE & SAVE THIS CONTENT ON
My Inspiration
We are a big steak family, and ribeyes are our favorite. My partner Gage follows a pretty strict carnivore diet, while I lean more toward Keto, but a perfectly done ribeye is a frequent menu item.

We NEVER order the steak at a restaurant because, honestly, we can make it better at home.
We've basically perfected our process here, and now we're sharing it with you. Nothing crazy, just a few simple steps that make ALL the difference. The dry brine, the sear, the baste, the rest. That's it. That's all you need to make the best steaks of your life. In the summer, we love to serve this up with a refreshing cucumber tomato onion salad to balance out the richness.
Ingredient Breakdown
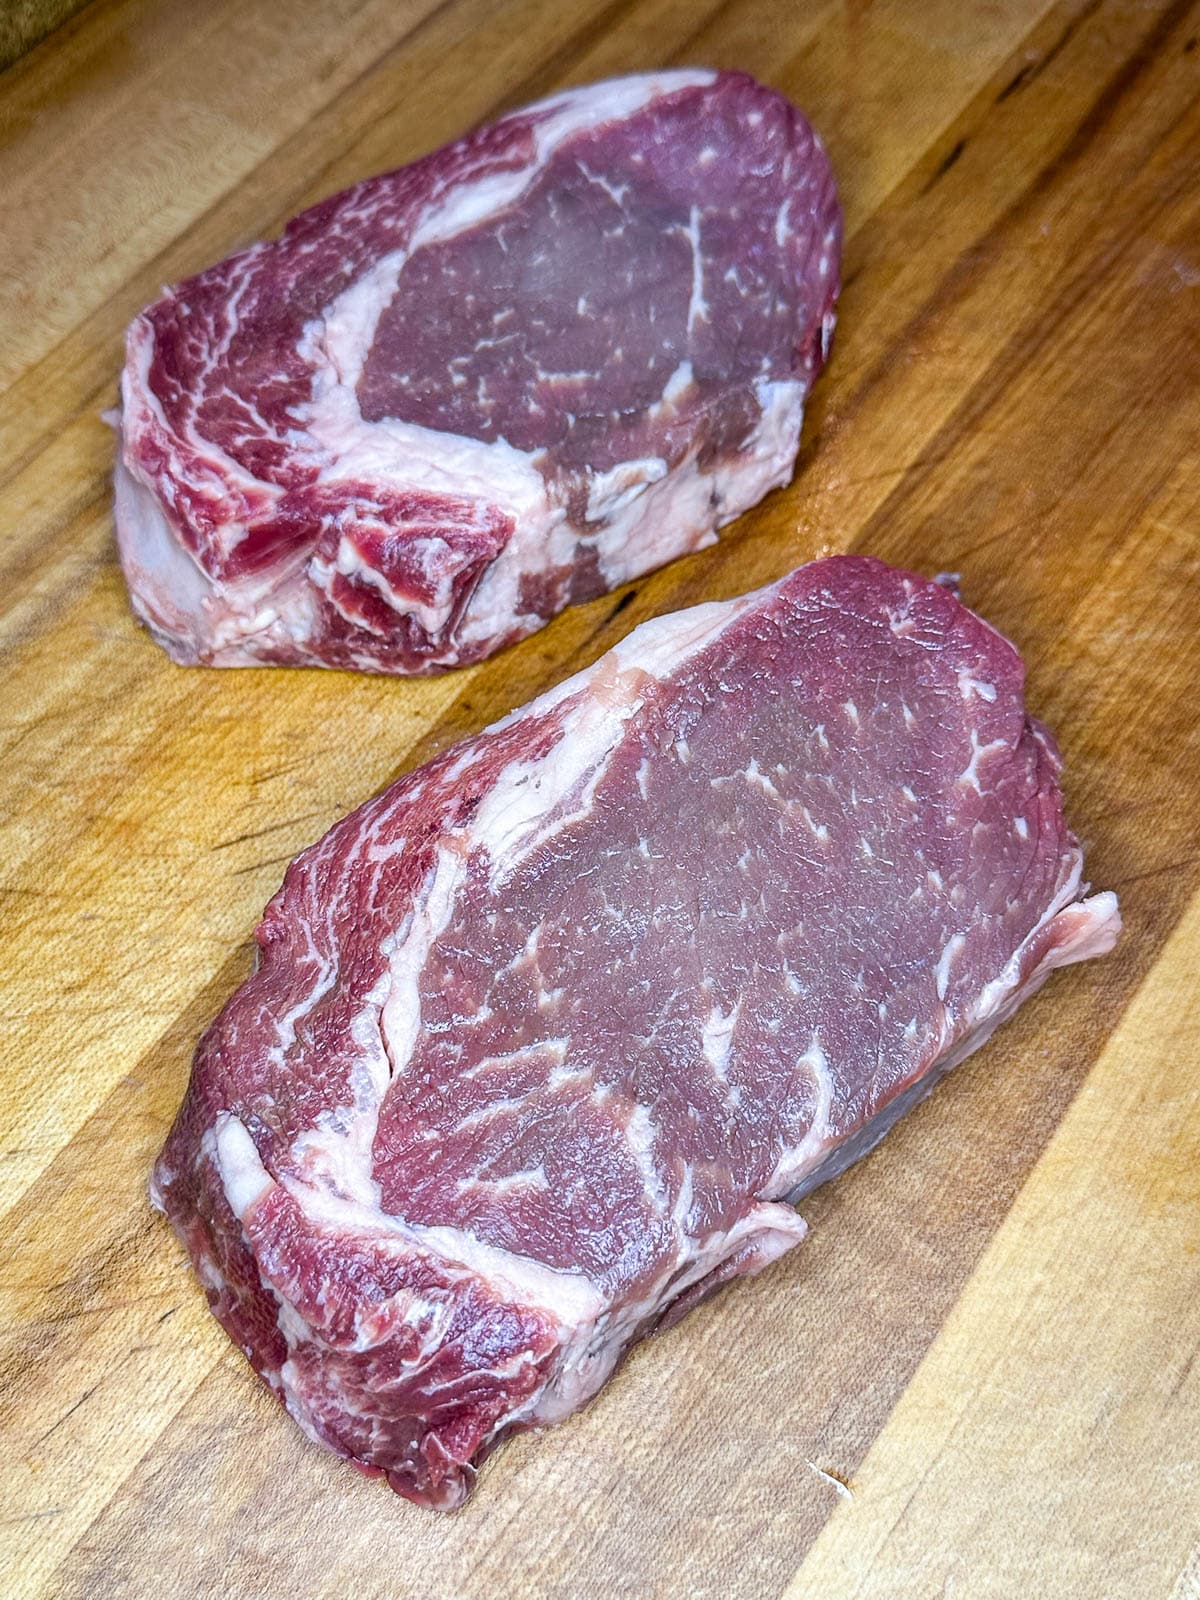
No matter what cut of meat you cook, whether it's a thick ribeye or a NY strip, make sure you either get the advice of your butcher or carefully choose your cut. Bits of gristle (the clear chewy stuff) or not enough marbling (the white lines of fat) will cause you to have a tough, chewy steak, instead of moist and tender.
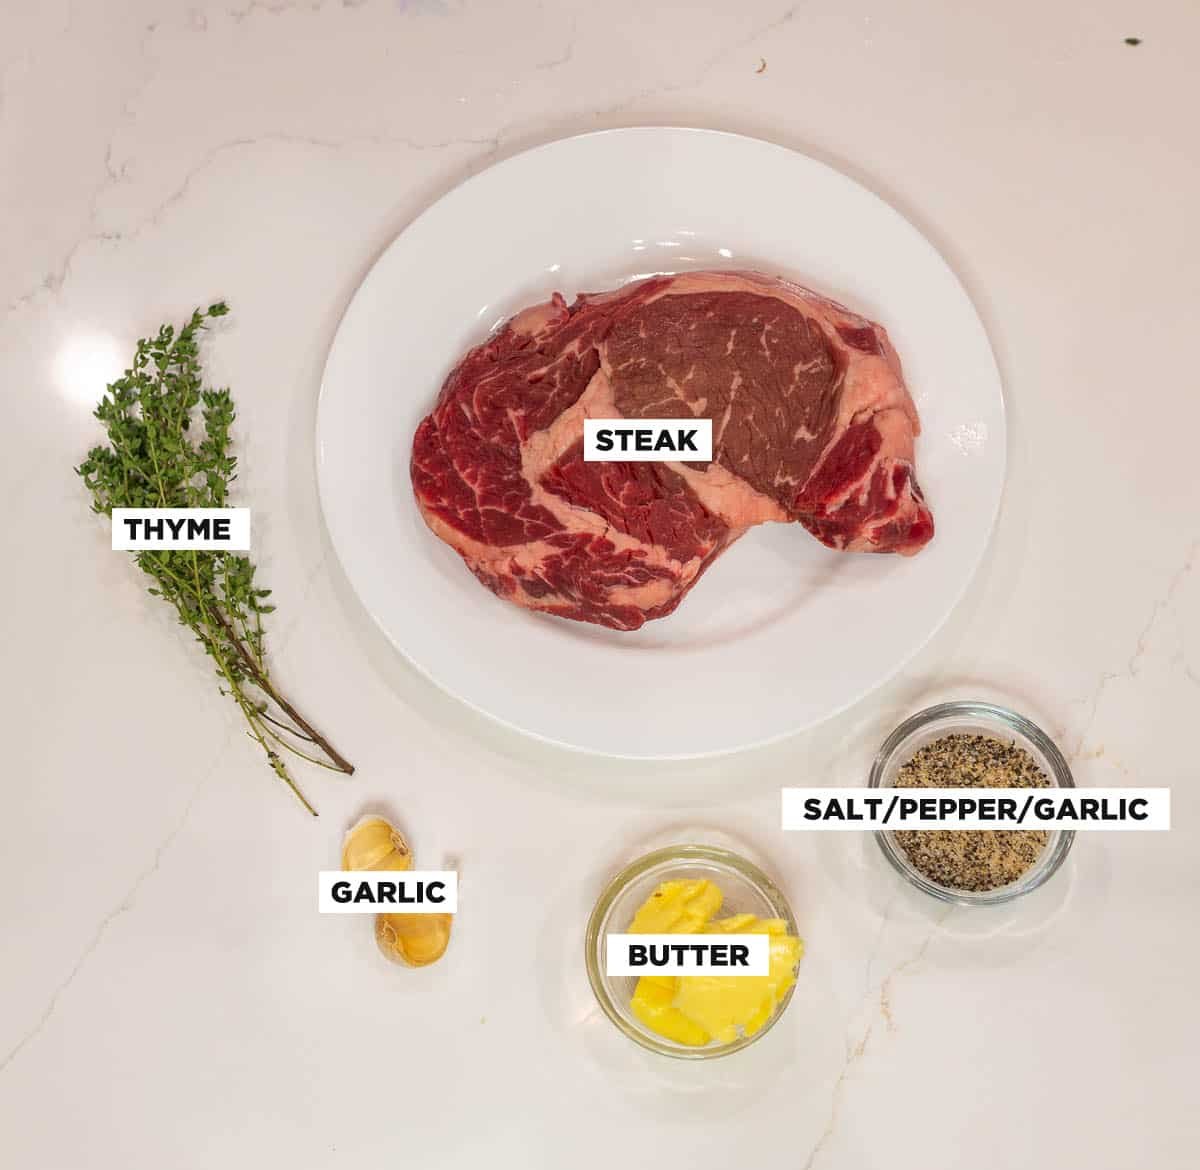
- Ribeye steak is the star here. You want something at least 1¼ to 1½ inches thick so it can handle the high heat without overcooking. Thinner steaks cook too fast and won't benefit from the 3-3-3 timing. If ribeye isn't available, a New York strip works well, but you'll lose some of that rich fat flavor.
- Kosher salt is essential for dry brining. The larger grains pull moisture to the surface, dissolve, and then get reabsorbed into the meat, seasoning it all the way through. Fine salt works in a pinch, but use less or it can get overly salty.
- Freshly cracked black pepper adds heat and texture to the crust. Pepper burns at high heat, but when added right before cooking, it creates that classic steakhouse flavor. You can skip it if you're sensitive to bitter notes, but I personally love it. I also add in some granulated garlic but that's personal preference.
- High-smoke-point oil like avocado oil or grapeseed oil helps create a hard sear without burning. Olive oil isn't ideal here because it smokes too quickly.
- Butter is for basting at the end, adding richness and helping carry flavor. If you're dairy-free, you can skip it or use a dairy-free butter alternative.
- Optional aromatics like garlic cloves, rosemary, or thyme are great for basting, but totally optional. This steak stands on its own
How To Pick A Good Ribeye Steak
Picking a great ribeye is one of those skills that instantly upgrades your steak game. Here's exactly what to look for at the butcher counter or grocery store so you don't end up with an expensive disappointment.

- Look for heavy marbling - (this matters more than almost anything). Marbling is the white streaks of fat running through the meat, not just the fat on the outside. A good ribeye should look almost laced with fat. That fat melts as it cooks, keeping the steak juicy and giving you that rich, beefy flavor ribeye is known for. If it looks lean (no marbling), keep walking.
- Check for the ribeye cap - The ribeye cap (also called the spinalis) is the most tender, flavorful part of the steak. A great ribeye will have a clearly defined cap wrapping around the eye of the steak, separated by a seam of fat. Bigger cap = better steak. Always.
- Thickness matters - Go for ribeyes that are at least 1¼ to 1½ inches thick. Thin steaks overcook fast and don't develop a proper crust before the inside is done. Thick steaks give you more control and better results with methods like the 3-3-3.
- Pay attention to color - Fresh ribeye should be bright red (or deep cherry red if vacuum sealed). Avoid steaks that look gray, brown, or dull. Some slight variation is normal, but the overall color should look fresh and vibrant.
- Look at the fat color - The fat should be white or slightly creamy, not yellow or waxy. Yellow fat can indicate an older cut or improper storage, and it won't render as nicely.
- Avoid excessive gristle or hard fat - A little fat is great-too much hard connective tissue is not. You want fat that looks soft and evenly distributed, not thick chunks of hard gristle running through the center. Gristle looks like cloudy plastic.
- Pick your prime - USDA grade helps, but don't rely on it alone.
- Prime usually means great marbling
- Choice can still be excellent if you inspect it closely
- Select is usually too lean for ribeye
I've had incredible Choice ribeyes and disappointing Prime ones-always trust your eyes more than the label. I usually get our steaks from Costco because the quality is really good and fairly priced, and I stock up when they are on sale.
Step-by-Step Instructions
Step 1 - Dry Brining
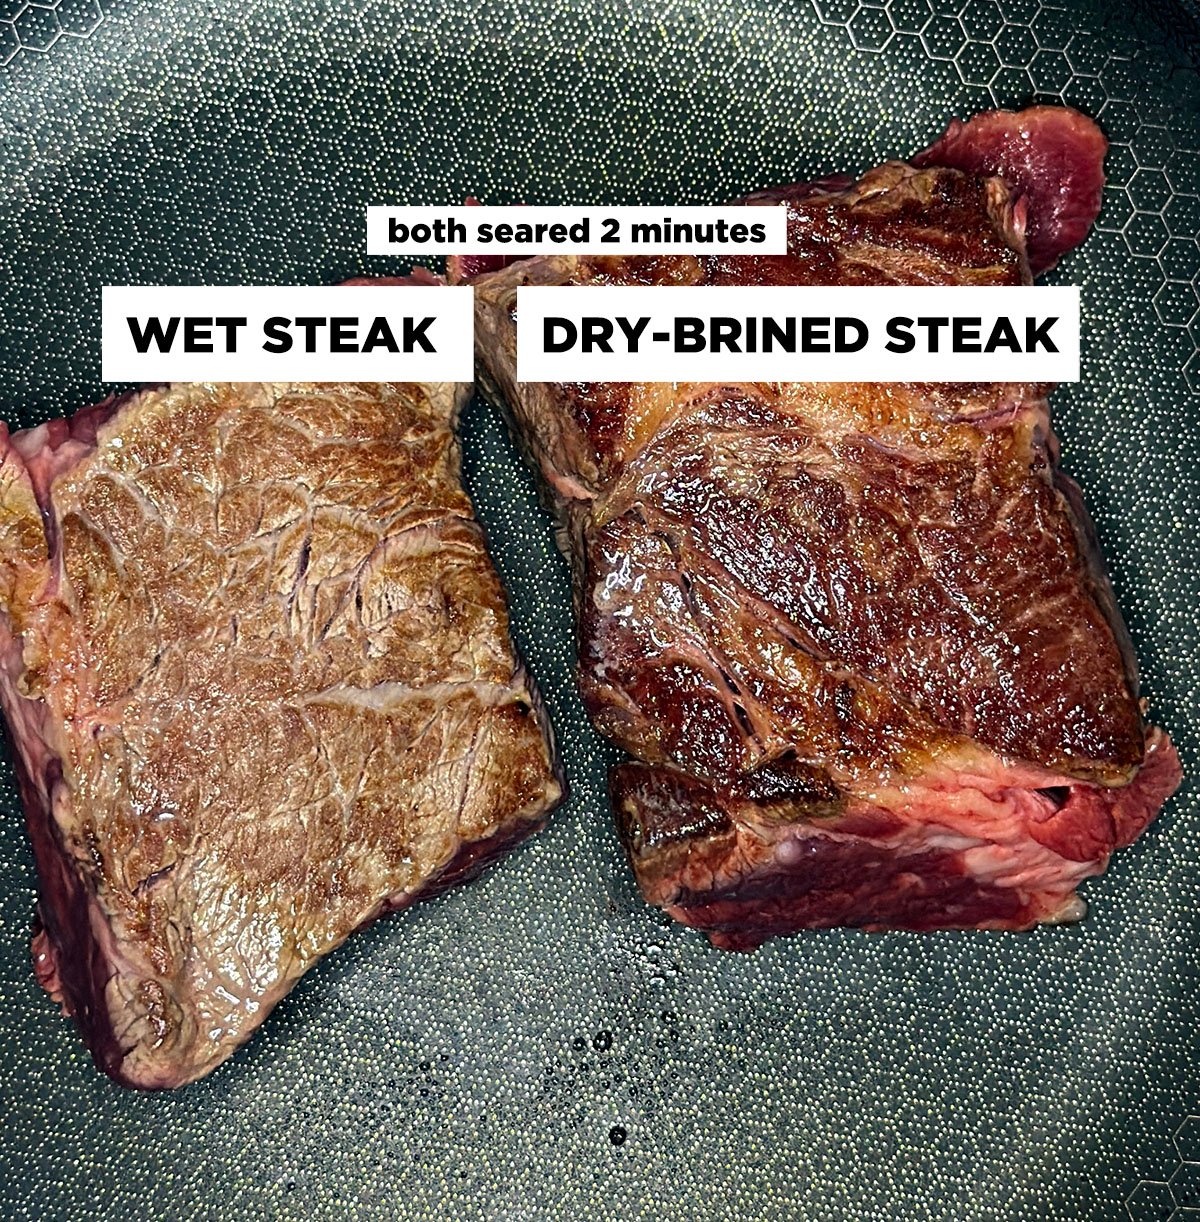
Dry-brining is the process of putting the salt-coated steak in the fridge 24 hours in advance to remove the moisture from the surface of the steak, resulting in a much more flavorful and brown crust on your ribeye.
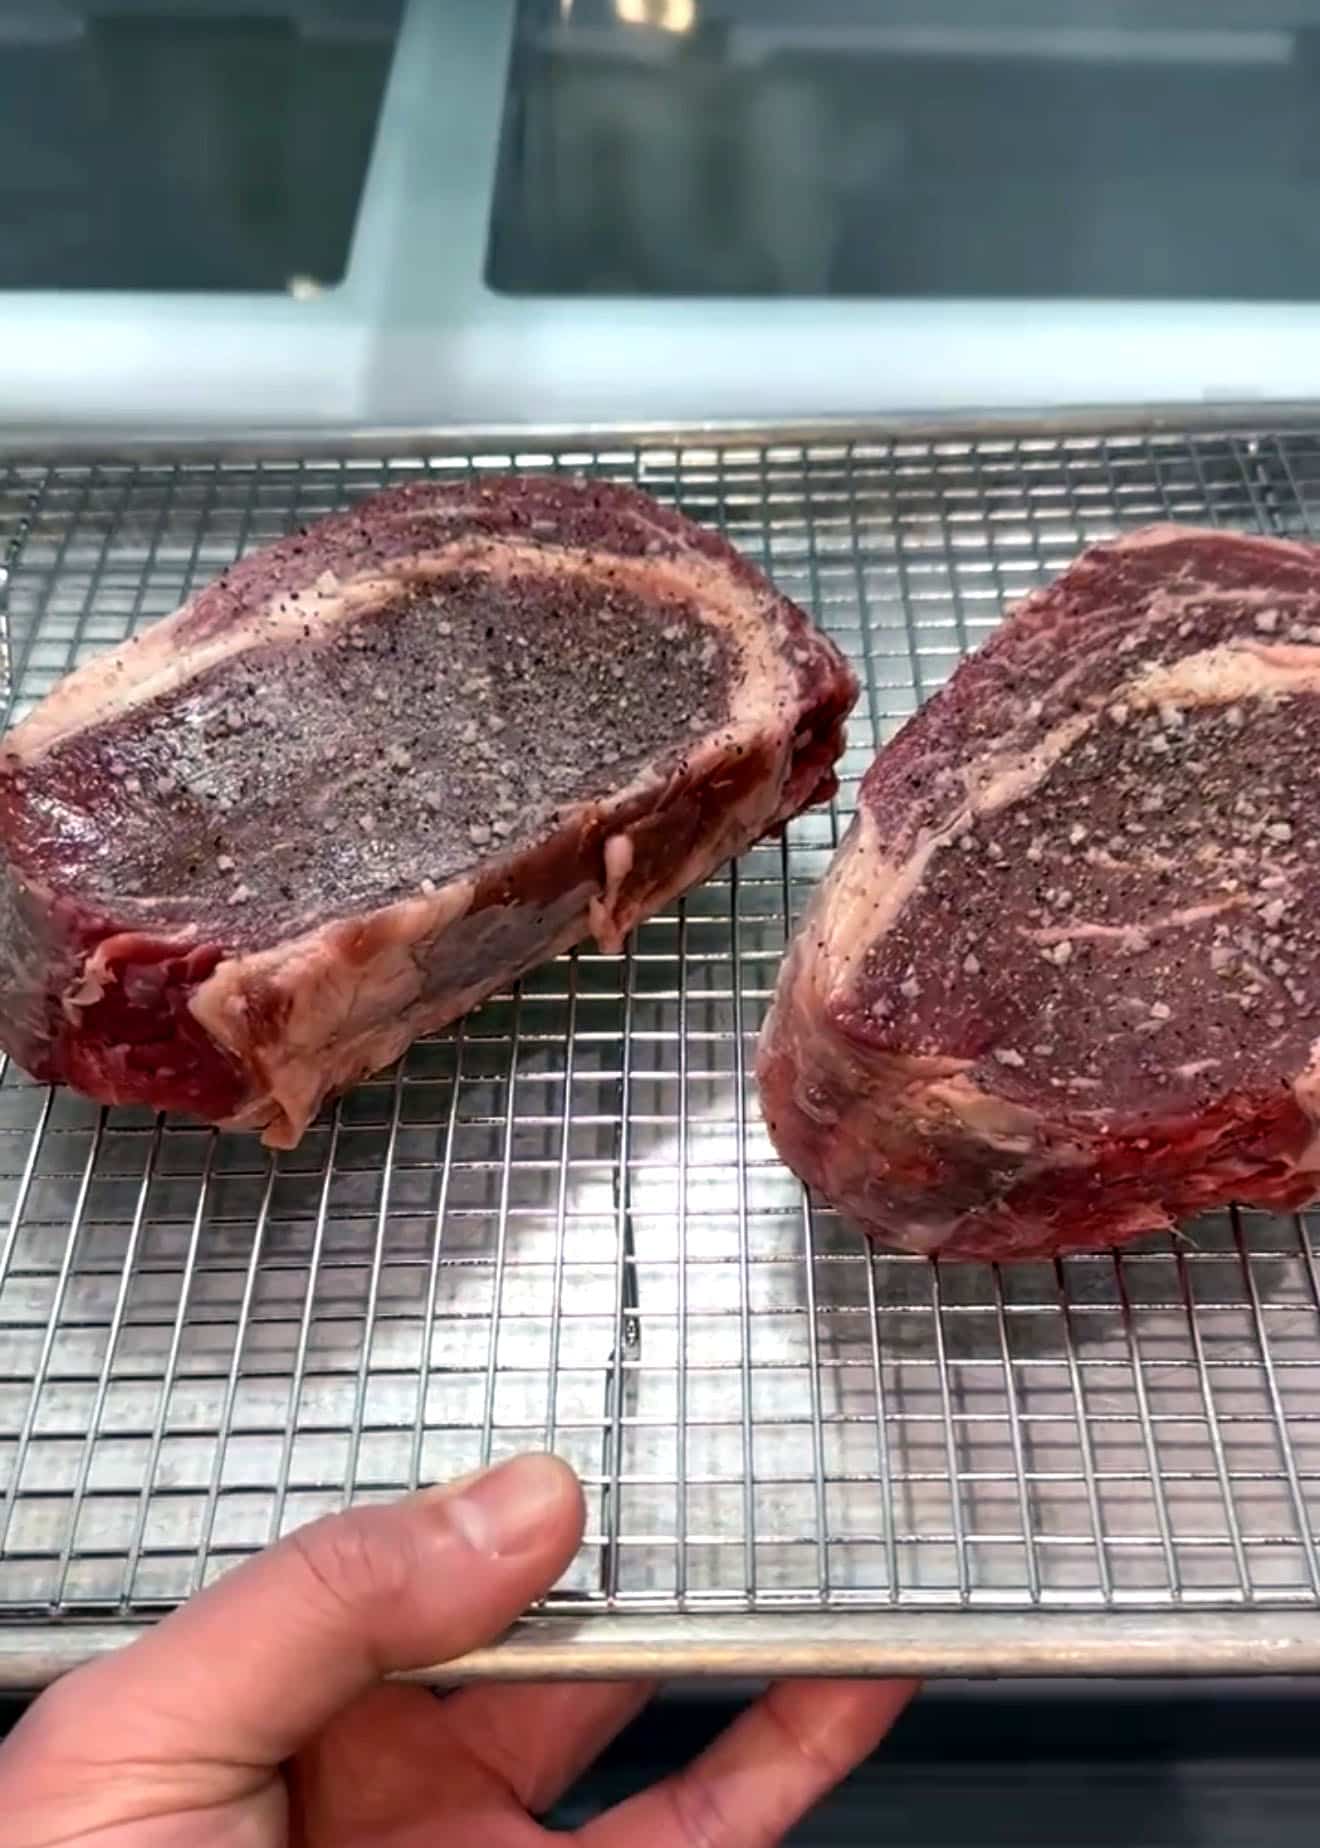
- Pat the ribeye dry with paper towels.
- Generously season all the sides with kosher salt.
- Place the steak on a wire rack set over a tray and refrigerate uncovered for at least 4 hours, but ideally overnight. This dries out the surface and seasons the steak from the inside out, which is key for a great crust.
Why this works: Moisture is the enemy of the Maillard reaction. NO browning can occur until the water evaporates. This water evaporation is called the steam layer. This layer prevents browning, but your meat is still cooking, so you end up with grey, chewy steak.
Dry brining also removes water that doesn't have flavor and leaves behind pure concentrated meat flavor.
Step 2: Bring to Room Temperature (or don't)
Some experts say that you no longer need to do this step as it makes little difference, but I have always done it, so I still do. Call me a woman of habit.
I remove the steak from the fridge about 1 hour before cooking. This helps it cook more evenly and prevents a cold center.
Step 3: Preheat the Pan
A SMOKING hot pan is needed for a successful sear. Why, you ask? Well, as soon as you place the steak in the pan, the temperature will drop by 100ºF at least. Browning (Maillard) happens between 285ºF and 330ºF. So if your pan is only 400ºF, you won't get much, if any, browning because your pan will be too cold.
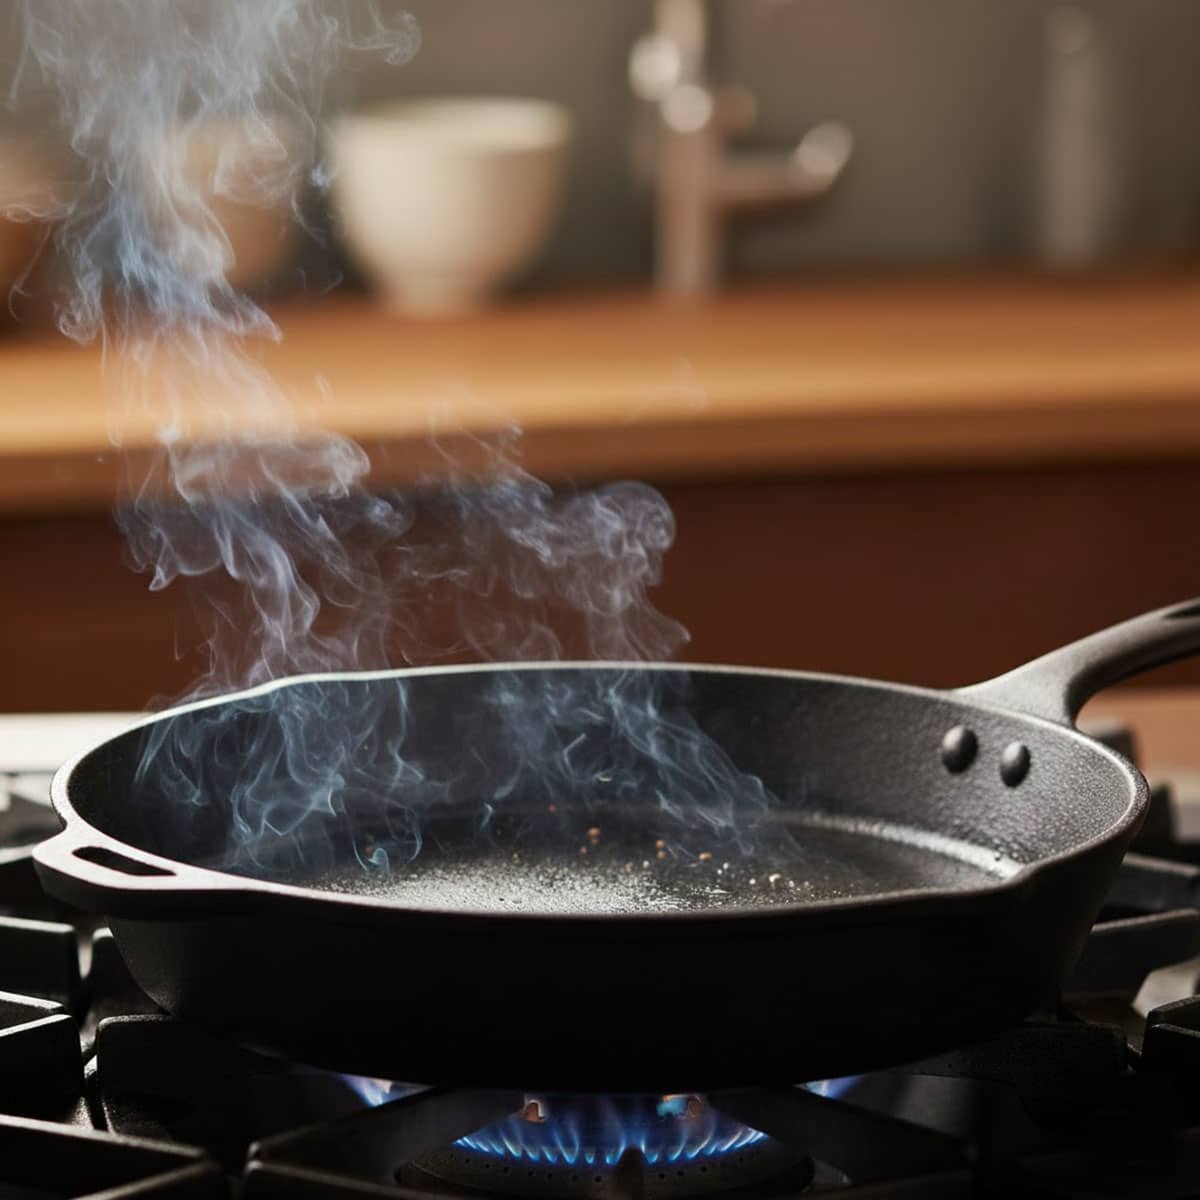
Heat a heavy skillet (cast iron is ideal) over medium-high heat until very hot. I aim for about 450ºF - 550ºF. I test this temp with a digital thermometer. Turn on the fan and open a window! It should be smoking!
Step 4: Sear
The sear is where all the flavor happens. Getting a nice thick crust on your steak greatly increases the flavor profile, texture, and taste of your steak.
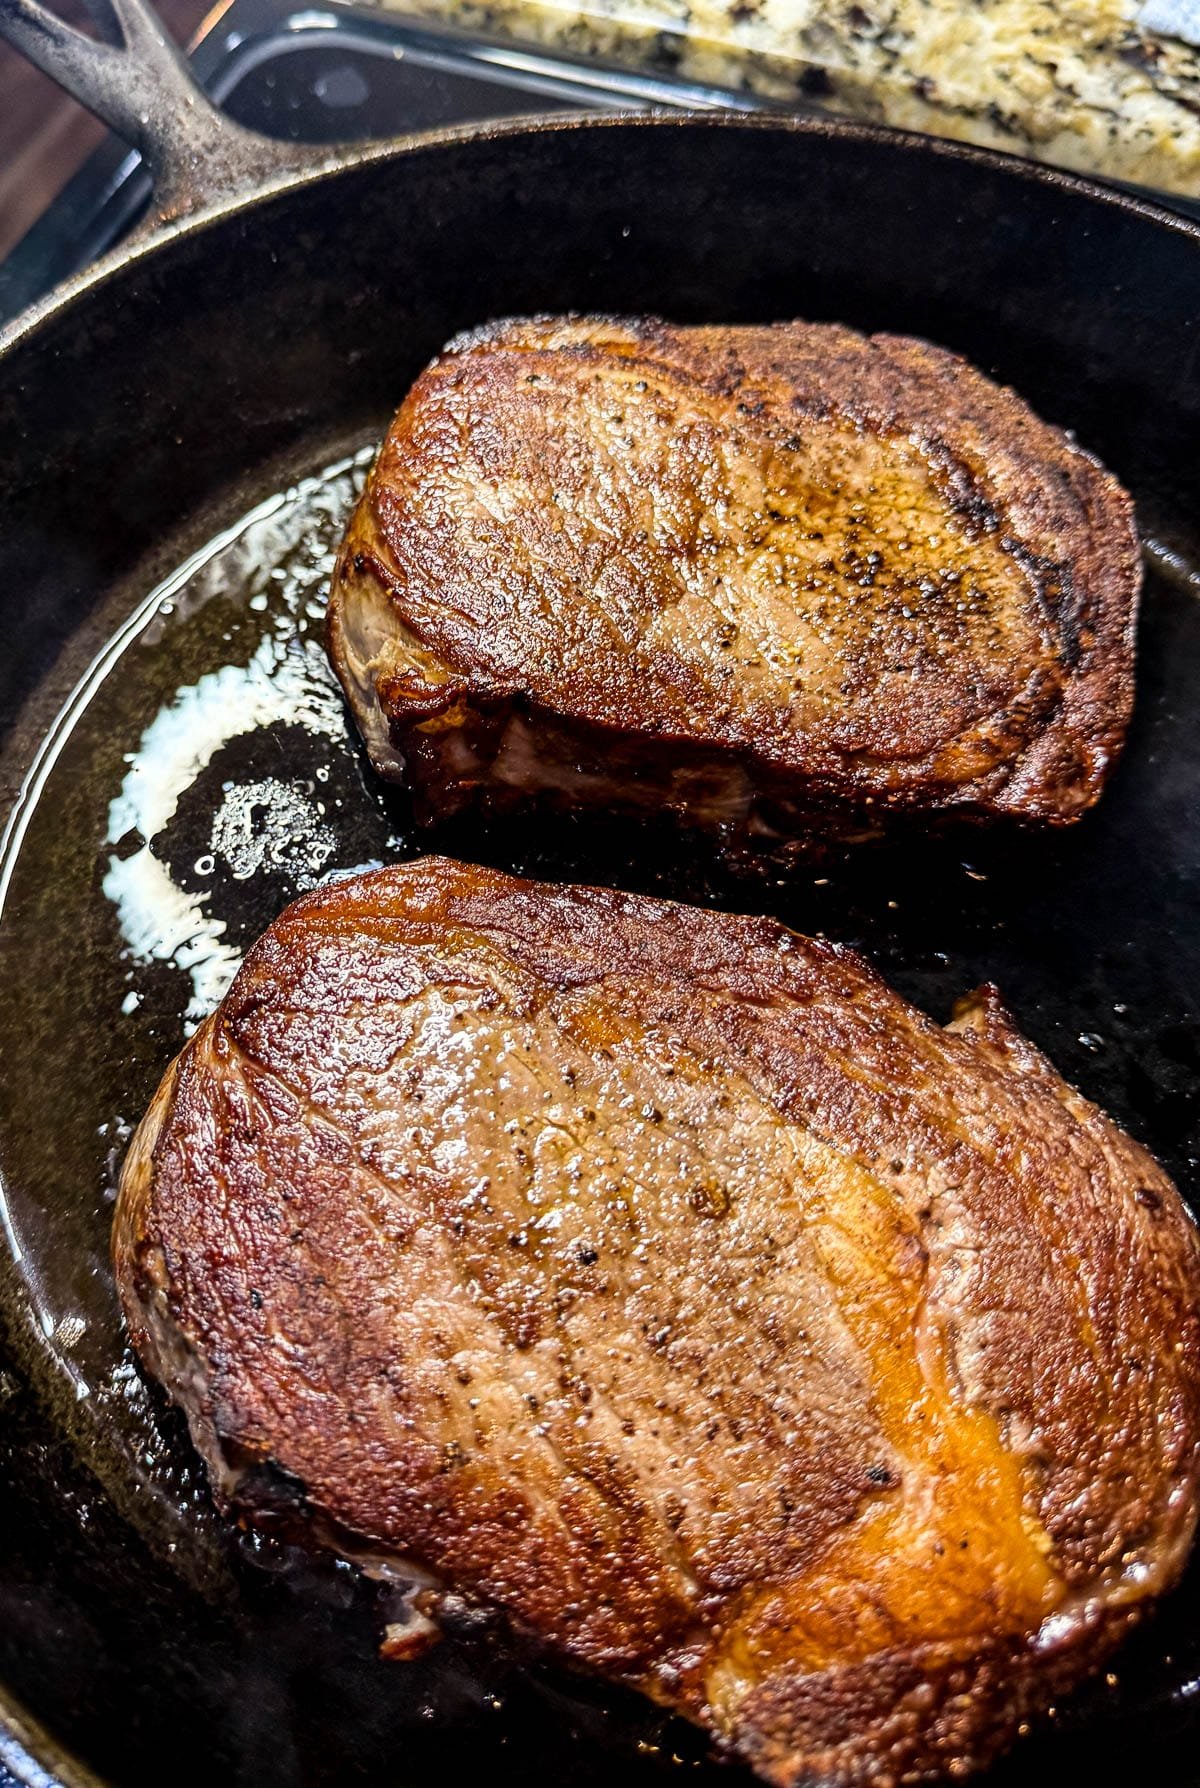
- Place the ribeye in the hot pan and don't touch it. While it's searing, a crust is forming. Move it too soon, and you can damage that crust.
- Let the steak sear for 3 minutes.
- Flip the steak and sear for another 3 minutes on the other side.
Did you know that you get more browning and flavor from a cast-iron skillet than a grill? The reason is that there is more contact with the source of heat, ensuring more browning. BUT, you get less flavor from the lack of smoke, which, in grilling, is an ingredient of its own.
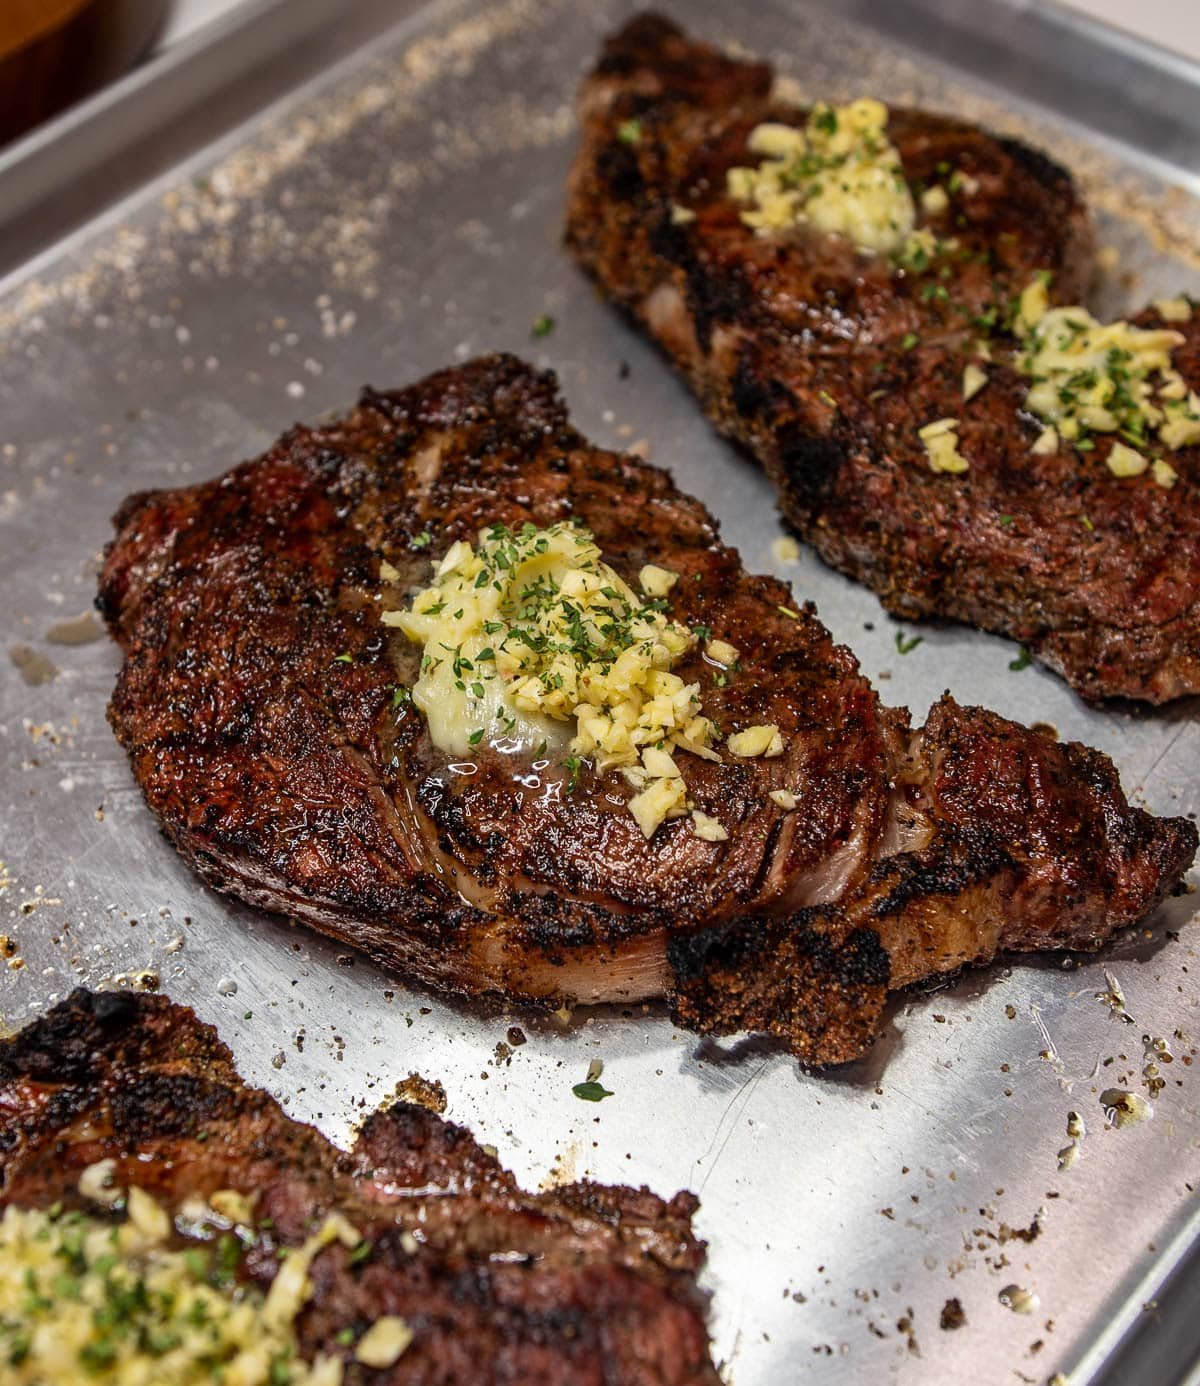
Step 5: Baste (Optional but Recommended)
Basting-or arroser is a finishing technique involving the spooning of melted butter or fat at the point of foaming over a piece of protein in the last 1-2 minutes of cooking. Oftentimes, an herb like fresh thyme, garlic, or rosemary is added to the butter/fat in order to incorporate aromatics into the food.
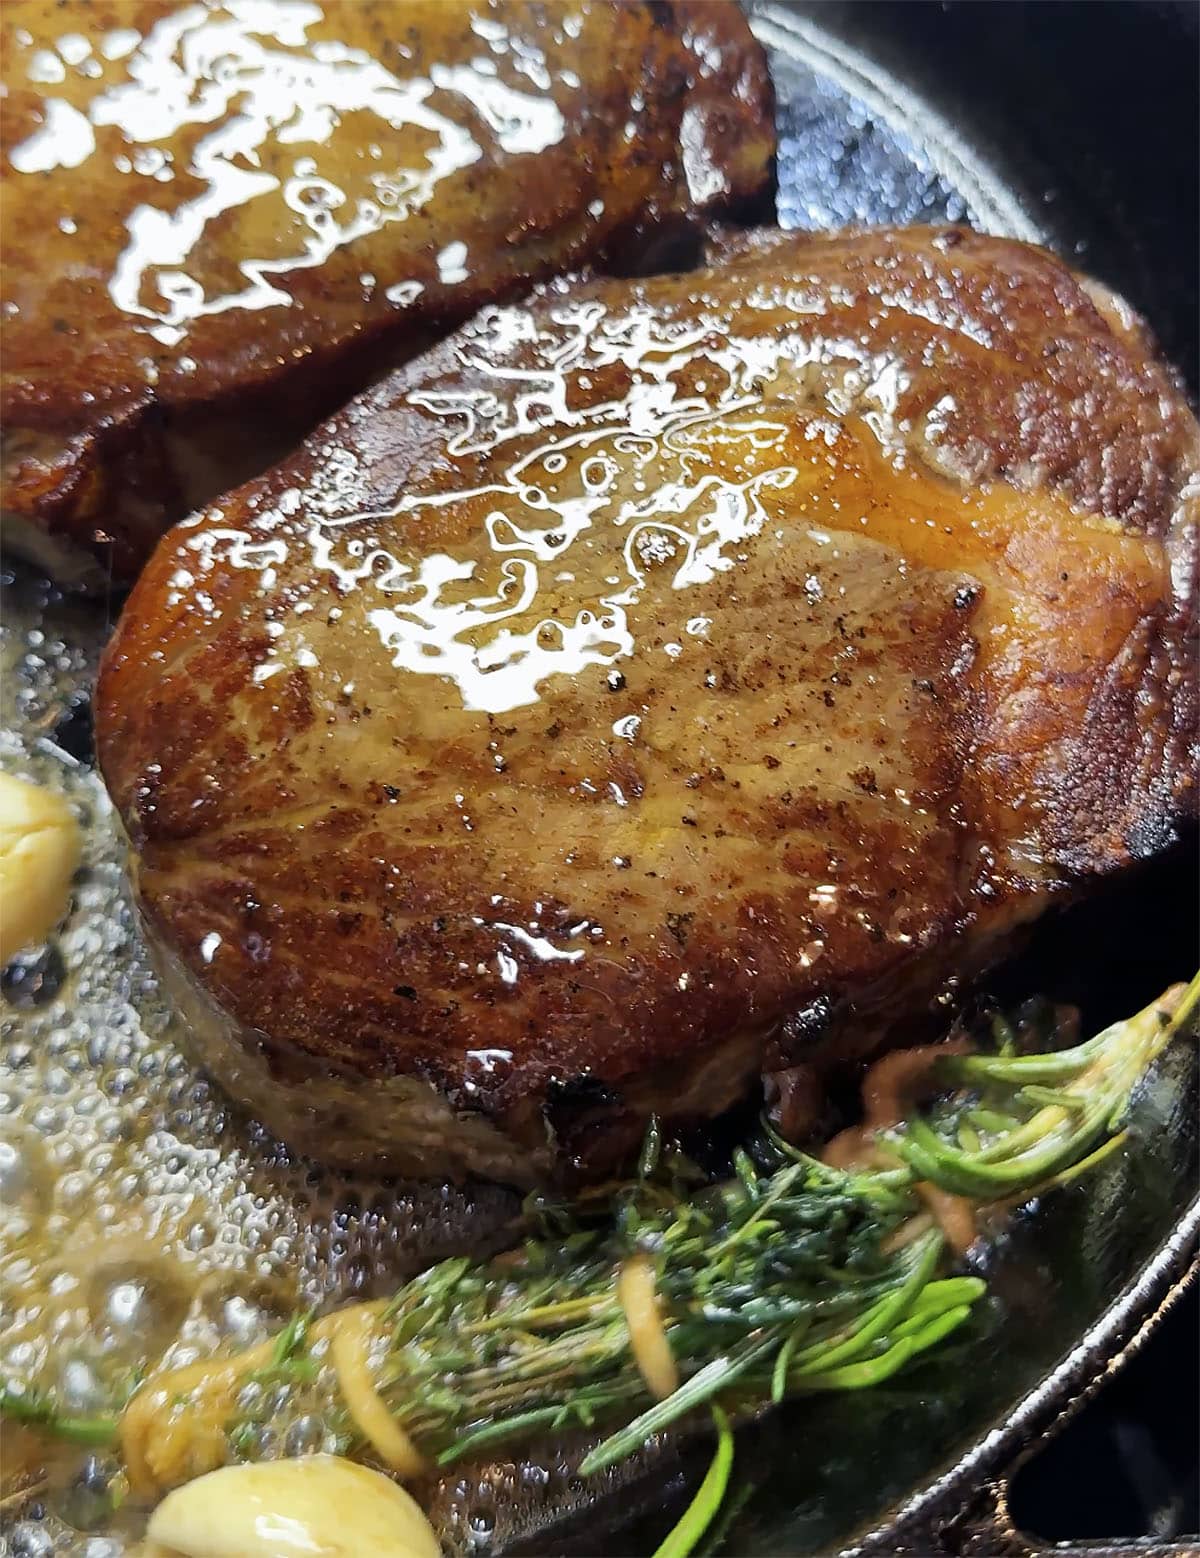
- Turn the heat off and add in your butter, garlic, and thyme.
- When the butter starts to foam, that is the water evaporating. Once the foam subsides and the butter turns a golden amber, it is at its most flavorful. Tilt the pan, pool the butter at the bottom with your aromatics, and use a large spoon to rapidly bathe the steak.
- Do this for the final 3 minutes or UNTIL the internal temperature of the steak reads 5º-10º less than your desired temp on your thermometer. The steak will continue to cook due to carryover cooking, so resist the urge to cook all the way until your desired temperature, or you'll end up with over-cooked steak!
- The Maillard Reaction & Even Browning - While the steak sears in the hot pan, basting with hot fat acts like a liquid heat conductor. The butter fills in the microscopic gaps between the meat and the pan, ensuring the entire surface-including the nooks and crannies-undergoes the Maillard reaction. This creates a deeper, more even, and more flavorful crust.
- Flavor Infusion (Fat as a Carrier) - Butter is roughly 80% fat, and fat is an incredible solvent for flavor.
- The Magic of Milk Solids - Unlike oil, butter contains milk solids. As you baste, these solids toast in the pan, turning into brown butter (beurre noisette). This adds a rich, nutty, and slightly sweet complexity that you simply can't get with high-heat vegetable oils.
- Controlled Temperature Finishing - Basting usually happens toward the end of the cooking process after you've lowered the heat. The cool butter slightly brings down the surface temperature of the pan, allowing you to gently bring the interior of the steak to its target temperature without burning the outside.
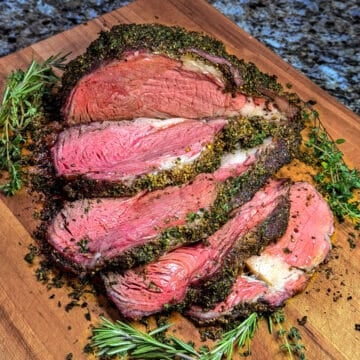
Step 6: Rest the Ribeye
A rested steak can retain significantly more moisture. In kitchen tests, a steak cut immediately can lose up to 10-15% of its weight in juice, whereas a steak rested for 5-10 minutes loses only about 1-2%.
Remove the steak from the pan and let it rest for 5-10 minutes. This allows the juices to redistribute so they stay in the steak, not on your cutting board.
Resting reverses that "sponge-wringing" effect through two main processes:
- Muscle Fiber Relaxation: As the temperature of the meat begins to drop slightly and stabilize, the tightly wound muscle fibers start to relax. This creates space for the liquid to move back into the fibers.
- Re-absorption and Viscosity: During the rest, the juices-which became thin and watery under high heat-cool down slightly. This increases their viscosity (thickness), making them "stickier" so they stay bonded to the protein rather than running off.
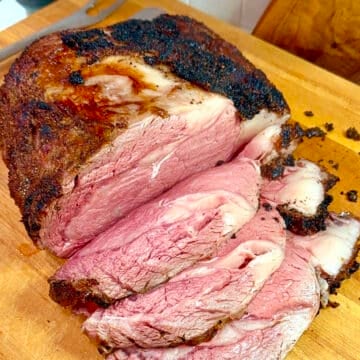
What Is Carryover Cooking?
Carryover cooking is the phenomenon where food continues to cook even after it has been removed from its heat source.
When you cook something like a thick steak or a roast, the exterior is significantly hotter than the center. Once you take it off the grill or out of the oven, that residual heat on the outside continues to migrate inward, raising the internal temperature by several degrees.
Heat always seeks equilibrium. The energy stored in the outer layers of the meat doesn't just disappear; it flows toward the cooler center until the temperature is uniform throughout. This is why a piece of meat that looks "perfect" at the moment you pull it off the heat often ends up overcooked by the time you cut into it.
The amount of carryover cooking depends on the size and density of the food:
- Small items (steaks, chops): Usually rise 3°F to 5°F.
- Medium roasts (pork loin, chicken): Can rise 5°F to 10°F.
- Large roasts (prime rib, whole turkey): Can rise as much as 10°F to 15°F.
Tips & Tricks
- A dry-brined steak will look darker and drier before cooking-that's a good thing
- Don't overcrowd the pan; cook one steak at a time for the best sear. Overcrowding can cause the pan to get too cold so you won't get a proper brown crust.
- If the steak is browning too fast, slightly lower the heat during the last 3 minutes
- Use tongs instead of a fork to avoid piercing the meat and losing juices
Final Thoughts
The combination of dry brining and the 3-3-3 method is one of those simple techniques that delivers ridiculously good results with very little effort. It's predictable, repeatable, and perfect for weeknight dinners or when you want to impress without stressing. Once you try ribeye this way, it's really hard to go back.
How to Cook a Ribeye FAQs
It works best for thick cuts like ribeye or New York strip. Thinner steaks cook too fast and can overcook.
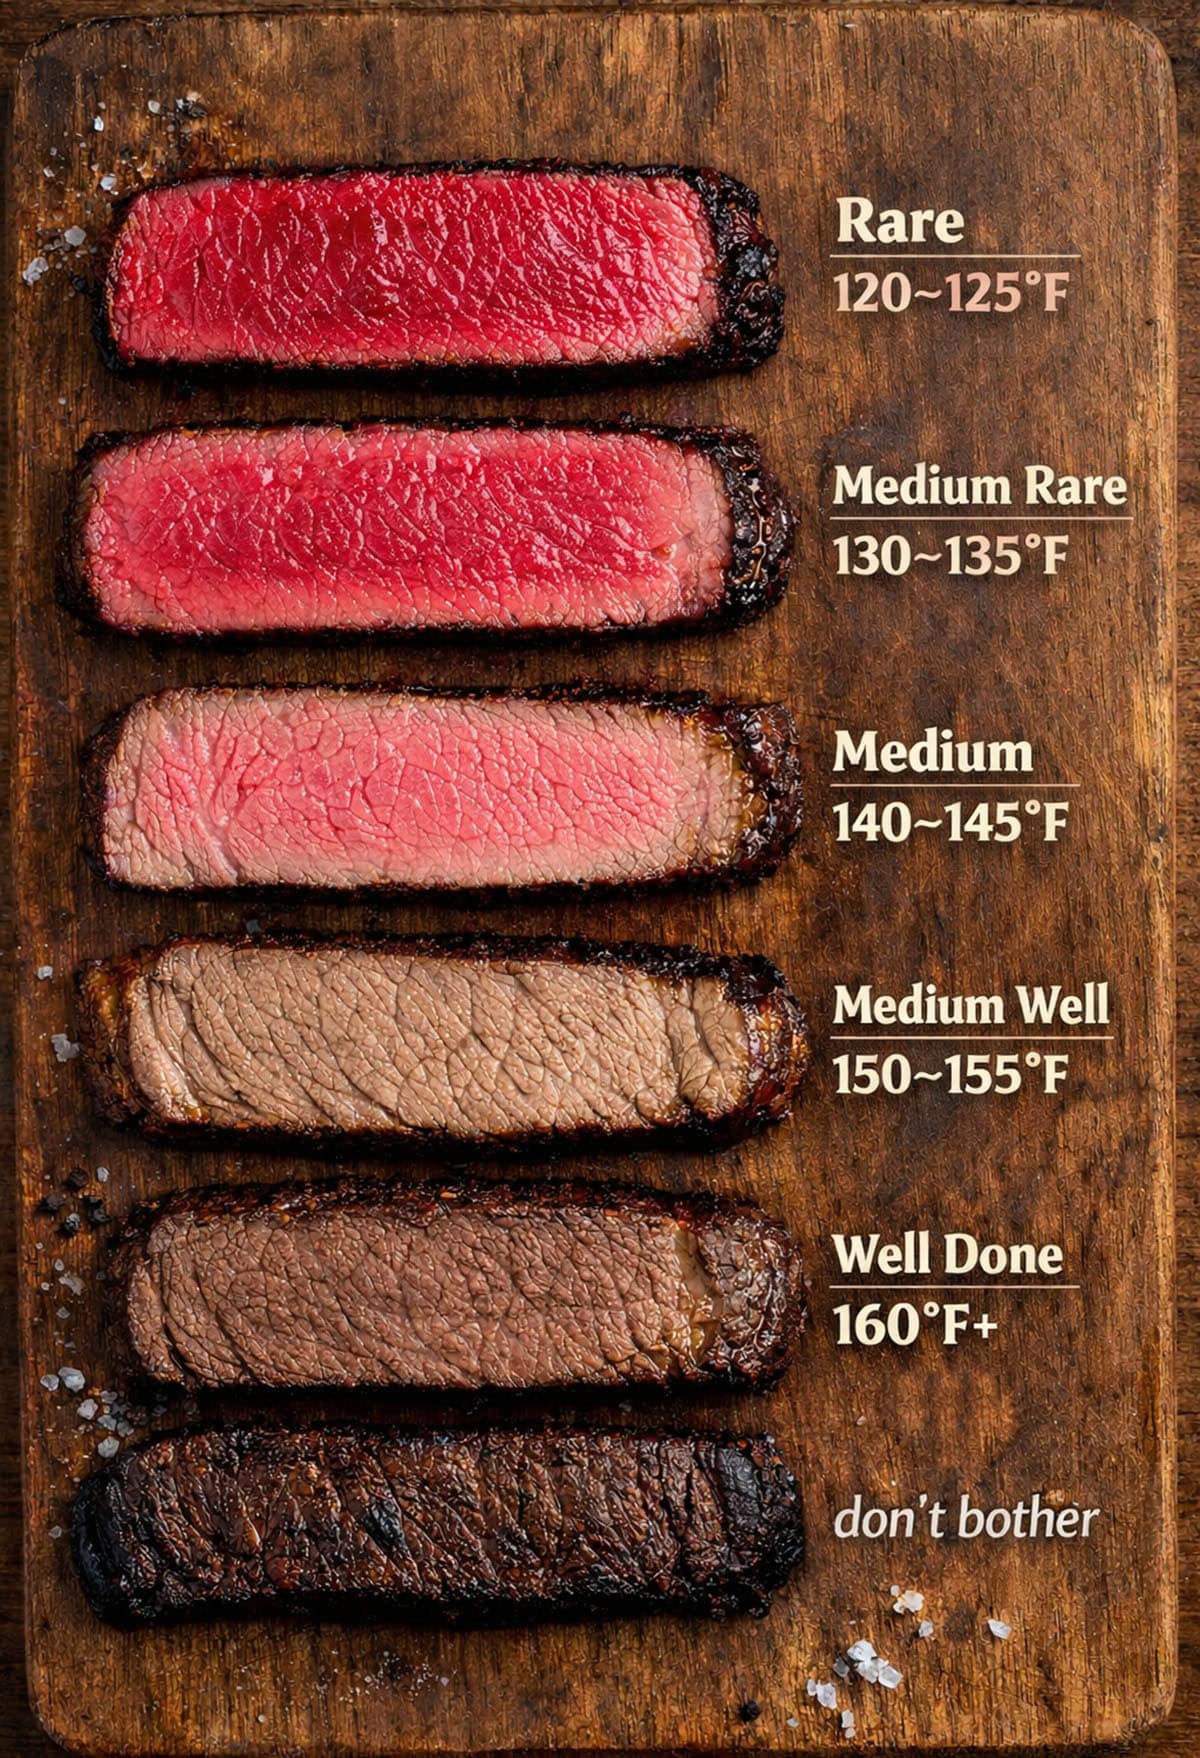
For a 1¼-1½ inch ribeye, it usually lands around medium-rare to medium, depending on heat and steak thickness.
Yes, up to 24 hours is great. Just keep it uncovered so the surface stays dry.
Not required, but if you want precision, pull the steak around 125-130°F for medium-rare and let carryover cooking finish the job.
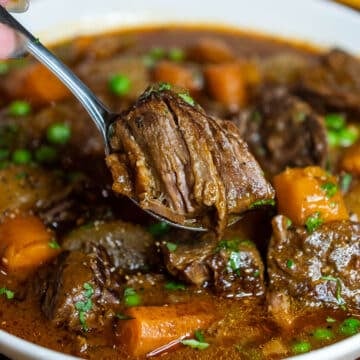
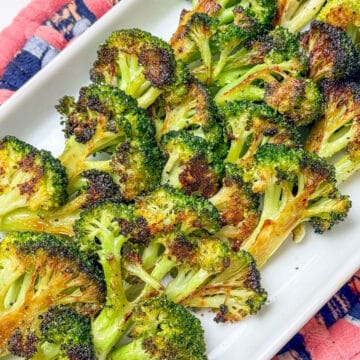
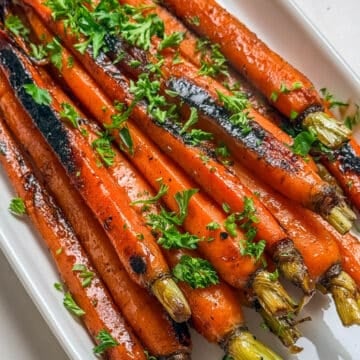
Suggested Sides for this Ribeye

If you tried this Ribeye recipe or any other recipe on my blog, please leave a 🌟 star rating and let me know how it goes in the comments. I love hearing from you!
Recipe

Ingredients
- 16 ounce ribeye 1 ½" thick
- 2 Tablespoons butter
- 2 cloves garlic
- 2 sprigs fresh thyme
- 1 Tablespoon kosher salt for brining
- 1 teaspoon SPG (salt pepper garlic) to taste
Instructions
- 24 hours in advance, pat your steaks dry with a paper towel then coat your steaks liberally with kosher salt. Place them onto a wire rack set inside a metal sheet pan. Leave them in the fridge overnight (or a minimum of 4 hours).
- One hour before cooking your steaks, remove them from the fridge to come to room temp.
- Place your heavy bottom pan (I like cast iron) over medium high heat until it's smoking hot. Shoot for about 500ºF. I use an infrared thermometer to check the surface temp but its not required.
- Place your steak into the pan and do not touch it for 3 minutes.
- Flip the steak and sear on the other side for 3 minutes.
- Turn off the heat.
- Add your butter, garlic, and thyme to the pan and begin basting your steak with the butter mixture.
- Flip the steaks every 30 seconds until a thermometer reads 5-10 degrees below your desired doneness. It will continue to cook when its removed from the heat.
- Allow your steaks to rest for 15 minutes before slicing to avoid losing all those juices.