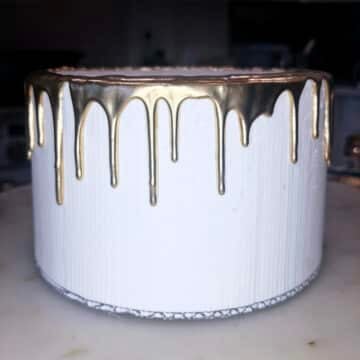
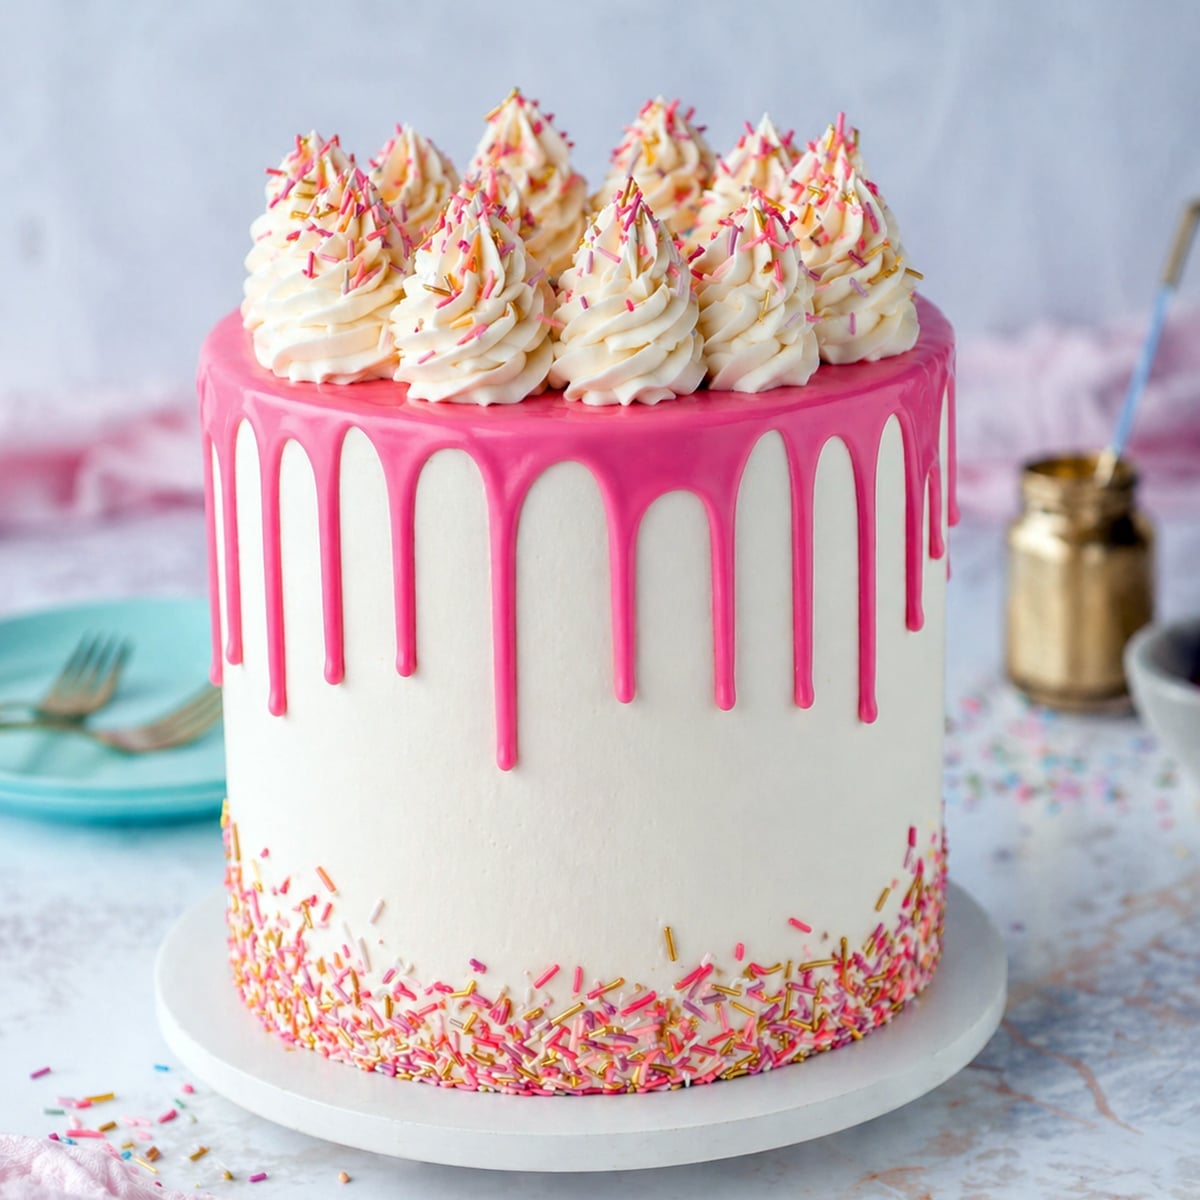
A drip cake is one of the easiest ways to make a decorated cake look professional, and the same simple recipe works for soft pink, deep red, navy blue, white, or even shiny gold. This walkthrough uses my water ganache method as the base, which means the drip itself takes less than five minutes from start to finish. Once you have the colored drip down, I'll also show you how to add a metallic gold finish using a quick bag-coating trick. This same technique works on any cake, including my vanilla cake, funfetti cake, or easy chocolate cake.
Quick Glance: Drip Cake Recipe
- Recipe Name: Drip Cake Recipe
- Why You'll Love It: Creates a dramatic metallic drip that looks like real gold and instantly elevates cakes for weddings, birthdays, and luxury desserts.
- Time and Difficulty: Less than 5 minutes, great for beginners
- Main Ingredients: White chocolate, water, gold luster dust
- Method: Make the water ganache, make the gold paste, coat the piping bag, pour the ganache into the piping bag to make the drips gold.
- Texture and Flavor: Smooth, glossy ganache with a rich white chocolate flavor and a metallic gold finish.
- Quick Tip: Always apply gold drip to a cold cake so the drips set quickly and don't run down the sides too far.
Jump to:
- Quick Glance: Drip Cake Recipe
- Why This Is The BEST Cake Drip Recipe
- Drip Cake Ingredients
- How To Make A Colored Drip Cake Step-By-Step
- Cake Batter and Frosting Calculator
- Cups of Batter Needed
- Cups of Frosting Needed
- How To Make A Gold Drip Variation
- Common Drip Cake Problems To Avoid
- Final Thoughts
- Other Cake Techniques To Try
- Drip Cake FAQs
- Watch: How To Decorate A Cake Step-by-Step
- Recipe
Why This Is The BEST Cake Drip Recipe
I've been working with water ganache since 2010, and after testing dozens of versions, this is the method I keep coming back to for any color of drip cake. The base ganache uses just two ingredients (candy melts plus hot water), and the result is a smooth, glossy drip that sets quickly, holds its color beautifully, and works in any climate.
The reason water ganache wins over a traditional cream-based ganache is stability. Cream ganache sweats in humid conditions, separates if it sits too long, and has a short shelf life. Water ganache doesn't have any of those problems. The chemistry of candy melts (which use vegetable fat instead of cocoa butter) makes the chocolate-to-water ratio forgiving. There's no tempering, no risk of seizing, and you can reheat it to bring it back if it sets too soon. White chocolate works the same way.
For colored drips, the easiest path is to start with colored candy melts (pink, red, blue, green, etc.) and skip food coloring entirely. If you want a custom shade, you can tint the candy melts with any kind of food coloring (it doesn't have to be oil-based because we have already added water) to the water ganache after you've made it.
PRO TIP: Add a drop of white food coloring to your water ganache if it's too transparent. The color will not change much but the white food coloring makes the color more opaque.
For metallic finishes (gold, silver, rose gold, copper, bronze), I have a separate trick: coat the inside of the piping bag with a thick paste of oil and edible luster dust before adding the ganache. As the white ganache passes through the bag, it picks up the metallic coating and pipes out already shiny. Brushing gold on after the drip sets is slow and streaky; mixing dust directly into the ganache dulls the shine because chocolate is opaque, and the metallic particles get buried. The bag-coating trick gives you even color on every drip without any of that.
One thing that's true for every color: the cake has to be cold, and the ganache has to be cooled to about 90ºF. Pulling a cake straight out of the fridge (or even a quick freezer chill) gives you a surface cold enough to stop a drip before it runs all the way down. Without that, even a perfect ganache will pool at the base of the cake.
Drip Cake Ingredients
The base recipe is just two ingredients. The optional add-ons depend on what color or finish you want.
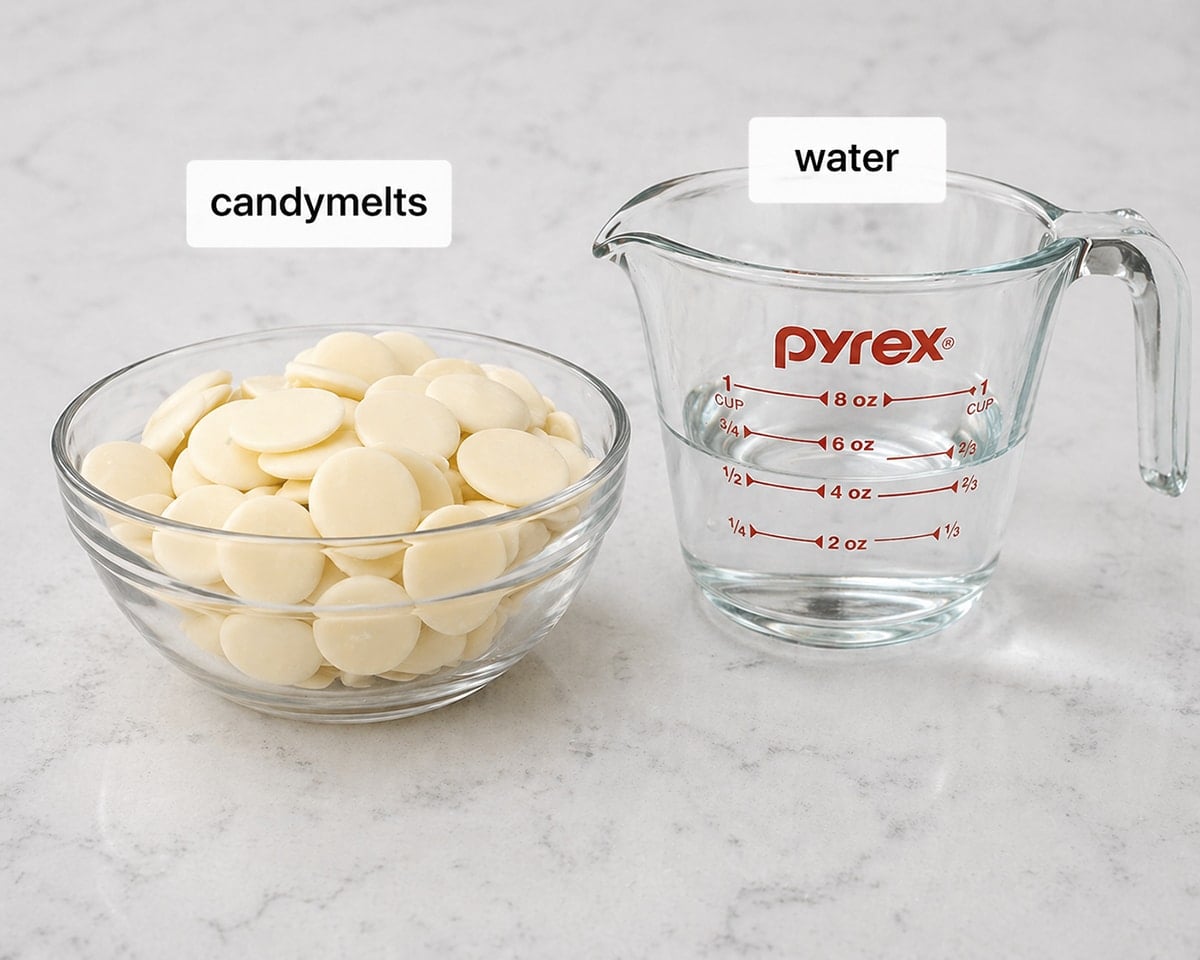
- Candy melts or white chocolate. Both work. Candy melts (Wilton, Merckens, Ghirardelli) come in dozens of colors and are made with vegetable fat instead of cocoa butter, which makes the chocolate-to-water ratio extra forgiving and means you don't need to temper anything, the way you would for a traditional chocolate ganache. Real white chocolate also works as long as you melt it gently. Pick the color you want for the drip: white, pink, red, blue, green, purple, or whatever matches your design. Don't substitute chocolate chips; they contain stabilizers that prevent clean melting.
- Hot water. Replaces the cream you'd use in a traditional ganache. Tap water is fine; it doesn't need to be filtered. The water hydrates the sugar in the chocolate without adding dairy, which is what makes the drip heat-stable. You can also adjust consistency by slightly increasing or decreasing the water by a teaspoon at a time.
Optional for tinting white ganache to a custom color:
- Food Coloring. Use this if you can't find candy melts in the exact shade you want. Any kind of food coloring will work.
Optional for a metallic gold (or silver, rose gold, copper, bronze) finish:
- Gold luster dust. This is what creates the metallic finish. Quality matters here more than anywhere else in the recipe. I use super gold dust from Truly Mad Plastics because it's exceptionally shiny and non-toxic; cheaper dusts can look chalky or dull. Substitutions: silver, rose gold, copper, bronze, or any metallic dust uses this exact same technique. For a deeper antique tone, mix a touch of bronze dust into the gold.
- Neutral oil. The job of the oil is to bind the dust into a paintable paste. Use something flavorless like vegetable oil, canola, grapeseed, or light corn oil. Don't use olive oil or coconut oil; both can carry flavor through to the finished drip. You only need a tiny amount.
How To Make A Colored Drip Cake Step-By-Step
This is the base method that works for any color. If you want a metallic gold or silver finish, follow these steps first to make the ganache, then jump to the Gold Drip Variation section below for the bag-coating technique.
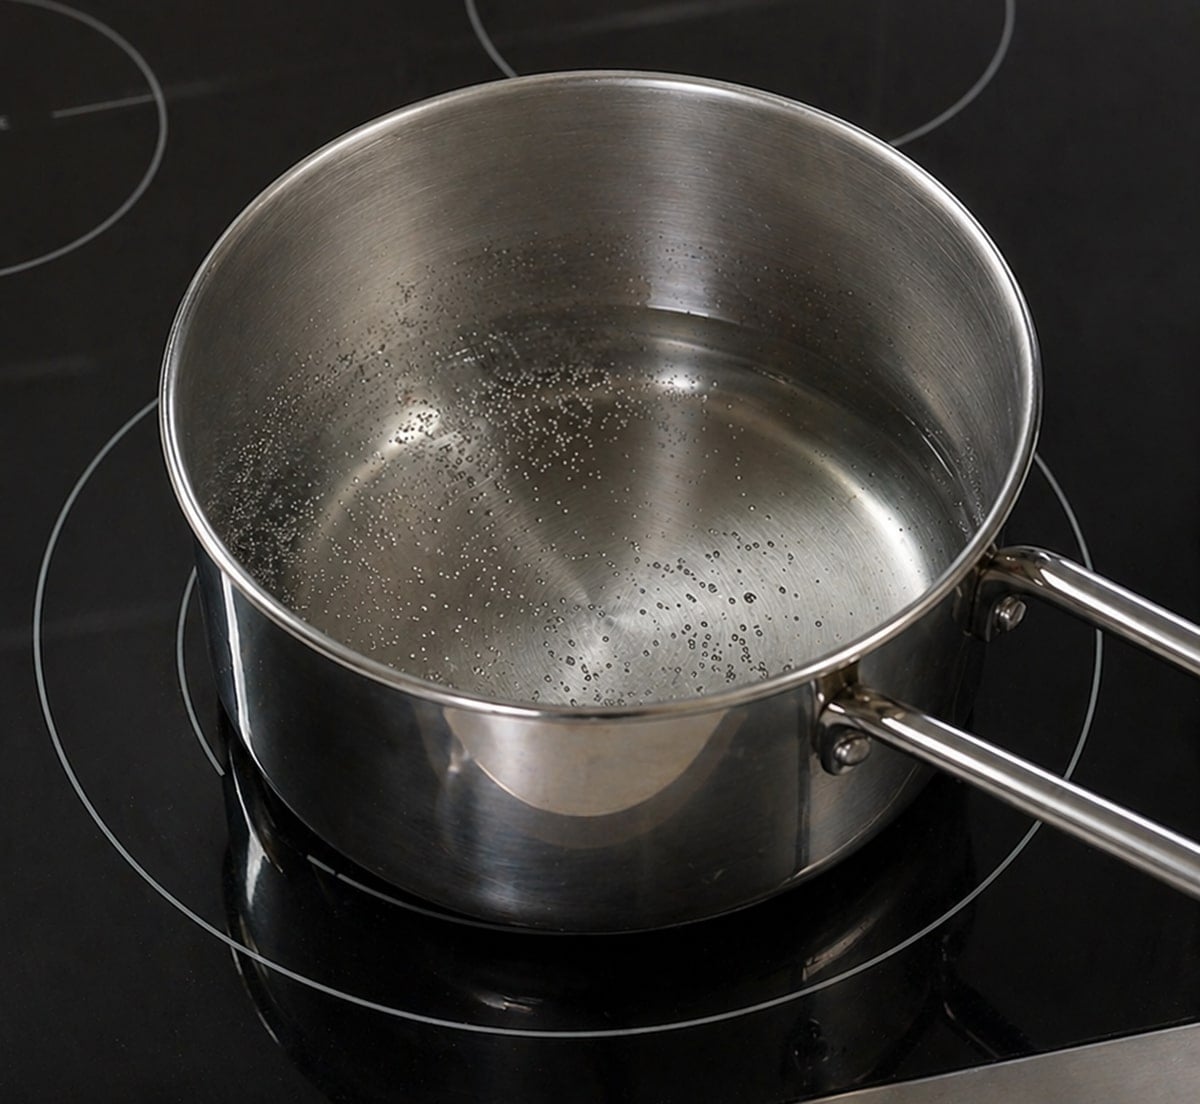
- Heat the water. In a small microwave-safe bowl, heat the water for about 30 seconds, until it's hot to the touch but not boiling. Or you can heat it on the stovetop in a saucepan.
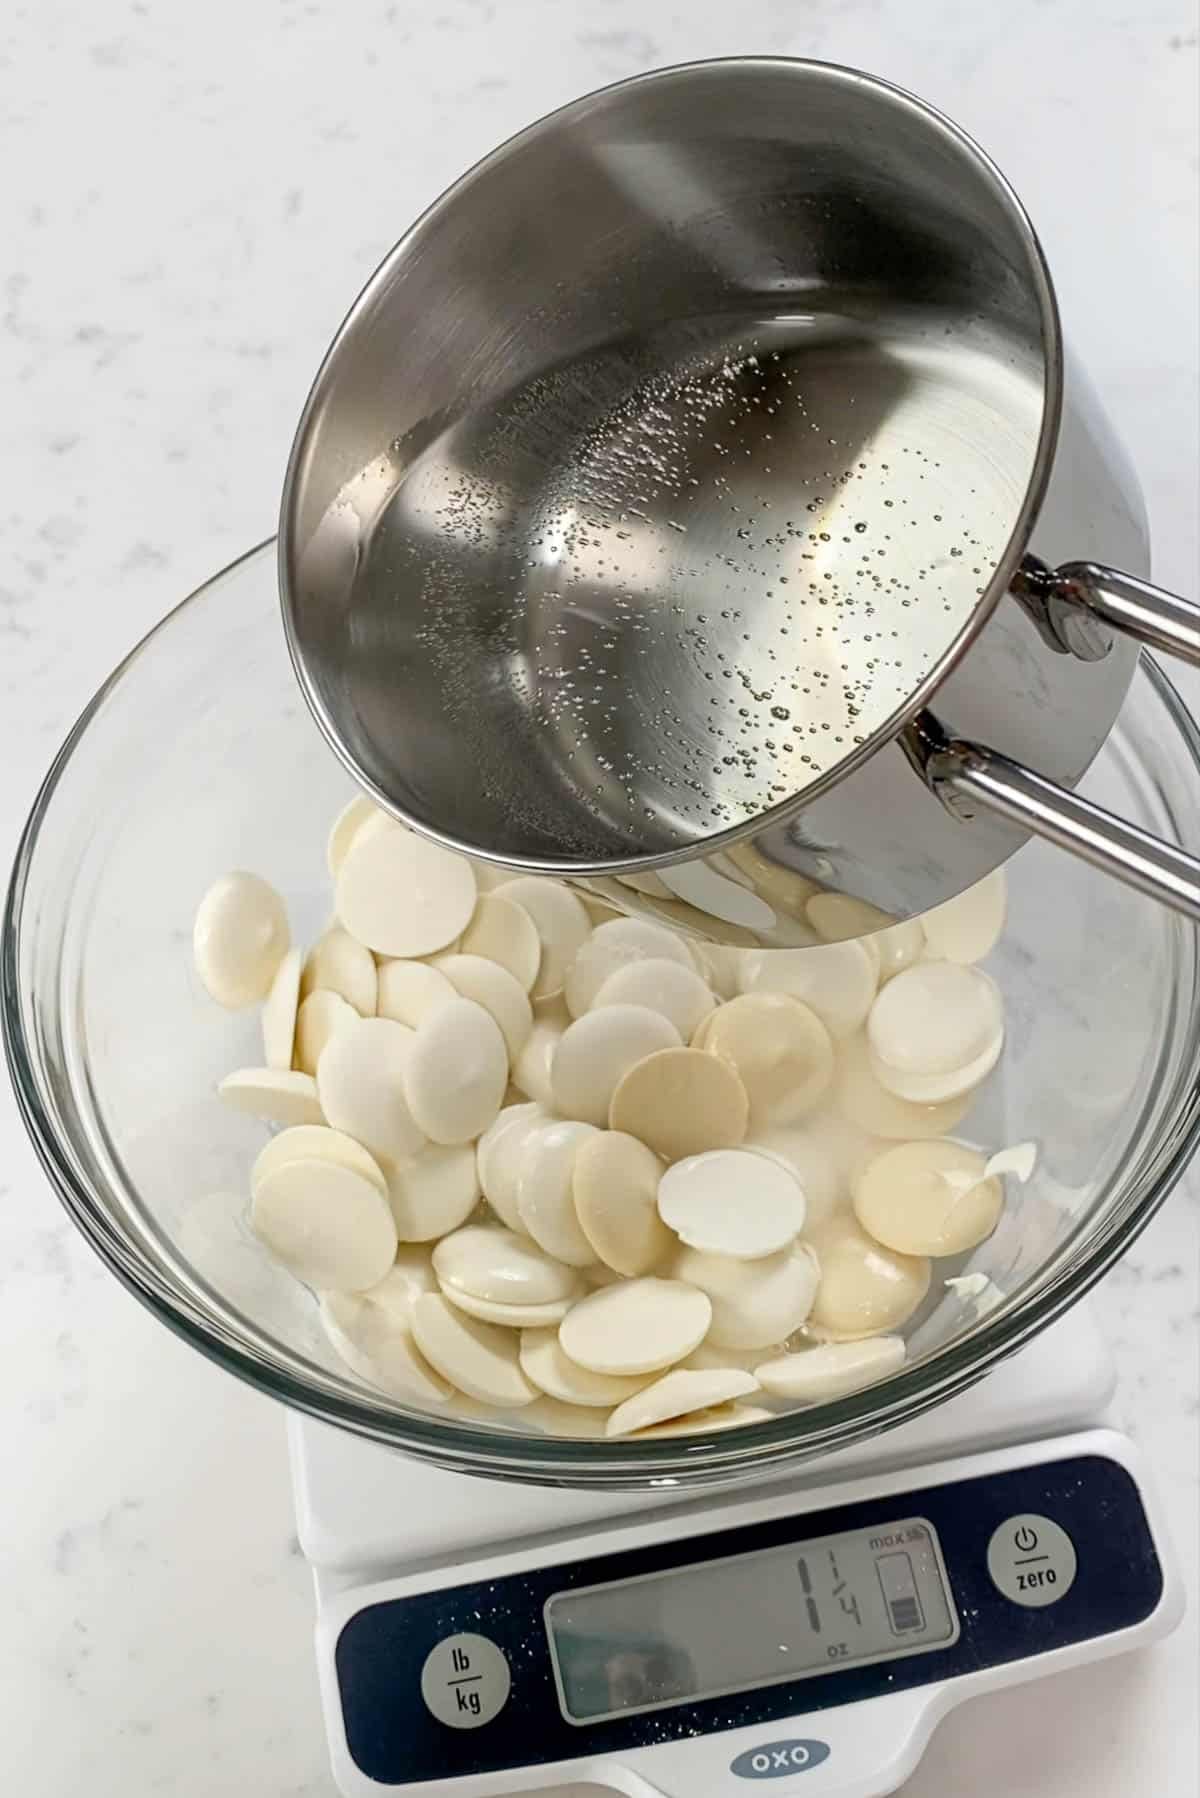
- Combine the hot water and candy melts. Microwave the candy melts for 1 minute to soften them up.
Pour the hot water over your candy melts (or chopped white chocolate) and let it sit for one to five minutes without stirring. The heat needs time to melt through.
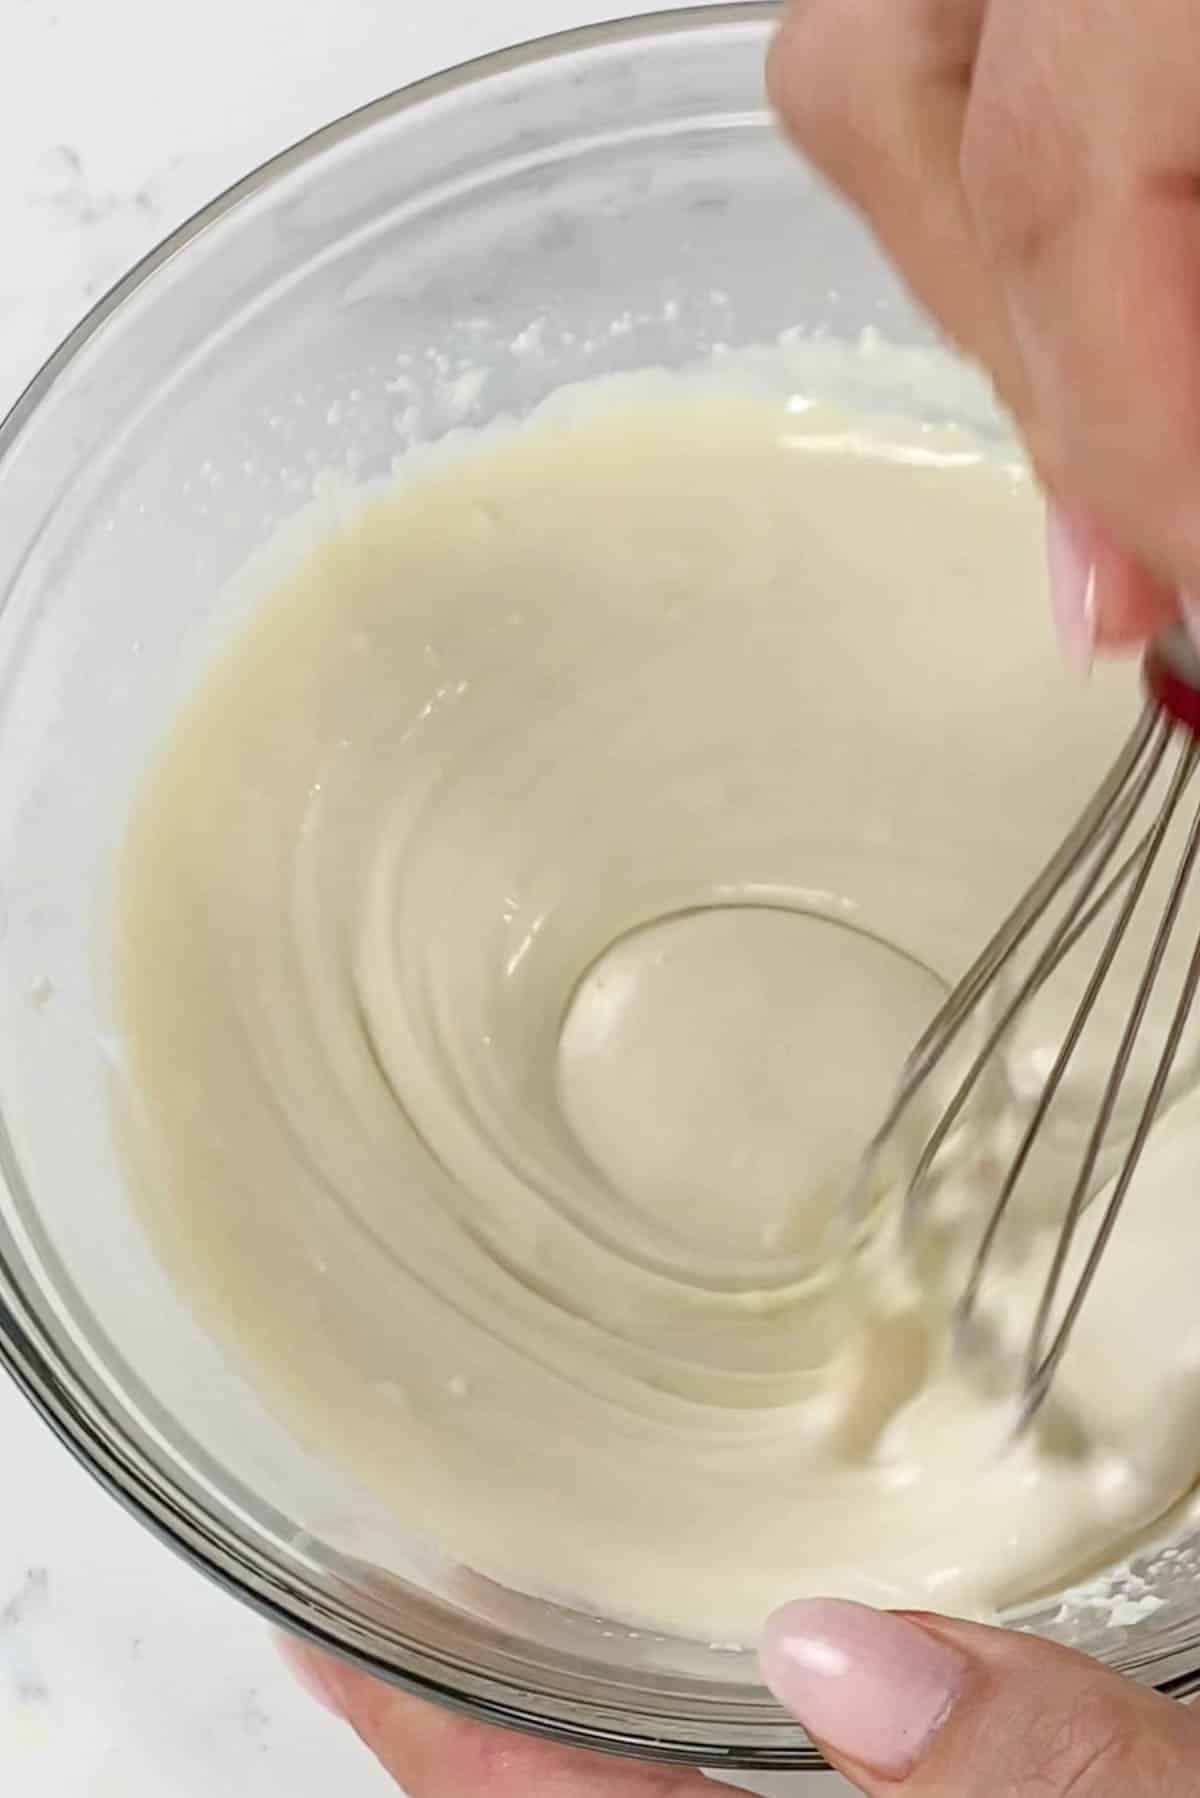
- Stir until smooth. Whisk gently until you have a smooth, glossy ganache. If chunks remain, microwave another 15 to 30 seconds and whisk again.
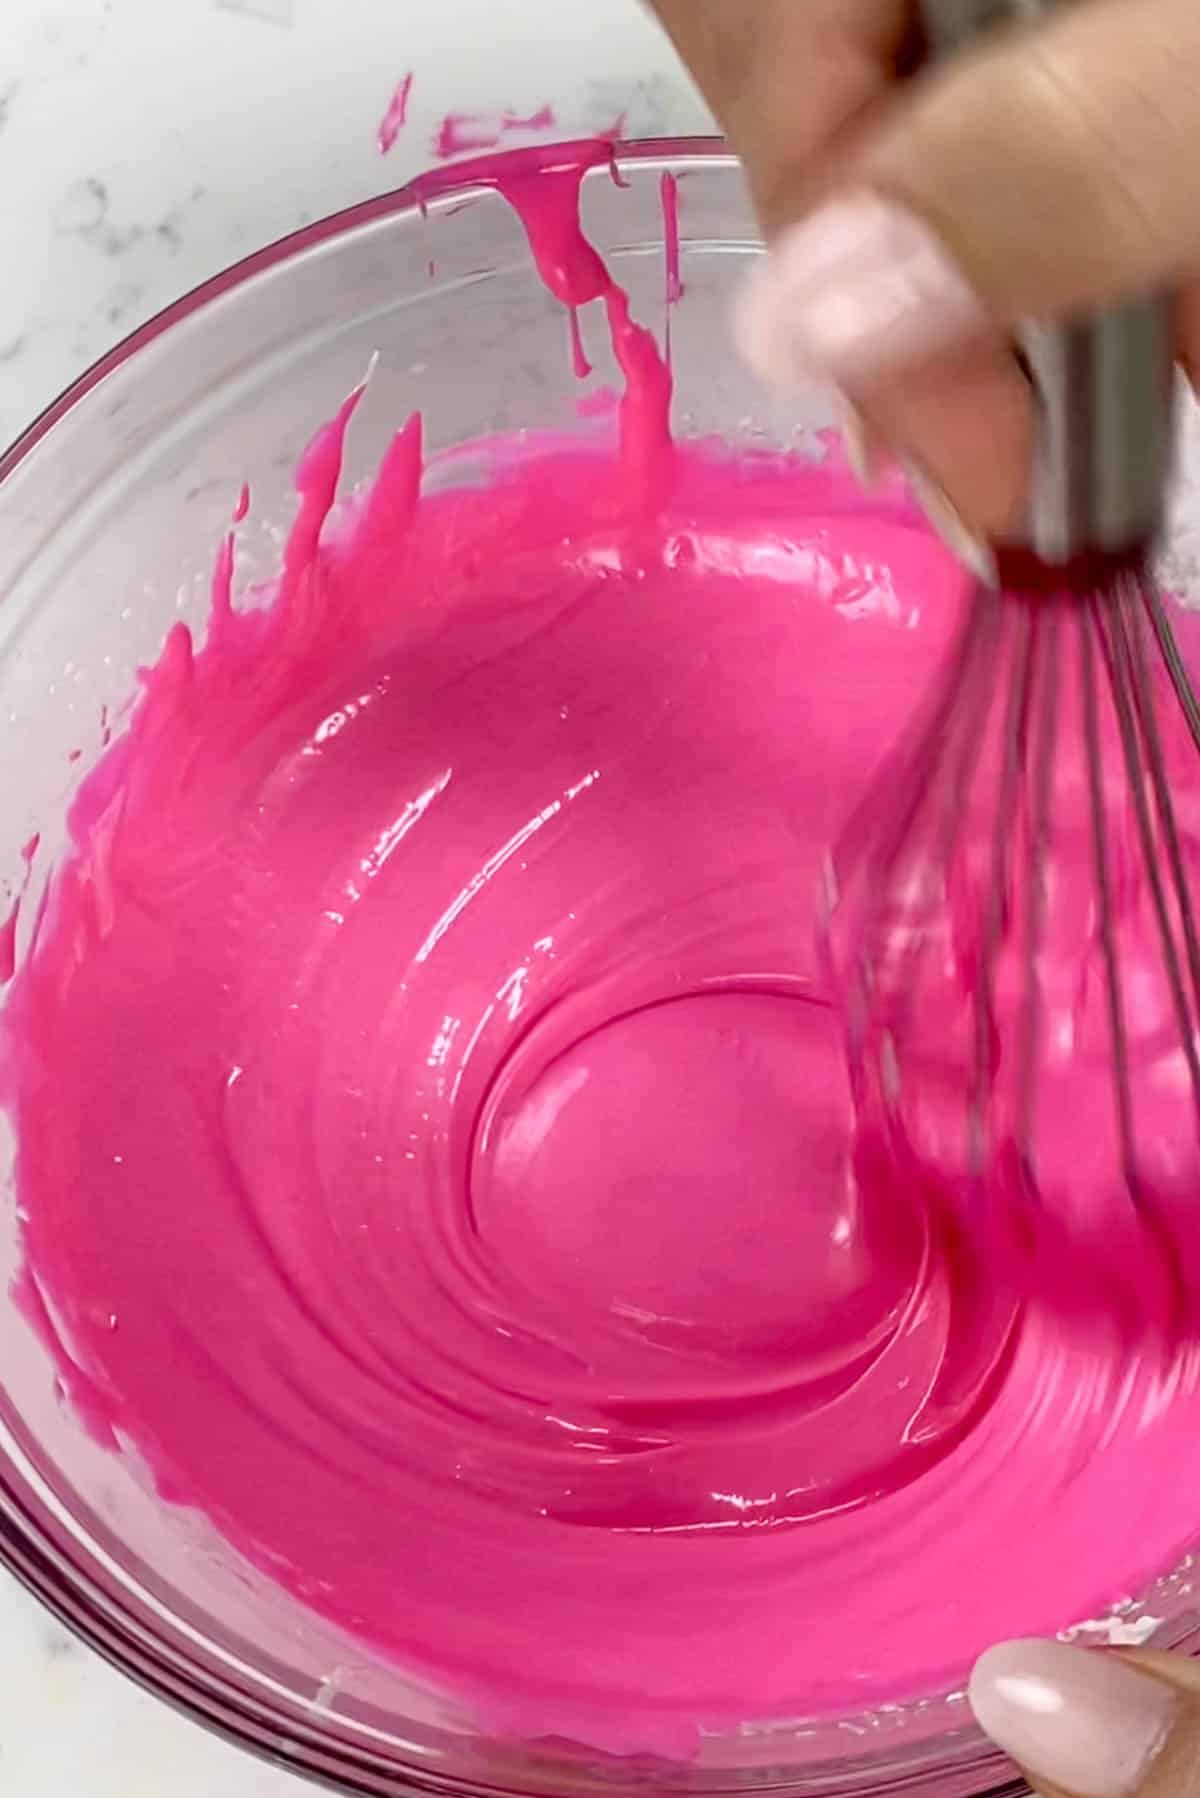
- Color the ganache. Add in your food coloring of choice, plus a couple drops of white food coloring to make the drip less transparent. Mix until smooth.
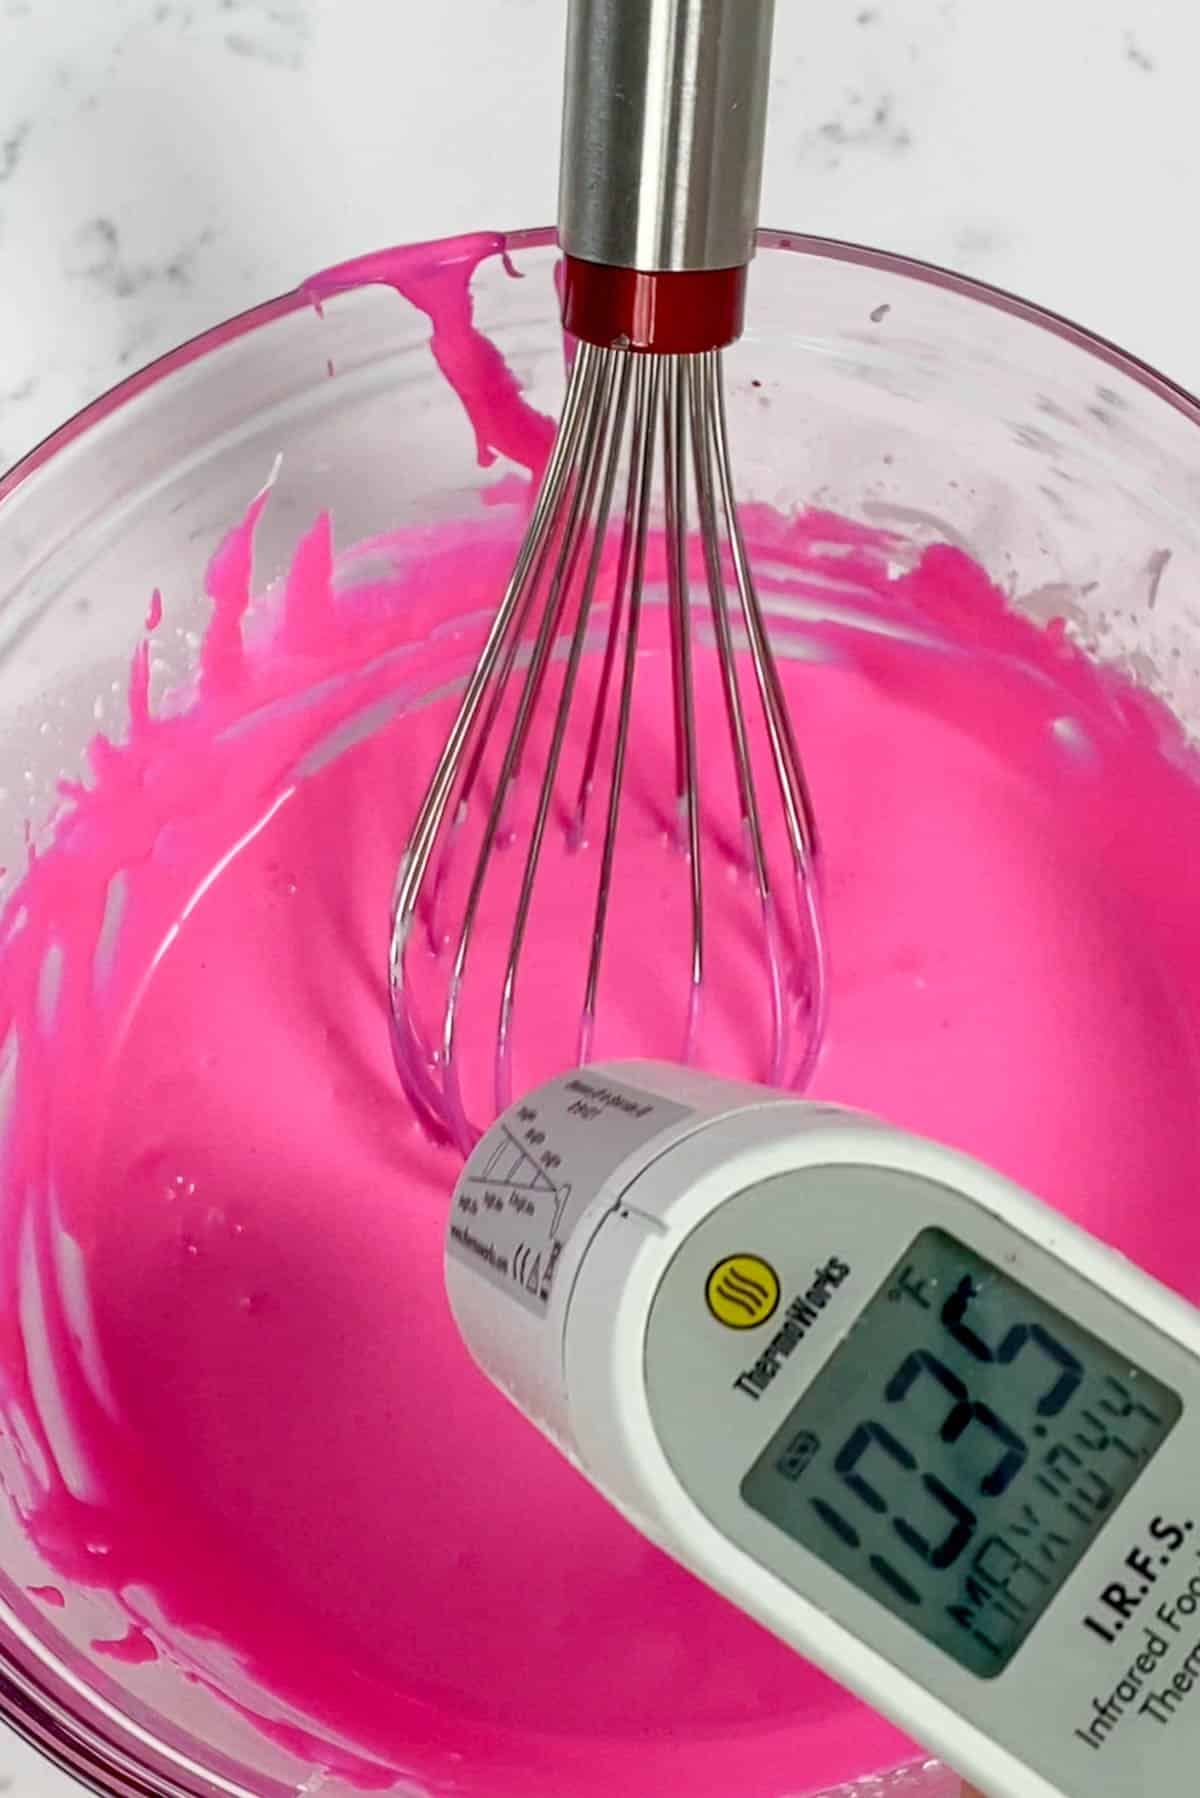
- Cool the ganache. Let the ganache sit for one to two minutes until it's slightly warm but not hot. I shoot for about 90°F. It should flow slowly off a spoon. If it's too warm, the drips will run all the way down the cake.
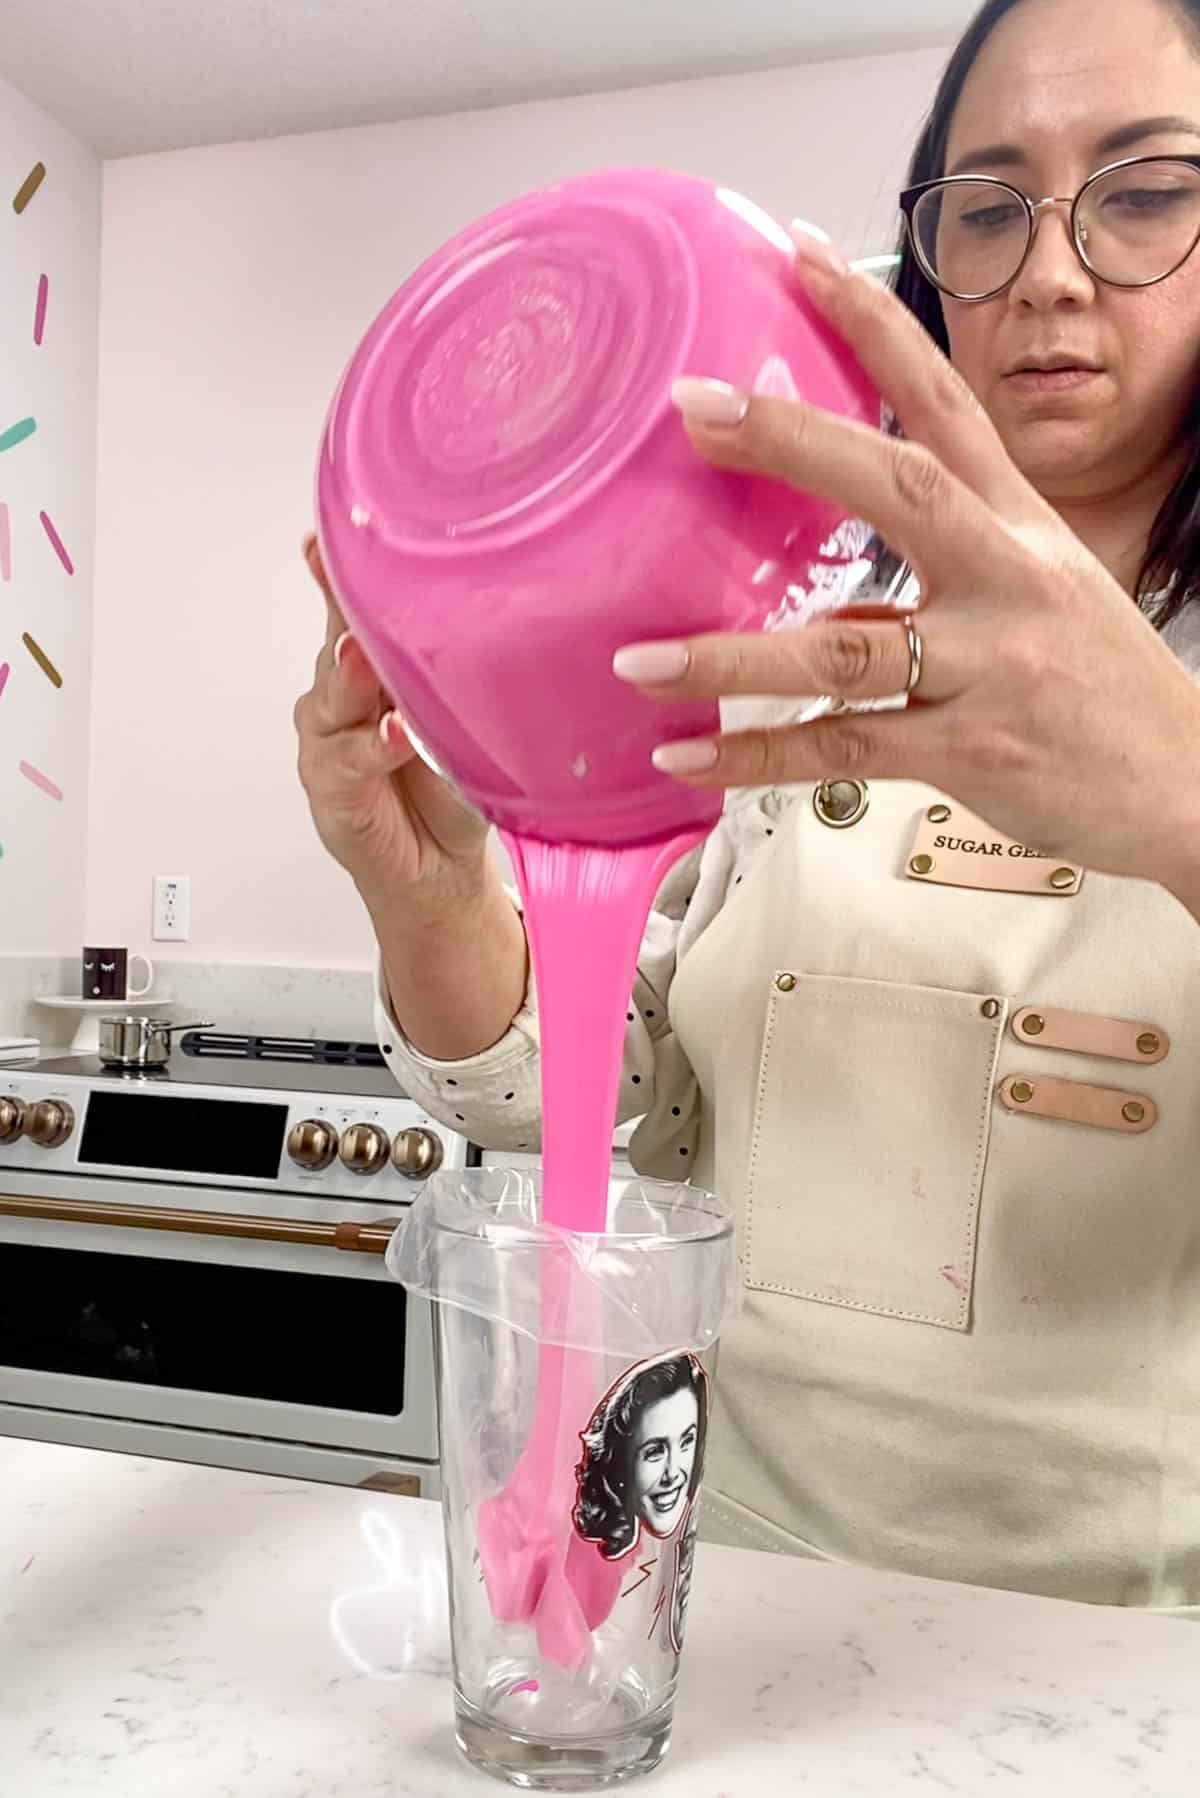
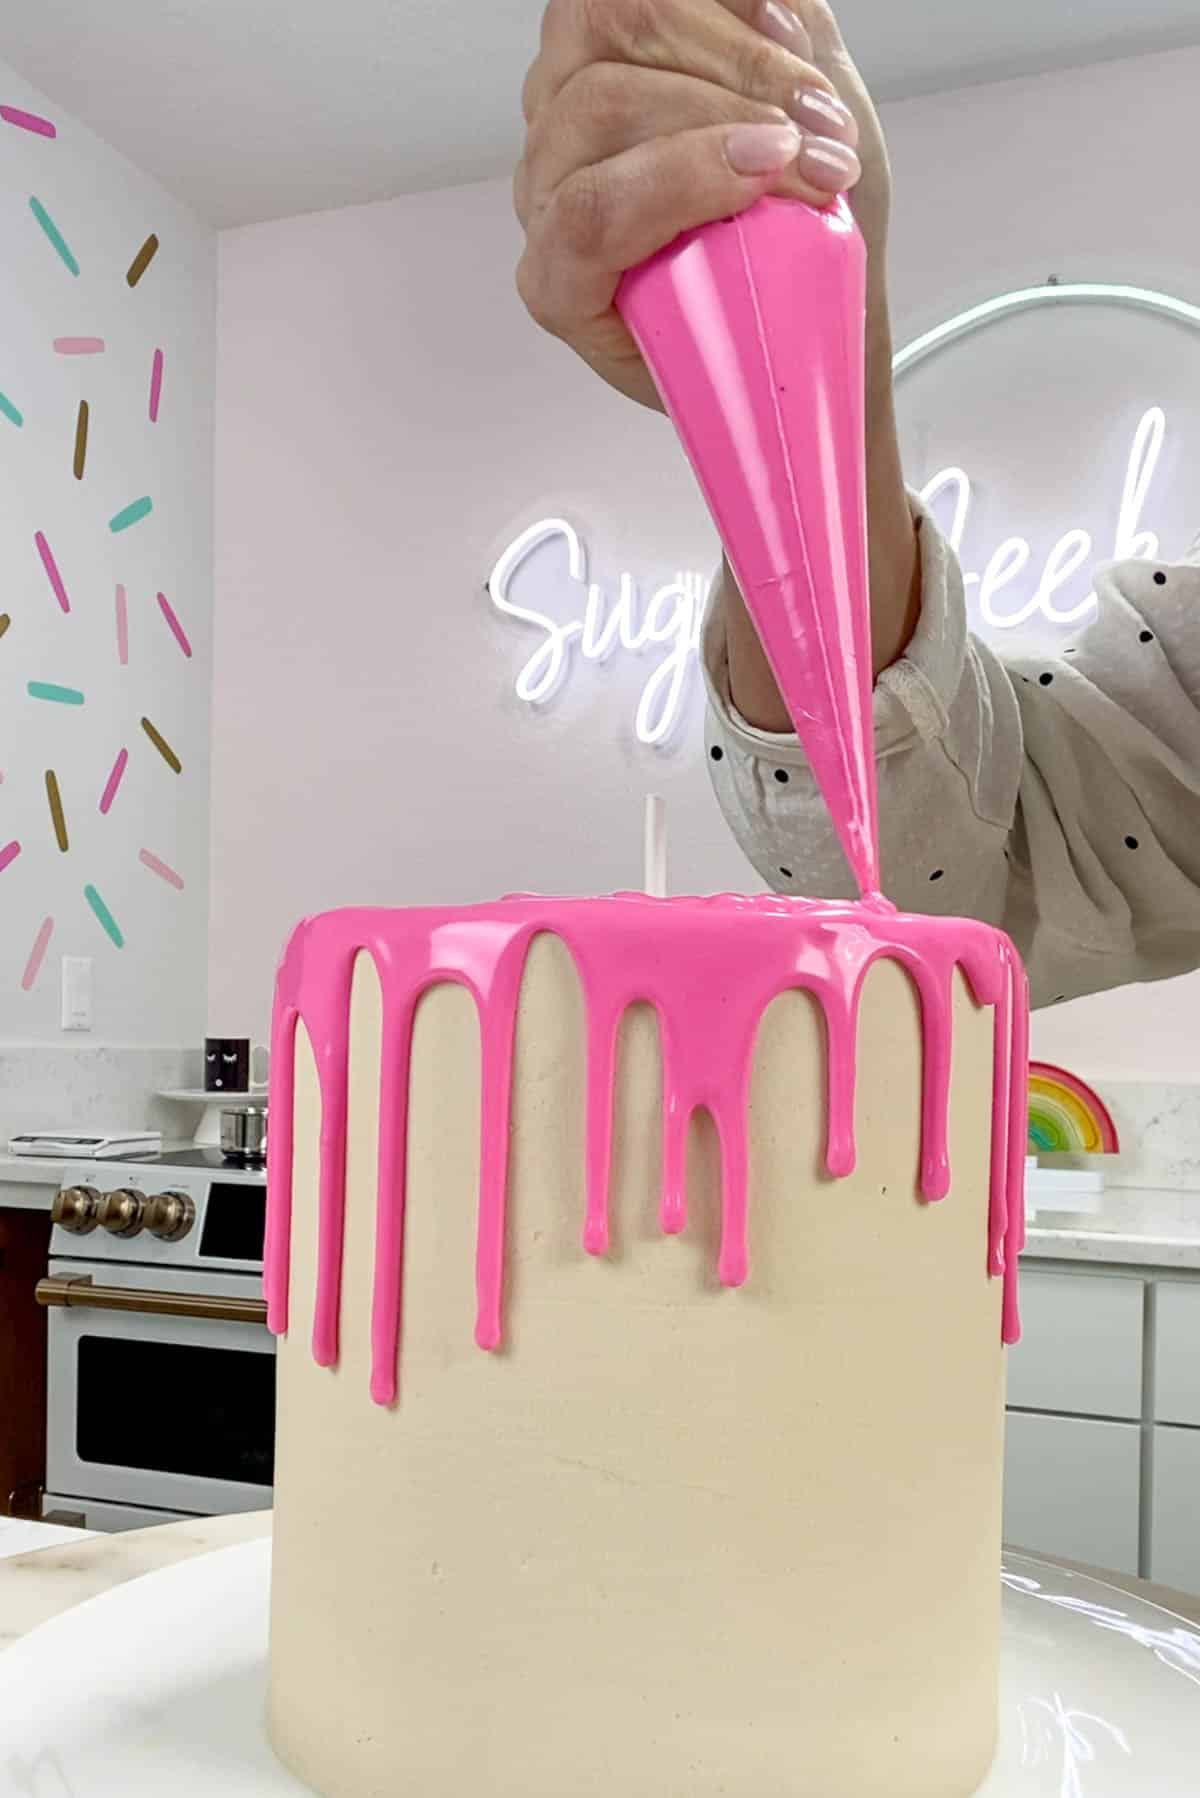
- Piping Bag. Fold a piping bag over a cup and pour the ganache inside. Snip a small amount of the tip off.
If you don't have a piping bag, you can use a ziplock bag with the corner snipped off, or you can just spoon it onto the cake, but your drips will not be as neat.
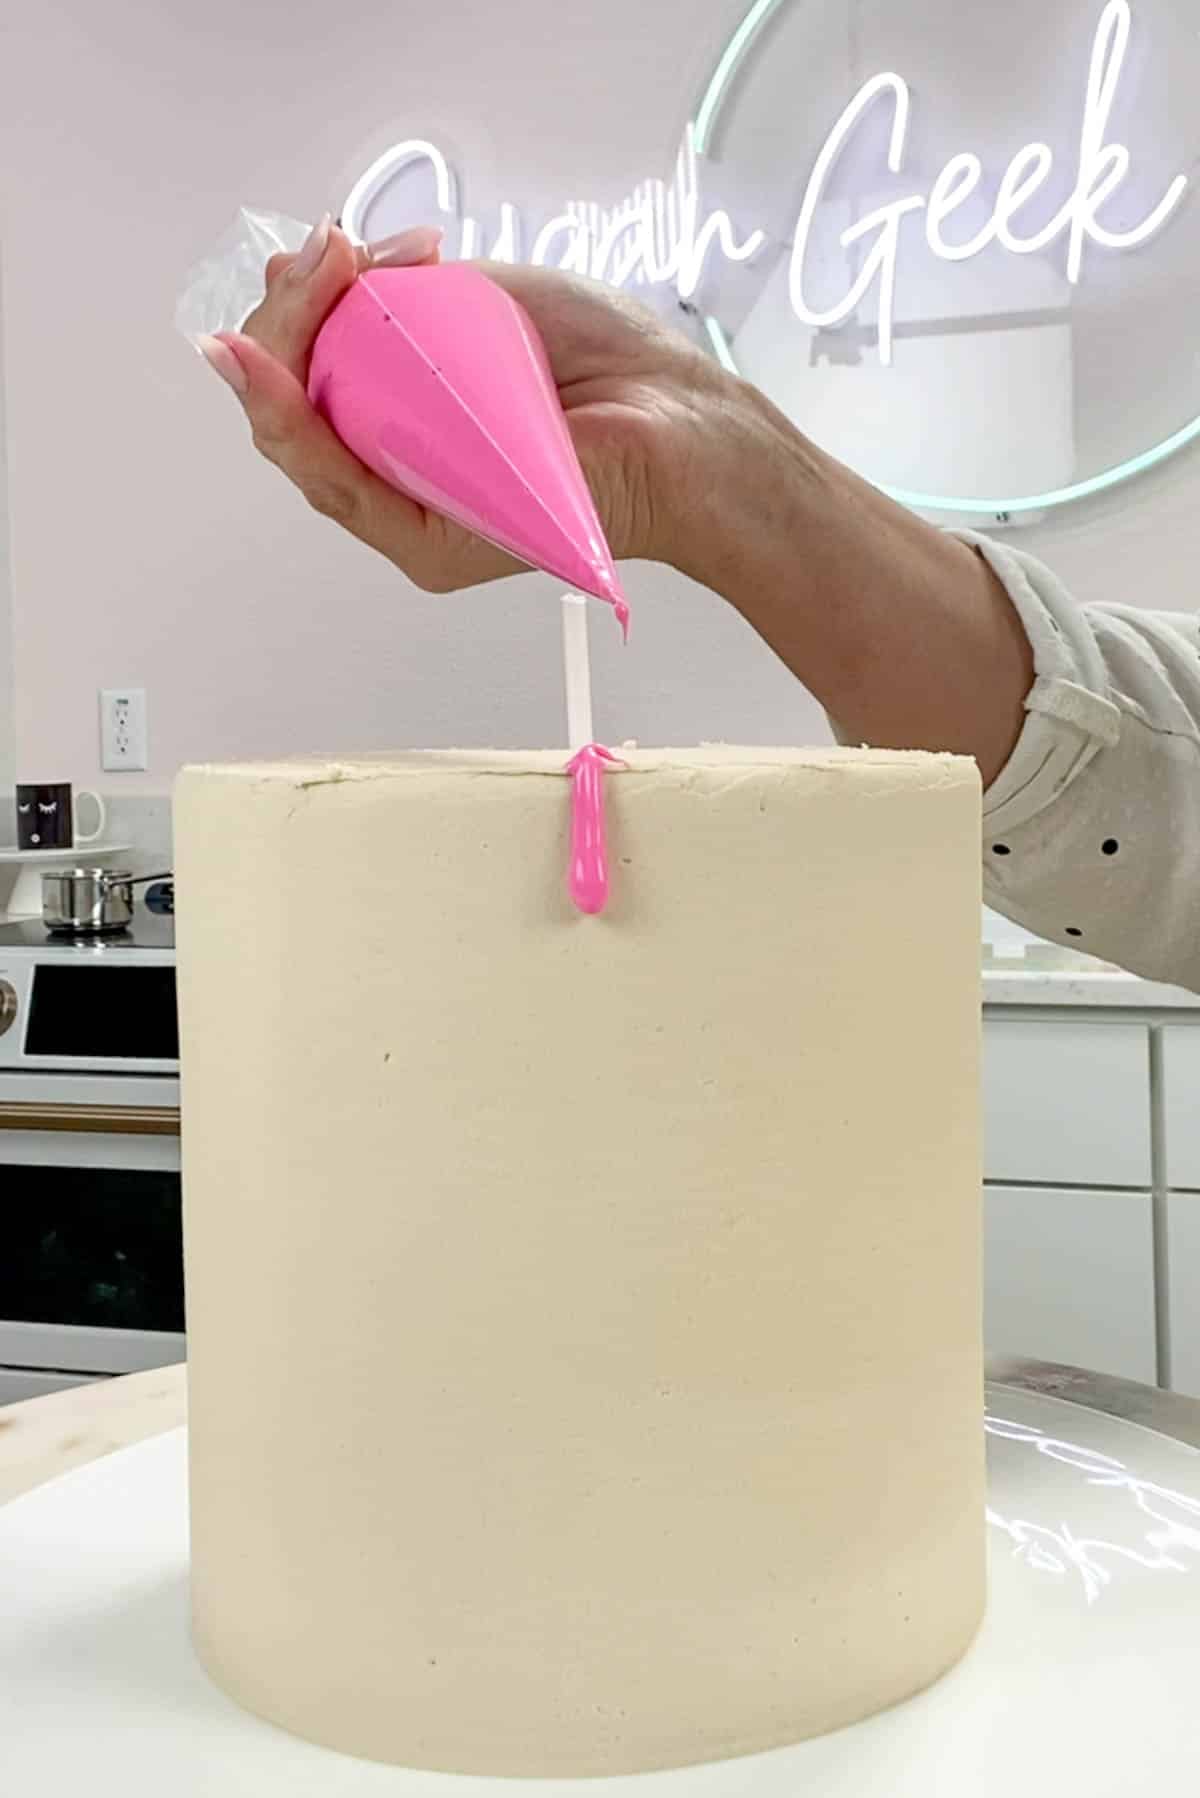
- Test the consistency. Pipe a single drop down the side of a cold drinking glass or bowl. It should set within a few seconds without running all the way down. This is your dry run before committing to the cake.
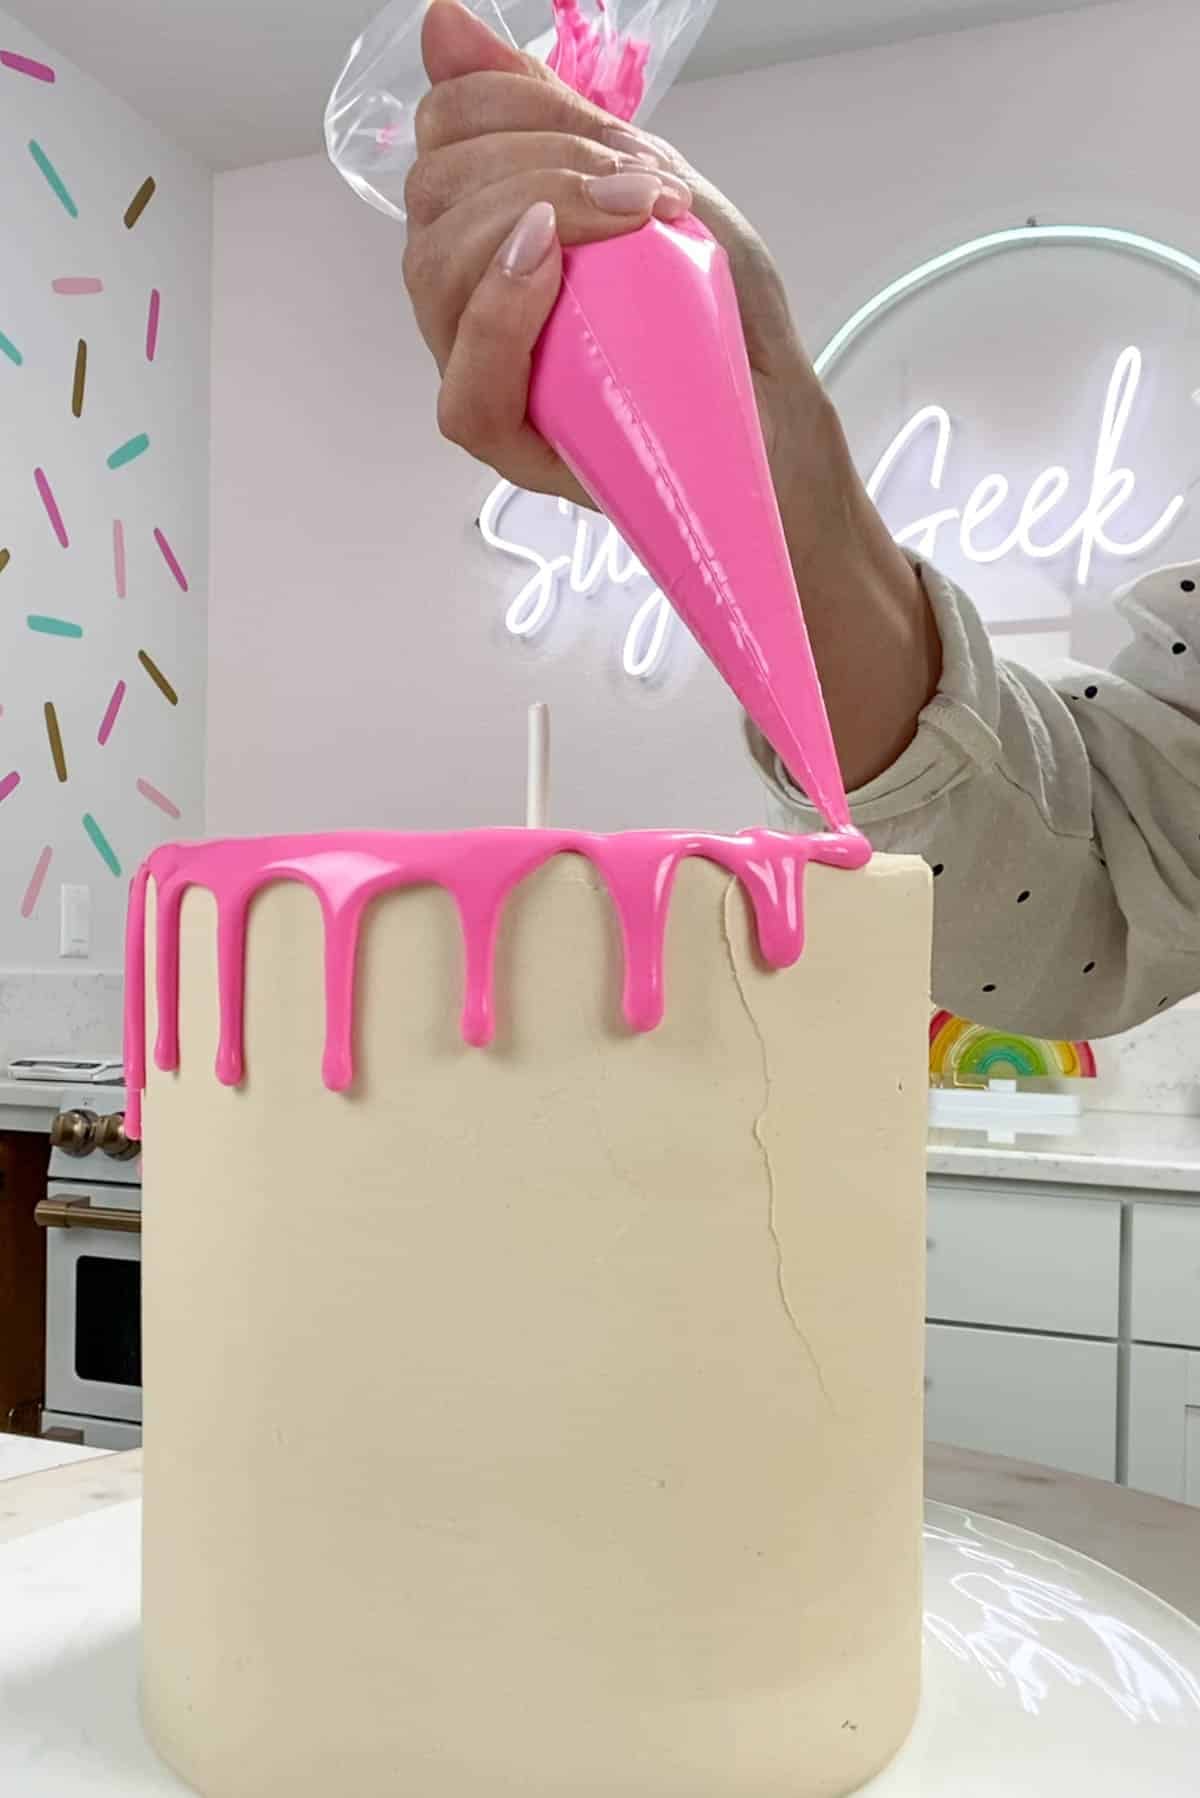
- Pipe the drips. Pipe drips along the edge of a chilled cake (a freshly frosted vanilla cake with easy buttercream is my go-to base). Squeeze with even pressure to make a drip, stop, move the bag over slightly, and repeat.
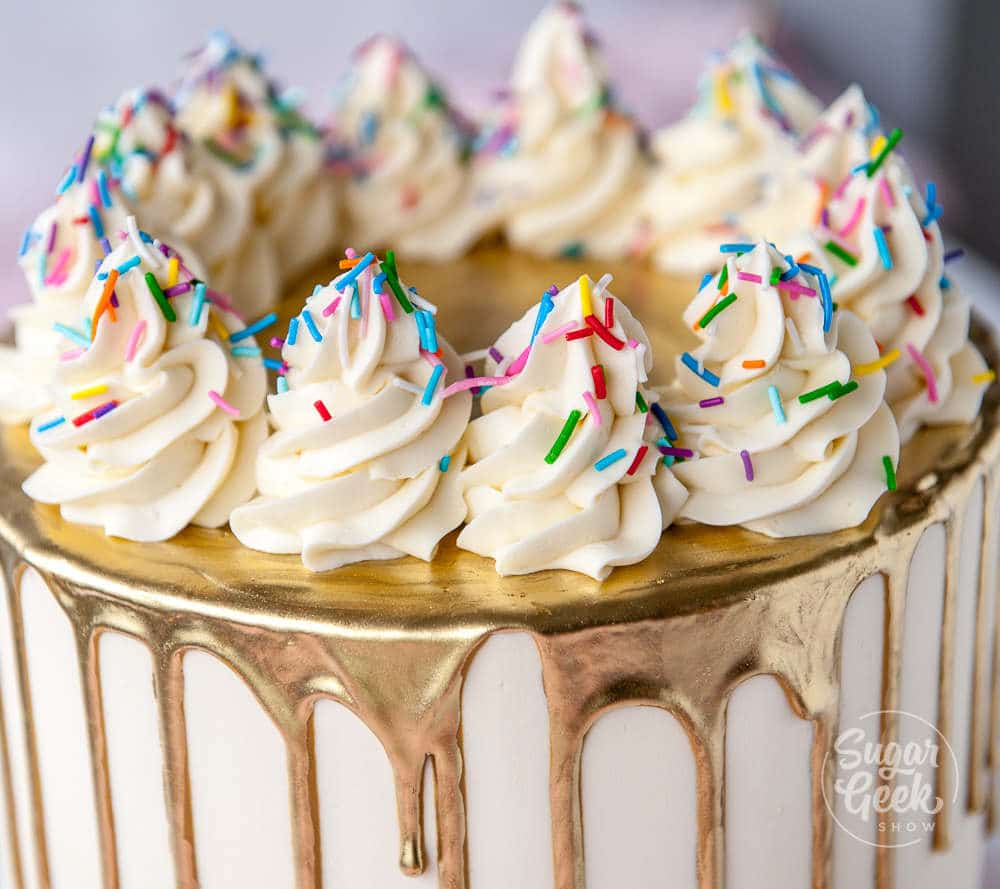
- Once the drips are placed, fill in the top of the cake with a smooth pool of ganache and then smooth it with an offset spatula if desired.
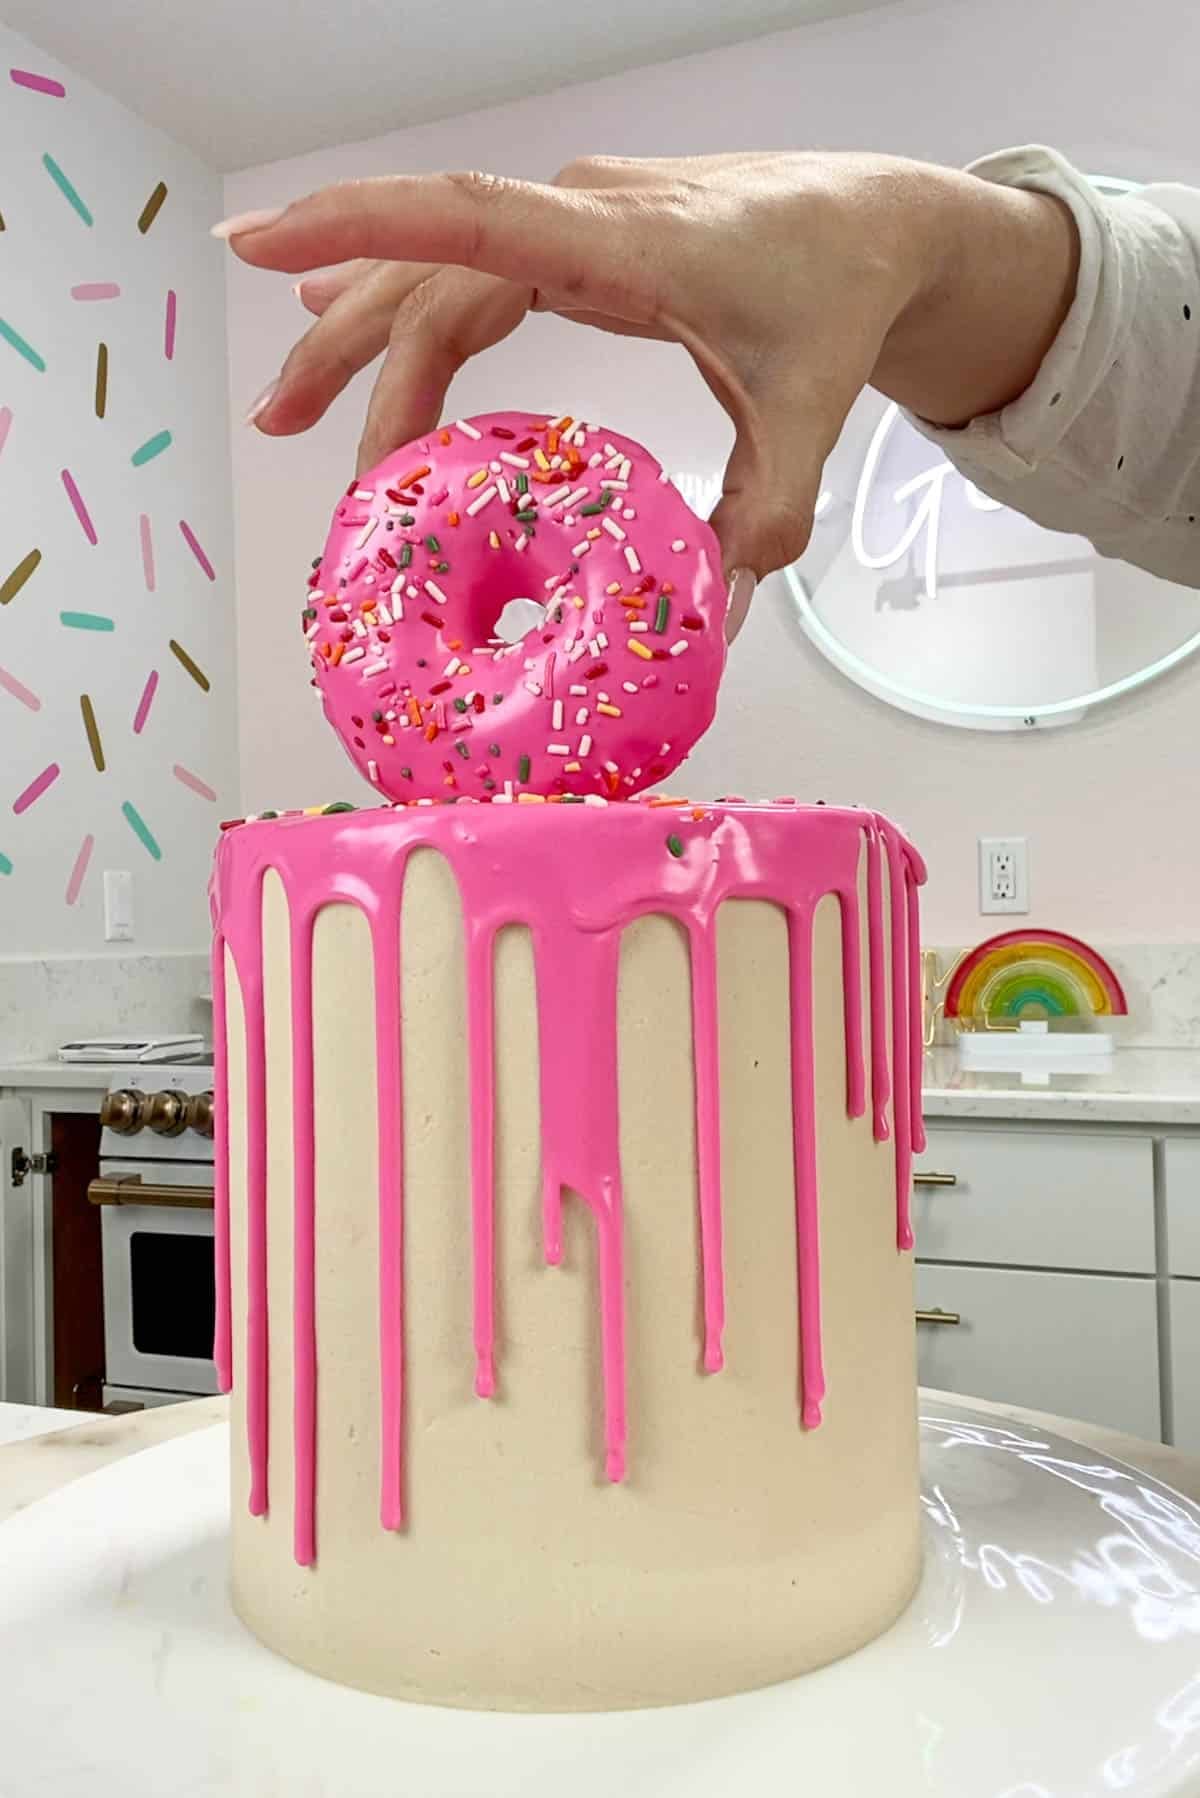
- Decorate the cake as desired.
Cake Batter and Frosting Calculator
Select an option below to calculate how much batter or frosting you need. Adjust the servings slider on the recipe card to change the amounts the recipe makes.
Choose a pan type
Choose a cake pan size
(based on 2" tall cake pan)
Choose a cake pan size
(based on 2" tall cake pan)
Cupcake Tin Size
Choose number of pans
Cups of Batter Needed
8 cups
Cups of Frosting Needed
5 cups
Note: measurements are estimated based off the vanilla cake recipe using standard US cake pans and sizes. Measurements used are for 2" tall cake pans only. Your results may vary. Do not overfill cake pans above manufacturer's recommended guidelines.
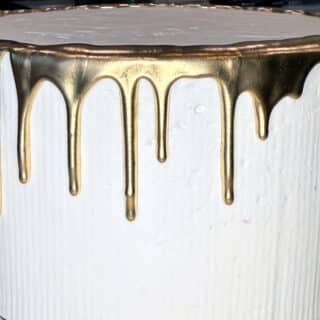
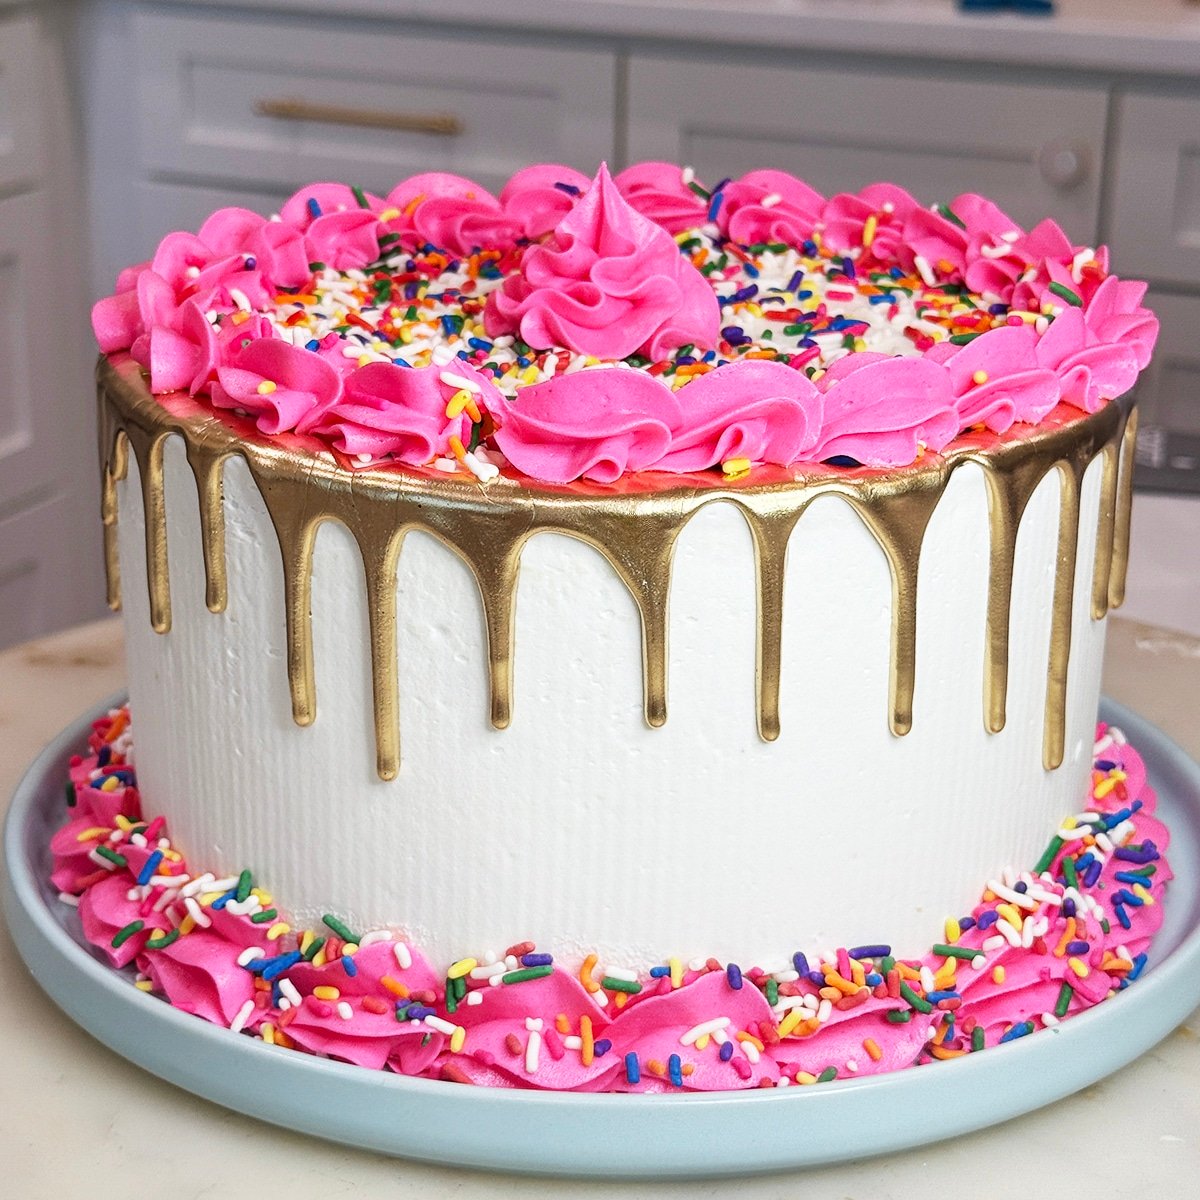
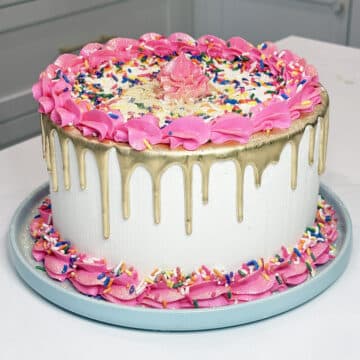
How To Make A Gold Drip Variation
To turn the colored drip into a metallic gold drip, as I did on my rainbow cake, you'll start with the white candy melts version of the base recipe and add two extra steps before piping. The trick is to coat the inside of the piping bag with a paste of luster dust and oil before filling it with ganache. As the ganache passes through the bag, it picks up the metallic coating and pipes out already shiny.
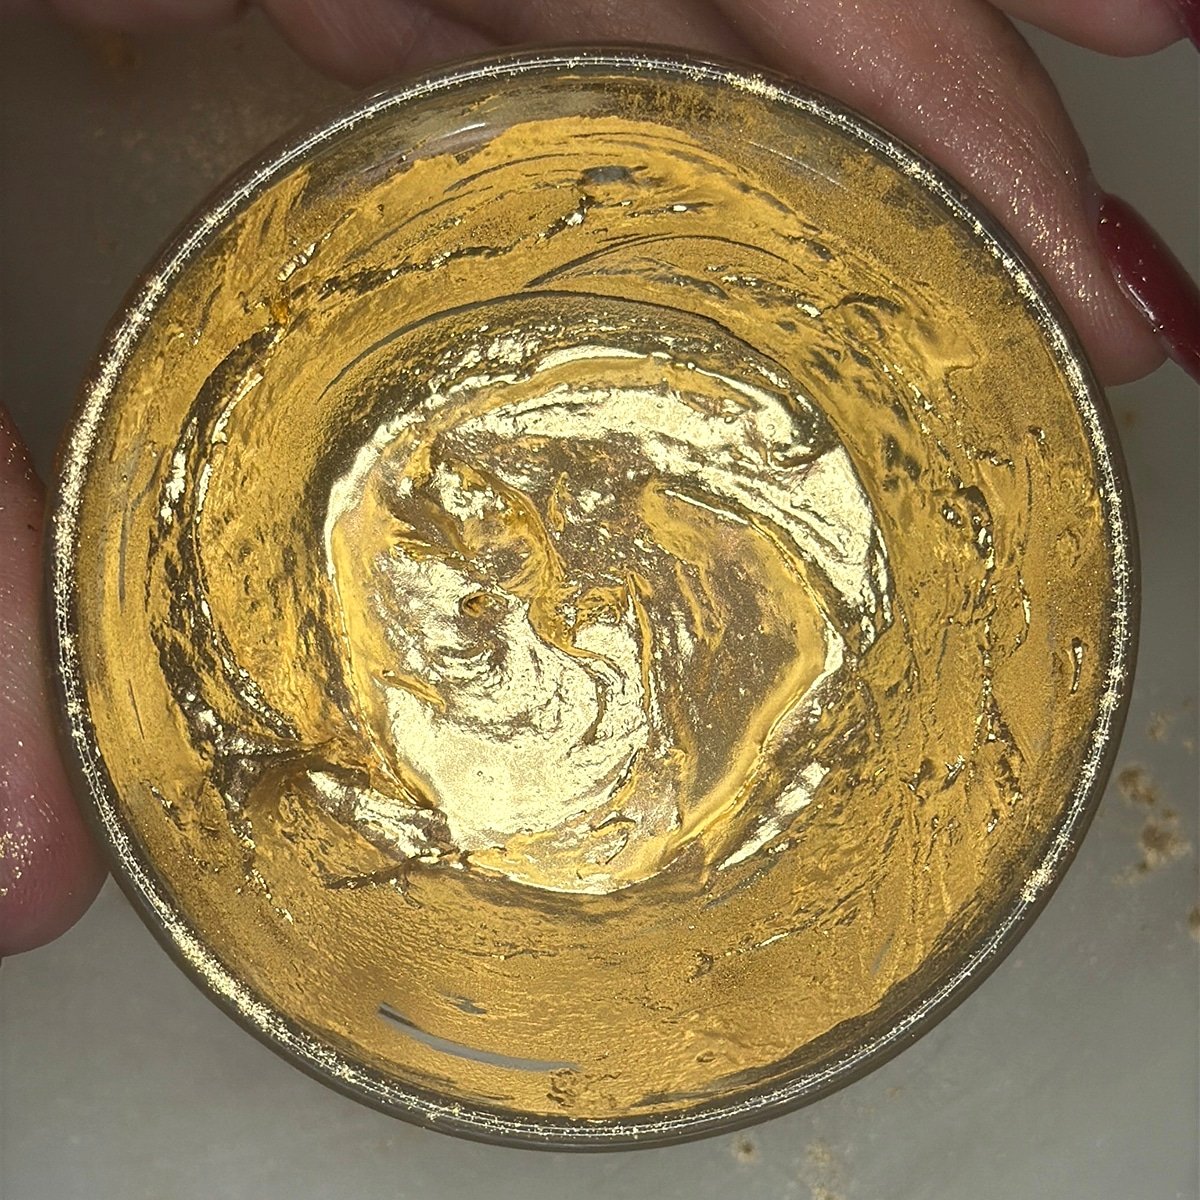
- Make the gold paste. In a small bowl, mix 2 teaspoons of edible gold luster dust and ¼ teaspoon of neutral oil into a thick, glossy paste roughly the consistency of toothpaste. If it's too runny, add more dust; if it's too dry, add a single drop of oil at a time.
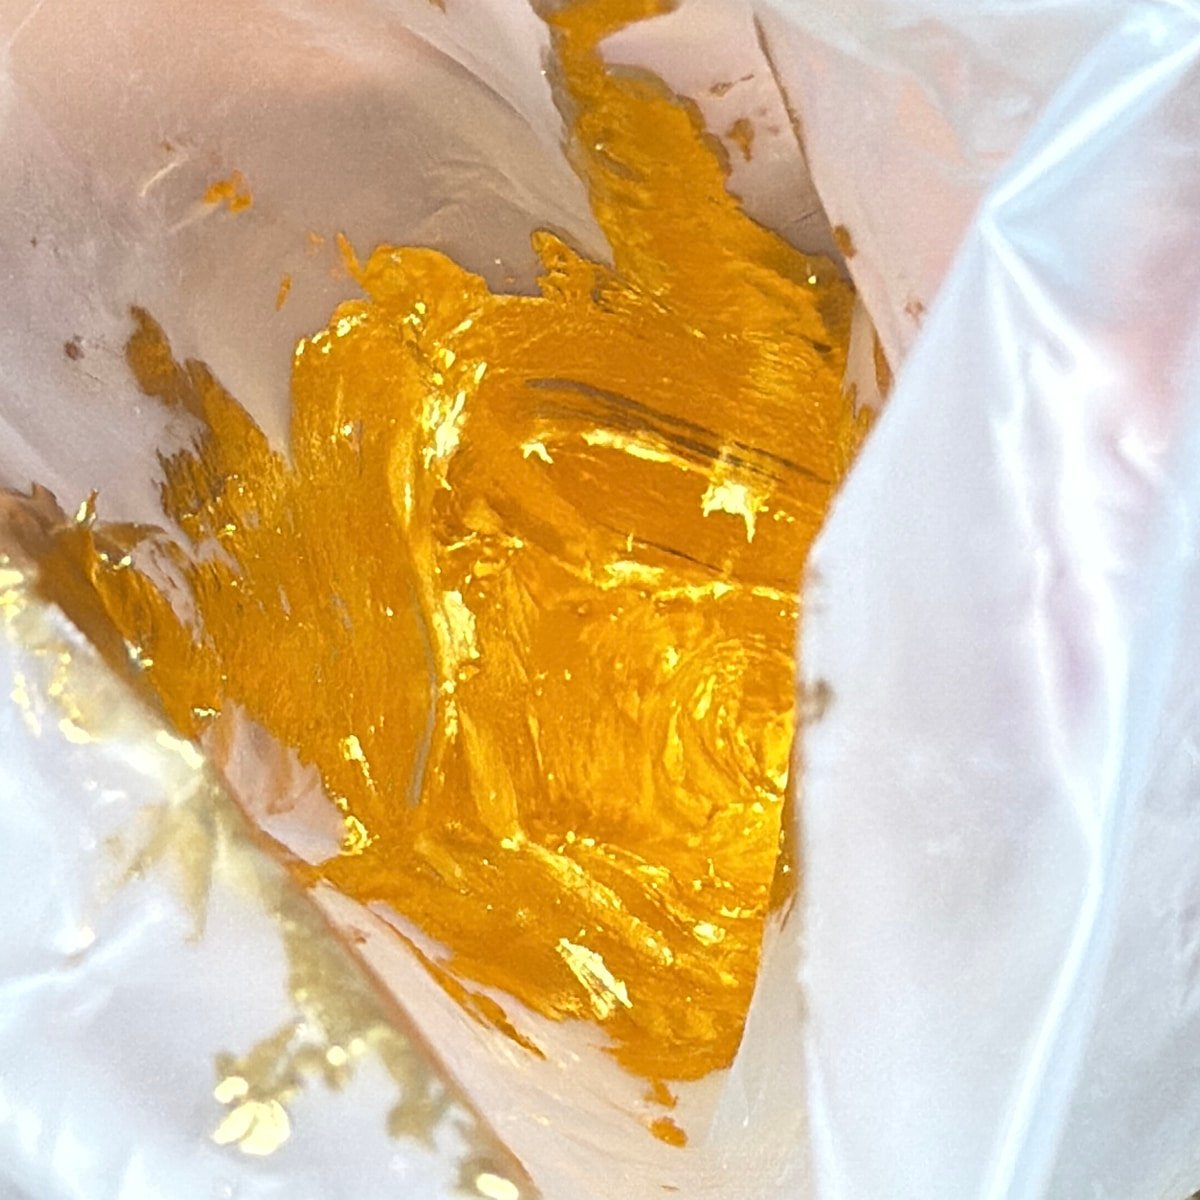
- Coat the piping bag. Place a piping bag into a tall cup or container and fold the edges down. Use a small paintbrush (or an offset spatula) to apply a thick, even layer of gold paste to the inside bottom of the bag, about two to three inches up from the tip. The thicker the coating, the more reflective the finish; for a heavier metallic look, double-coat the bag.
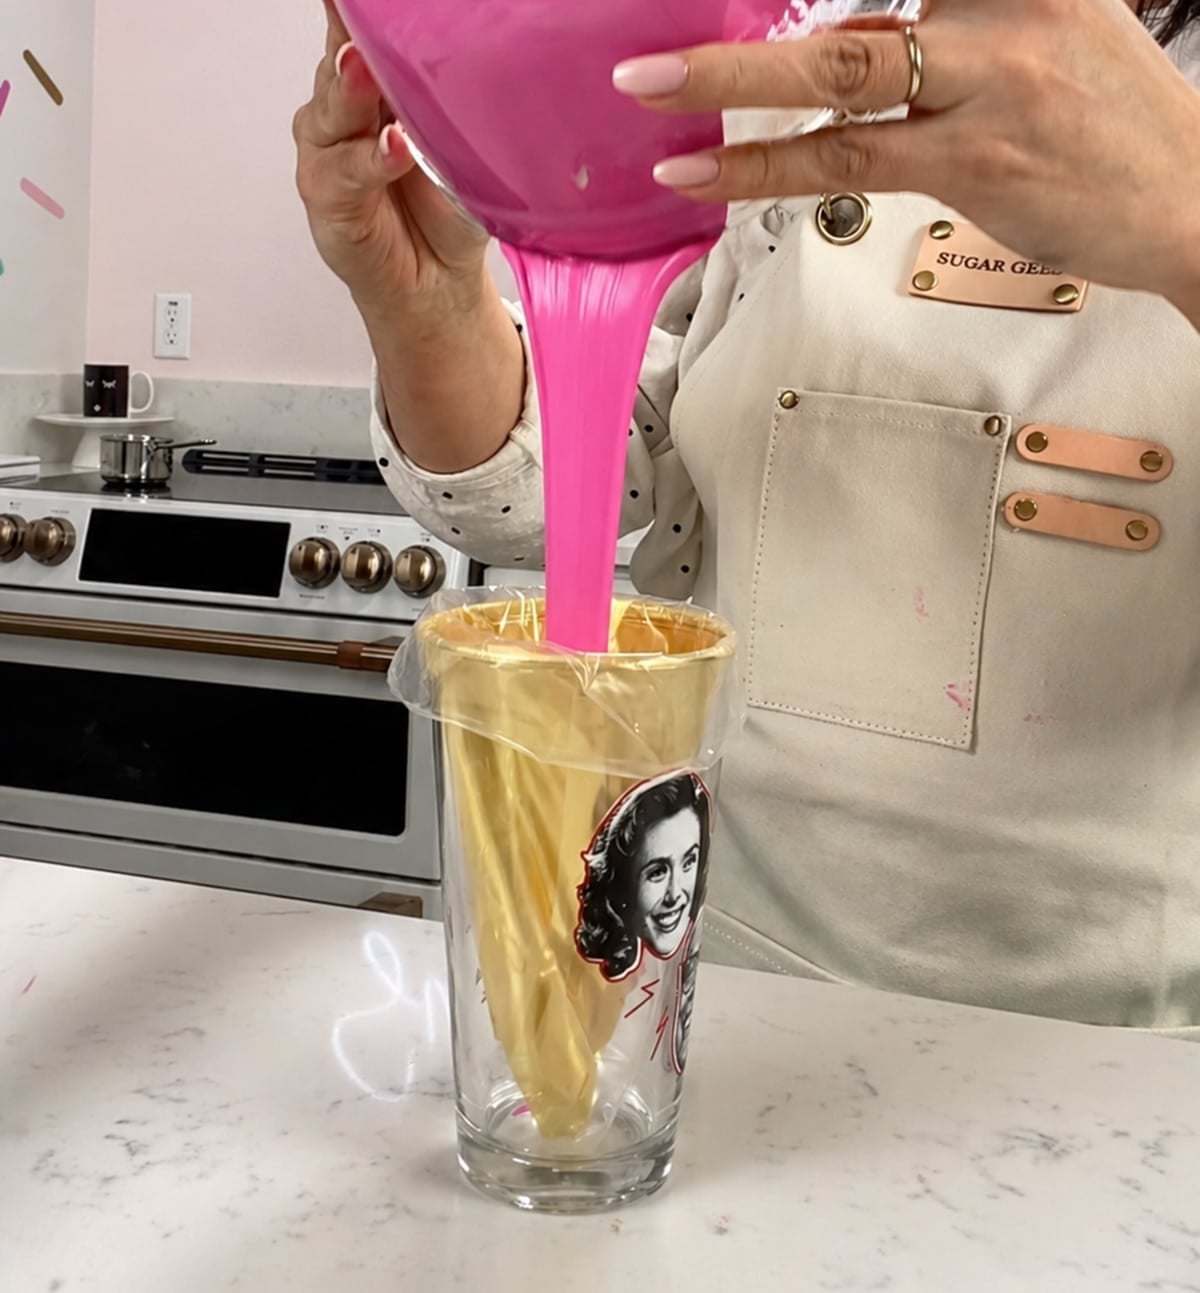
- Fill. Carefully pour your cooled water ganache into the bag without disturbing the dust coating.
Pull the piping bag out of the cup, twist the top to close it, then stip a small amount of the tip off.
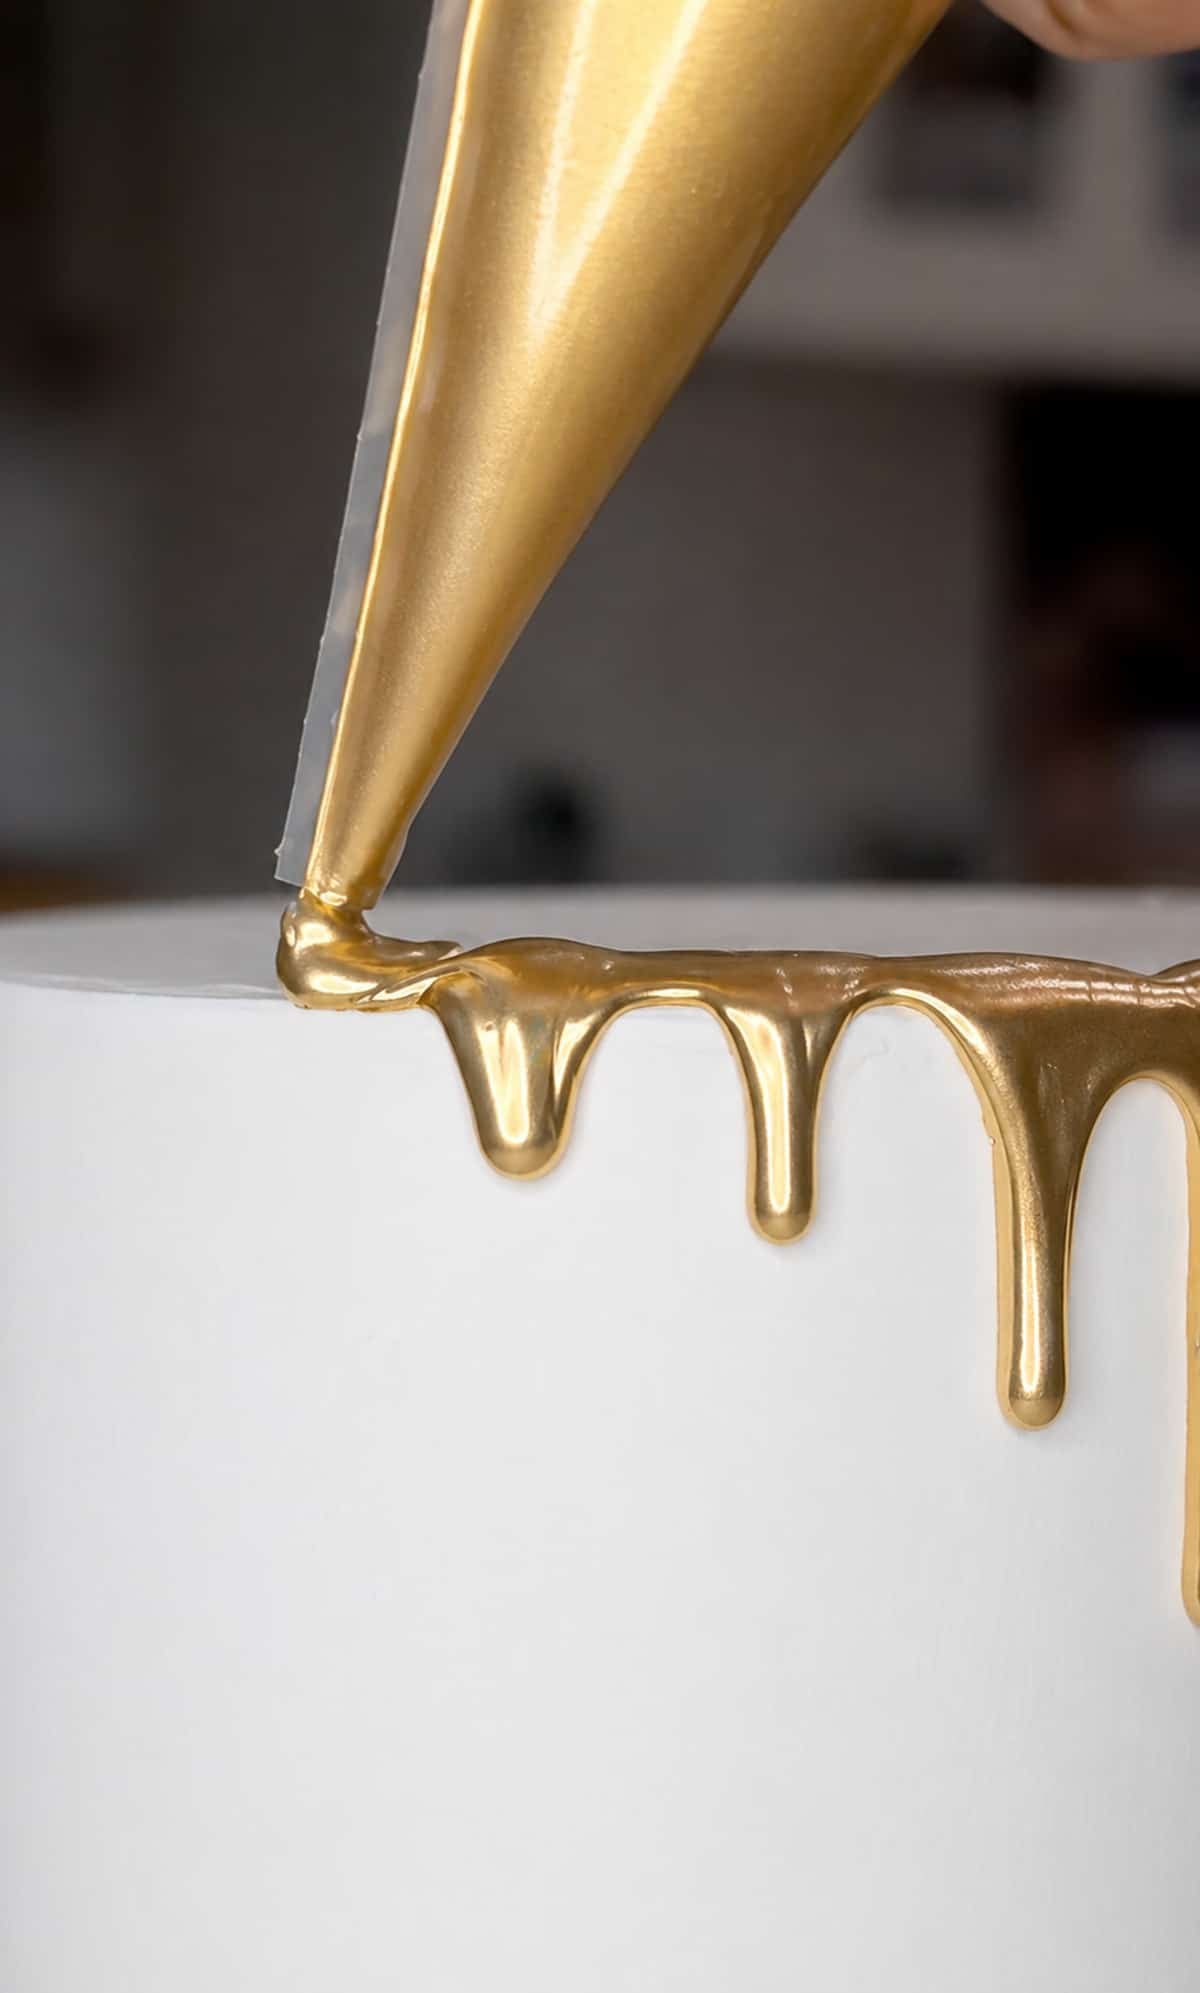
- Pipe drips along the edge of a chilled cake just like the base method. The ganache picks up the gold paste as it passes through the bag and comes out already metallic.
For other metallic colors (silver, rose gold, copper, bronze, antique gold), swap the gold dust for whichever color you want and follow these same steps. For a custom antique gold, mix a small amount of bronze dust into the gold paste before coating the bag.
You can also use this same bag-coating technique with buttercream instead of ganache. Microwave a small amount of buttercream until it's just melted enough to flow, coat the bag with metallic dust, paste the same way, and pipe.
If you'd rather skip the metallic finish entirely and use a traditional cream-based chocolate drip, my chocolate drip recipe walks through the cream-and-chocolate ratios.
Common Drip Cake Problems To Avoid
- Skipping the refrigeration. If you don't refrigerate your cake, your drips are going to drip all down the cake and maybe even become transparent.
- Using hot water ganache. Hot water ganache will not only drip down the cake, but it will also melt your outer layer of buttercream. Always cool your water ganache to about 90ºF before piping it onto your chilled cake.
- Using Chocolate Chips. Chocolate chips have stabilizers in them that can make your drip very chunky and should be avoided.
- Skipping the white food coloring. White candy melts, and white chocolate is pretty transparent, so if you don't add a drop of white food coloring to your water ganache, you could potentially have a transparent drip.
Final Thoughts
I wish I'd had this recipe fifteen years ago. I spent so much time painting individual drips with gold dust and a tiny brush, and the result was always slow, streaky, and inconsistent. Once I figured out the bag-coating trick, drip cakes went from being one of the most stressful parts of a wedding cake setup to something I could knock out in five minutes between layers.
It's also the technique that's most fun to teach in classes, because the moment people see that first gold drip come out of the bag perfectly even, you can watch the lightbulb go off. If you've been frustrated by streaky metallic drips in the past, this is the fix. The first time you try it, you probably won't go back.
Other Cake Techniques To Try
Drip Cake FAQs
A drip cake is a decorated cake with a controlled "drip" of ganache, chocolate, or another liquid topping running down the sides from the top edge. It's a popular finishing technique for wedding cakes, birthday cakes, and celebration cakes because it's visually dramatic but quick to execute once you know the method.
Yes. Any kind of chocolate works for the base ganache because the gold paste coats each drip from the inside of the piping bag, regardless of what color the ganache underneath is. White chocolate gives the cleanest, brightest gold; darker chocolate gives a slightly warmer, more antique tone.
You can, but the result is much duller. Chocolate is opaque, and mixing gold dust into melted ganache buries the metallic particles inside the mixture instead of letting them sit on the surface where they reflect light. The bag-coating method keeps the dust concentrated on the outside of each drip, which is what creates the shine.
No. The amount of oil is tiny (a quarter teaspoon for the entire batch), and using a neutral oil like vegetable, canola, or grapeseed means the flavor blends invisibly into the chocolate. You won't taste it.
Two reasons, almost always. The first is ganache temperature; if it's too hot, it stays liquid all the way down. Cool it until a test drip on a cold glass sets within a few seconds. The second is cake temperature; the cake needs to be cold (refrigerator-cold or briefly freezer-chilled) so the drip stops on contact.
Yes. Microwave a small amount of easy buttercream for a few seconds until it's just melted enough to flow, coat the piping bag with metallic dust paste the same way, and pipe. The result is a slightly softer drip than chocolate ganache, but the same metallic finish.
Yes. Once the drips set (a few minutes at room temperature, or faster in the fridge), the finished cake holds beautifully overnight. Store covered at room temperature if your kitchen is cool, or in the fridge if it's warm or humid. Bring to room temperature before serving so the cake itself isn't cold.
Watch: How To Decorate A Cake Step-by-Step
Before you start decorating, watch the video below where I show you every step of decorating a cake from start to finish. Seeing the process in action makes it much easier to follow along
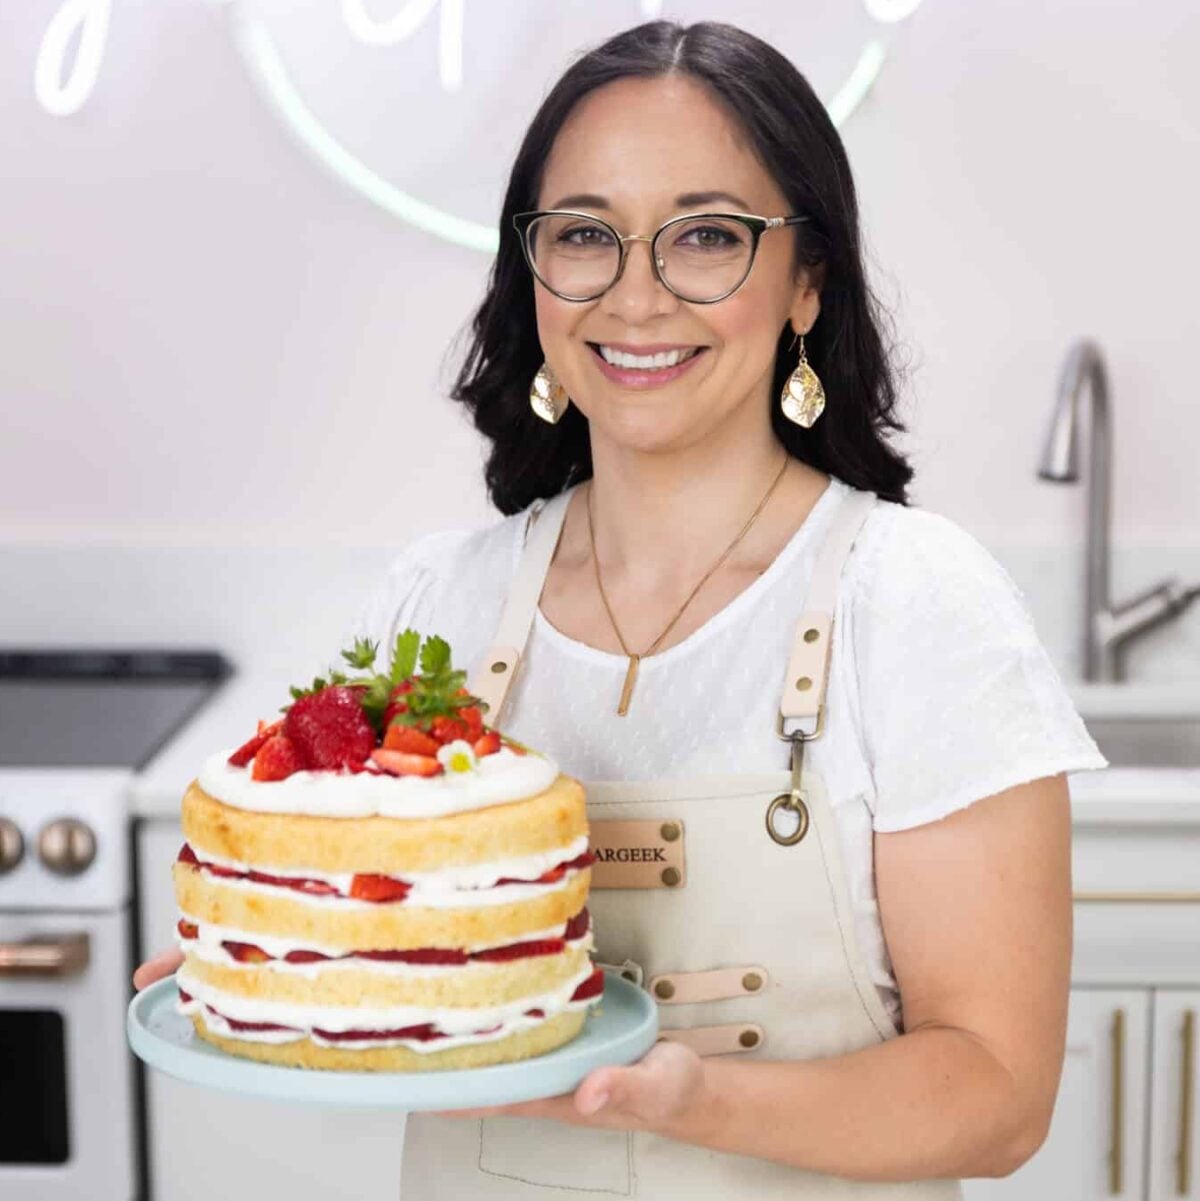
- Liz Marek.
Recipe
Equipment
- 1 Piping Bag Or you can use a ziplock bag
Instructions
- Heat the water in a microwave-safe bowl for about 30 seconds, until hot but not boiling.
- Microwave the candy melts for about 1 minute on full power just to begin the softening process.
- Pour the hot water over the candy melts or chopped chocolate. Let sit for 1 to 5 minutes without stirring. (Alternatively: microwave the water and candy melts together for 30 seconds, then stir.)
- Whisk gently until smooth. If chunks remain, microwave another 15 to 30 seconds and whisk again.
- Cool for 1 to 2 minutes until warm but not hot (about 90°F). Test the consistency by piping a drop down a cold drinking glass; it should set within a few seconds.
- Spoon the cooled ganache into a piping bag, snip a small hole at the tip, and the drip is ready to pipe onto a chilled cake.
Video
Notes
- Use colored candy melts (pink, red, blue, etc.) for the easiest custom color.
- For a custom shade, tint white candy melts with food coloring and a touch of white food coloring to make it less transparent.
- Mix 2 teaspoons edible gold luster dust with ¼ teaspoon neutral oil into a thick paste.
- Place a piping bag in a tall cup, fold the edges down, and use a small paintbrush to coat the inside bottom of the bag with a thick layer of paste, about 2 to 3 inches up from the tip. For a heavier metallic look, double-coat.
- Carefully fill the bag with cooled white water ganache without disturbing the dust coating. Pipe as normal. The same technique works for silver, rose gold, copper, or bronze dust.
- The ganache is best used within 30 minutes of making it. If it sets too soon, microwave in 5 to 10-second bursts and whisk smooth.
- Once piped onto a cake, drips set within a few minutes at room temperature.
- Don't substitute chocolate chips for the candy melts or chopped chocolate; the stabilizers prevent clean melting.
- Don't use olive oil or coconut oil for the metallic paste; they carry flavor through to the finished drip.
- Don't apply to a warm cake. Always pipe onto a chilled cake.