
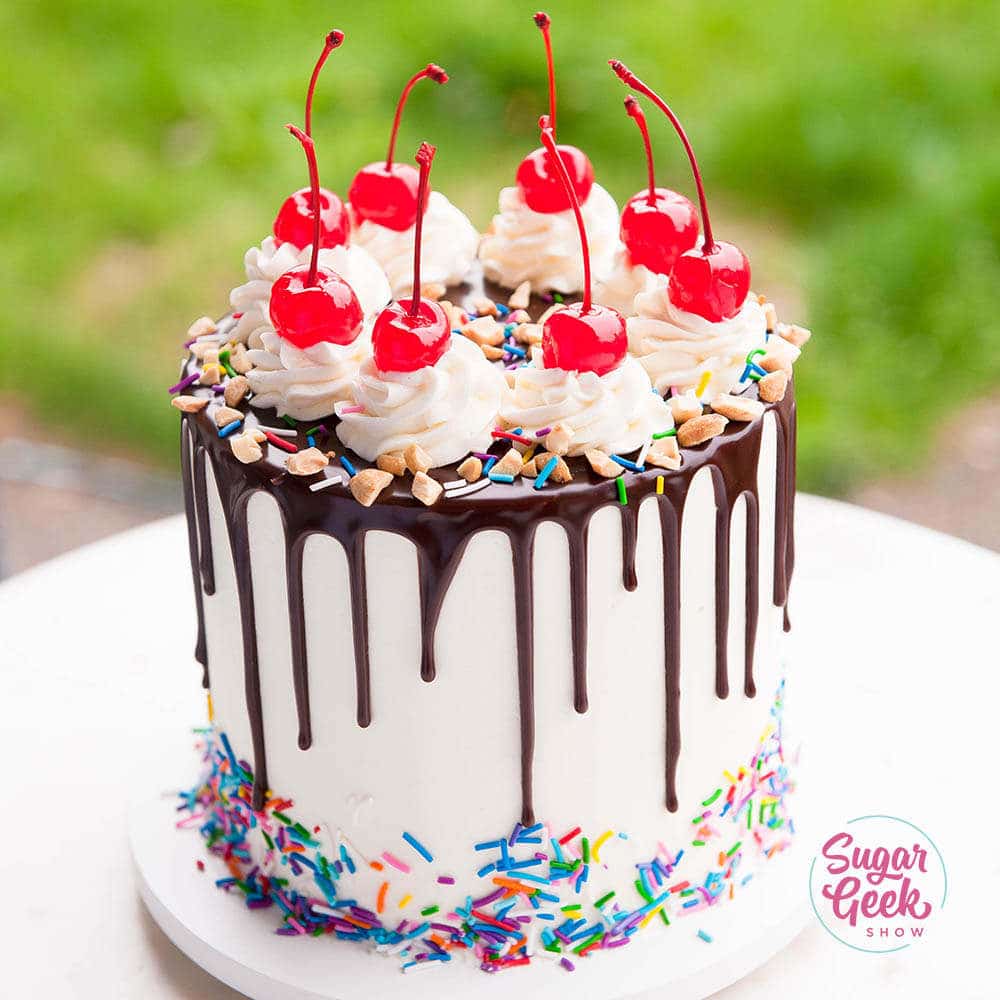
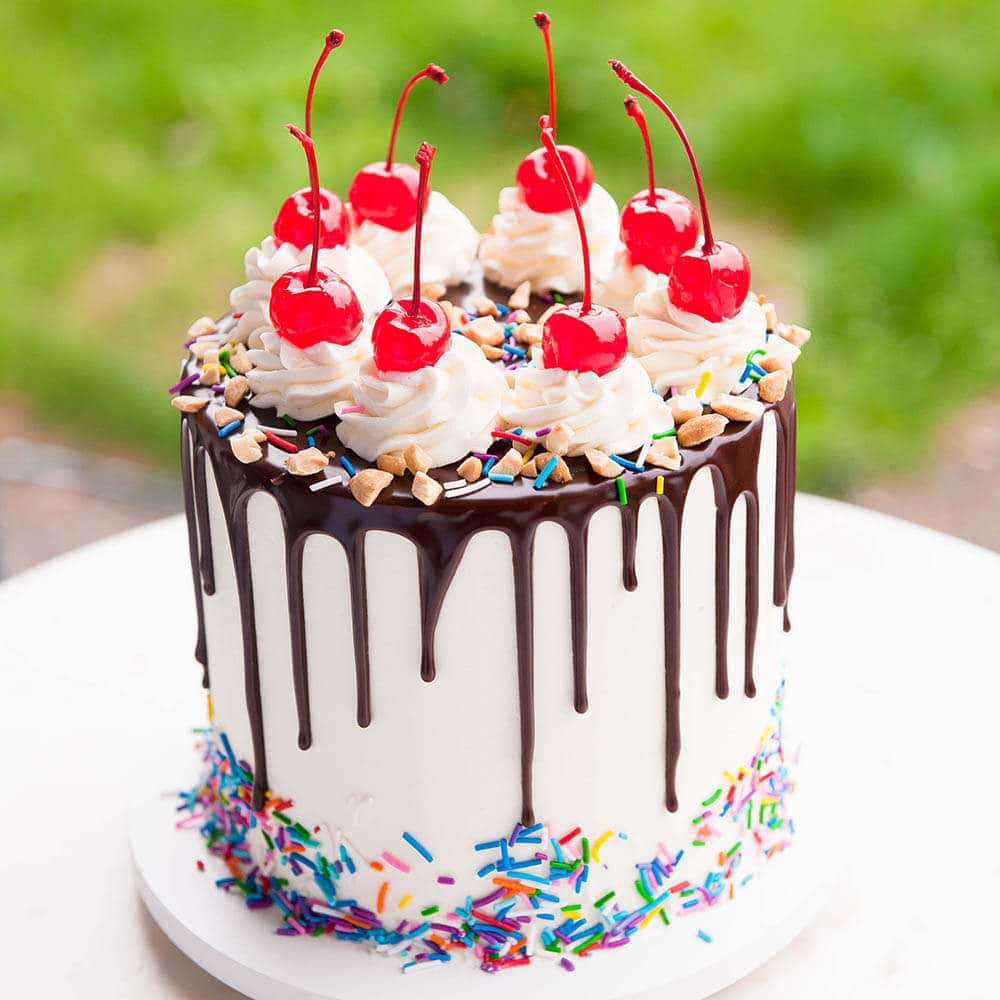
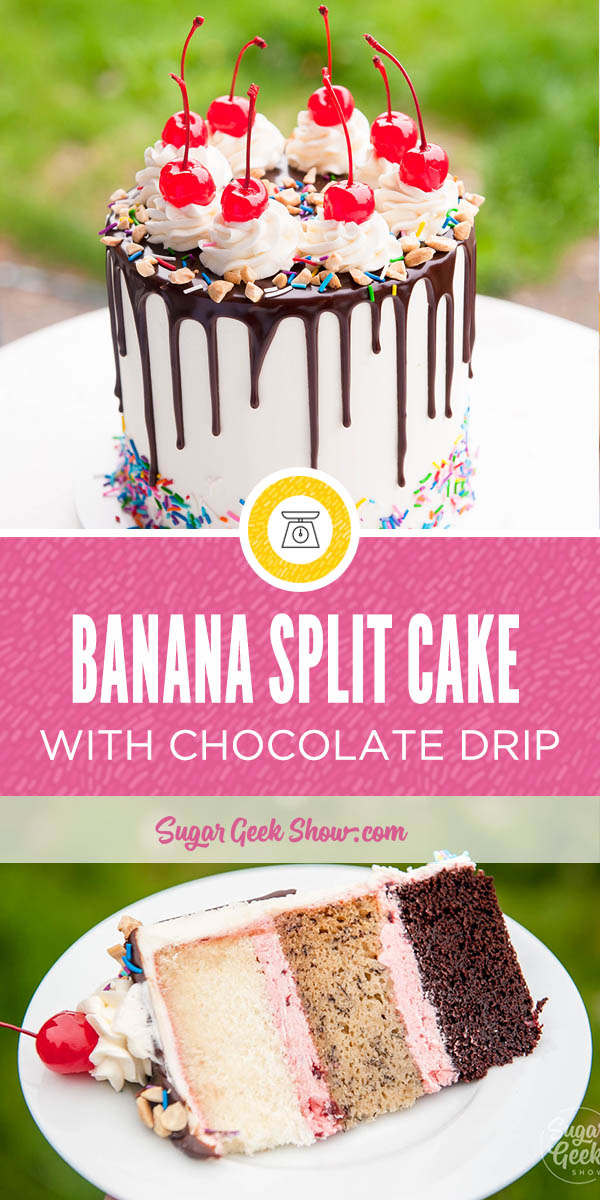
A banana split cake made from decadent strawberry, vanilla, and chocolate cake and topped with chocolate drip and cherries!
I am in love with this banana split cake! It's so festive! Totally takes me back to those yummy banana splits I had when I was a kid with heaps of creamy ice cream and of course toppings like maraschino cherries, sprinkles, and nuts!.
Whenever I have leftover cake batter, I always bake it up in a 6" round and freeze it. When I was still making cakes for clients I would use these cakes for the cake tastings.
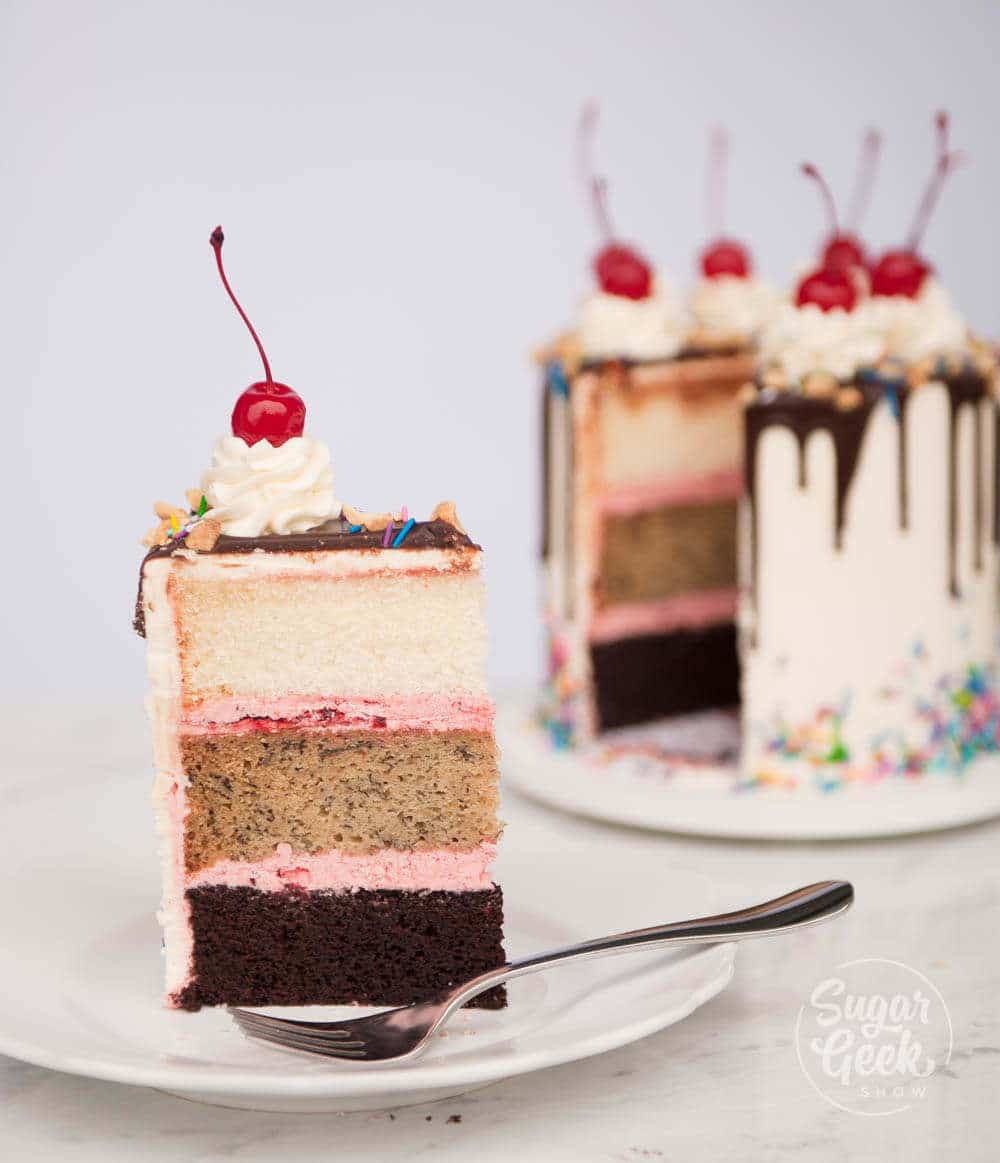
Now that it's up to me to eat all that leftover cake, I decided to take some of my leftover chocolate cake, strawberry cake, and banana cake and make a banana split drip cake!
If you don't have any leftover cake in your freezer then go ahead and follow the recipe below. This will make one 8" layer of each flavor of cake. The perfect amount for a fun birthday or celebration!
How to make a banana split cake
After you bake up your layers, let them cool fully. I put mine in the freezer (unwrapped) for about an hour to speed up the process.
Level off your cakes by cutting off the domes and trim off the brown from the bottom and sides (optional).
I decided to fill my cakes with my fresh strawberry buttercream because it's more stable for traveling but you can definitely use stabilized whipped cream with fresh strawberries layered on top. Whipped cream is softer but tastes more like a traditional banana split cake.
I finished my cake with a smooth layer of easy buttercream on the outside of the cake and then popped it back into the freezer to chill for 15 minutes while I made my chocolate drip.
If you need more detailed info on how to make a cake then you can watch my free tutorial for beginners.
I added some rainbow sprinkles to the base of the cake too, which really gives it the festive banana split look!
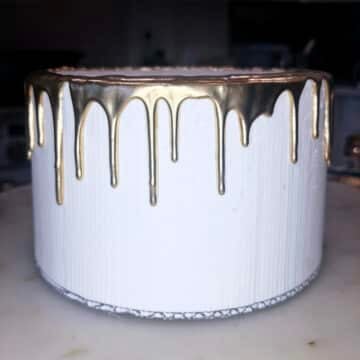
How to make a chocolate drip
To make the chocolate drip, I decided to go with a ganache drip but you can also make a water ganache drip if you prefer.
To make the drip I combined heated 4 oz of cream on the stove in a small pan just until it started to steam. Do not let the cream boil or it will cause your ganache to be grainy.
I poured this cream over 6 oz of finely chopped semi-sweet chocolate. Press down the chocolate so that it's fully submerged in the cream. Let sit for 5 minutes.
After 5 minutes you can whisk the chocolate until it's smooth. Sometimes you see some small lumps of unmelted chocolate. You can get rid of them with an immersion blender or pop everything into the microwave for 30 seconds to melt further.
If your ganache is too thin, you can add in another ounce of melted chocolate to the mixture. If your ganache is too thick, add in another ounce of hot cream (can be warmed in the microwave).
The chocolate you use will GREATLY affect the consistency of the ganache but no matter what, you can always fix your ganache.
Once your ganache has cooled a bit, I pour mine into a piping bag so I can have more control of the drip. You can use a squeeze bottle too but a spoon will make your drips too globby and messy.
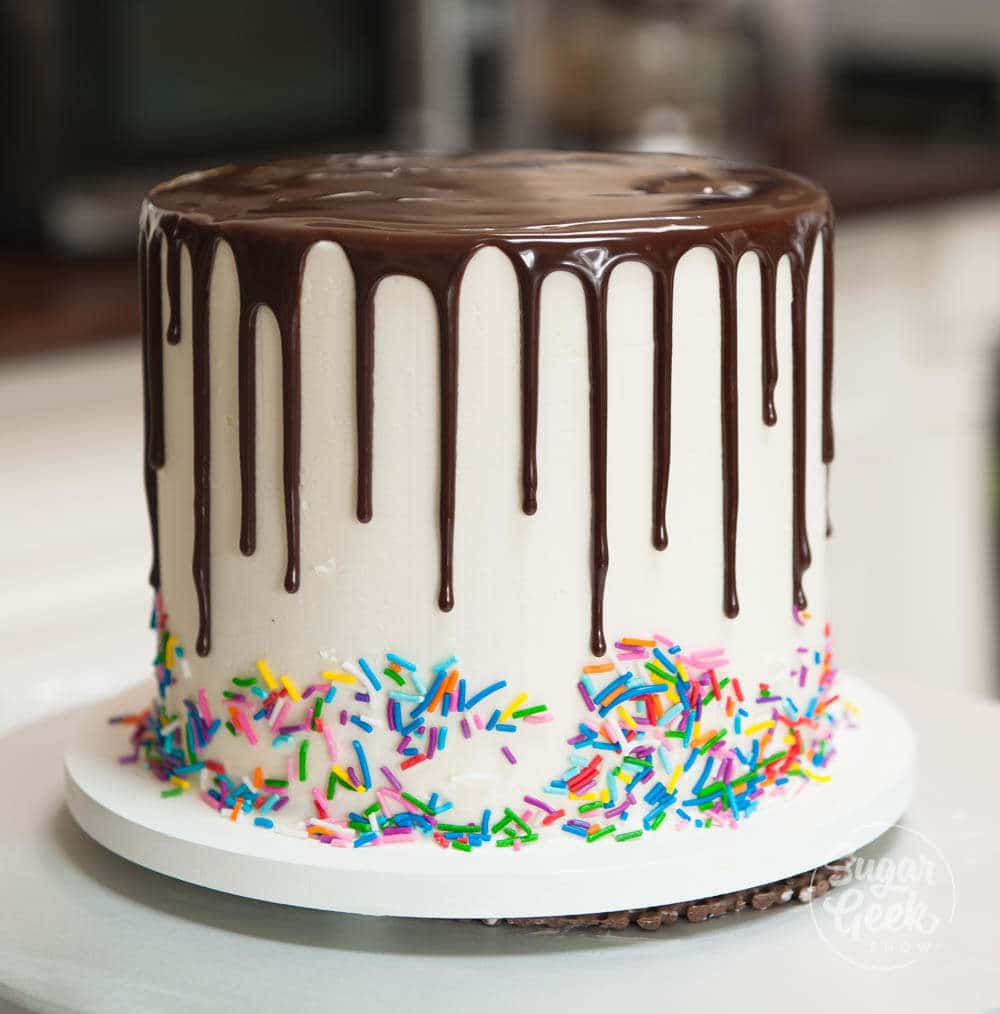
finish the drip by filling in the center with the excess ganache and smooth out any gaps.
Finishing the banana split cake
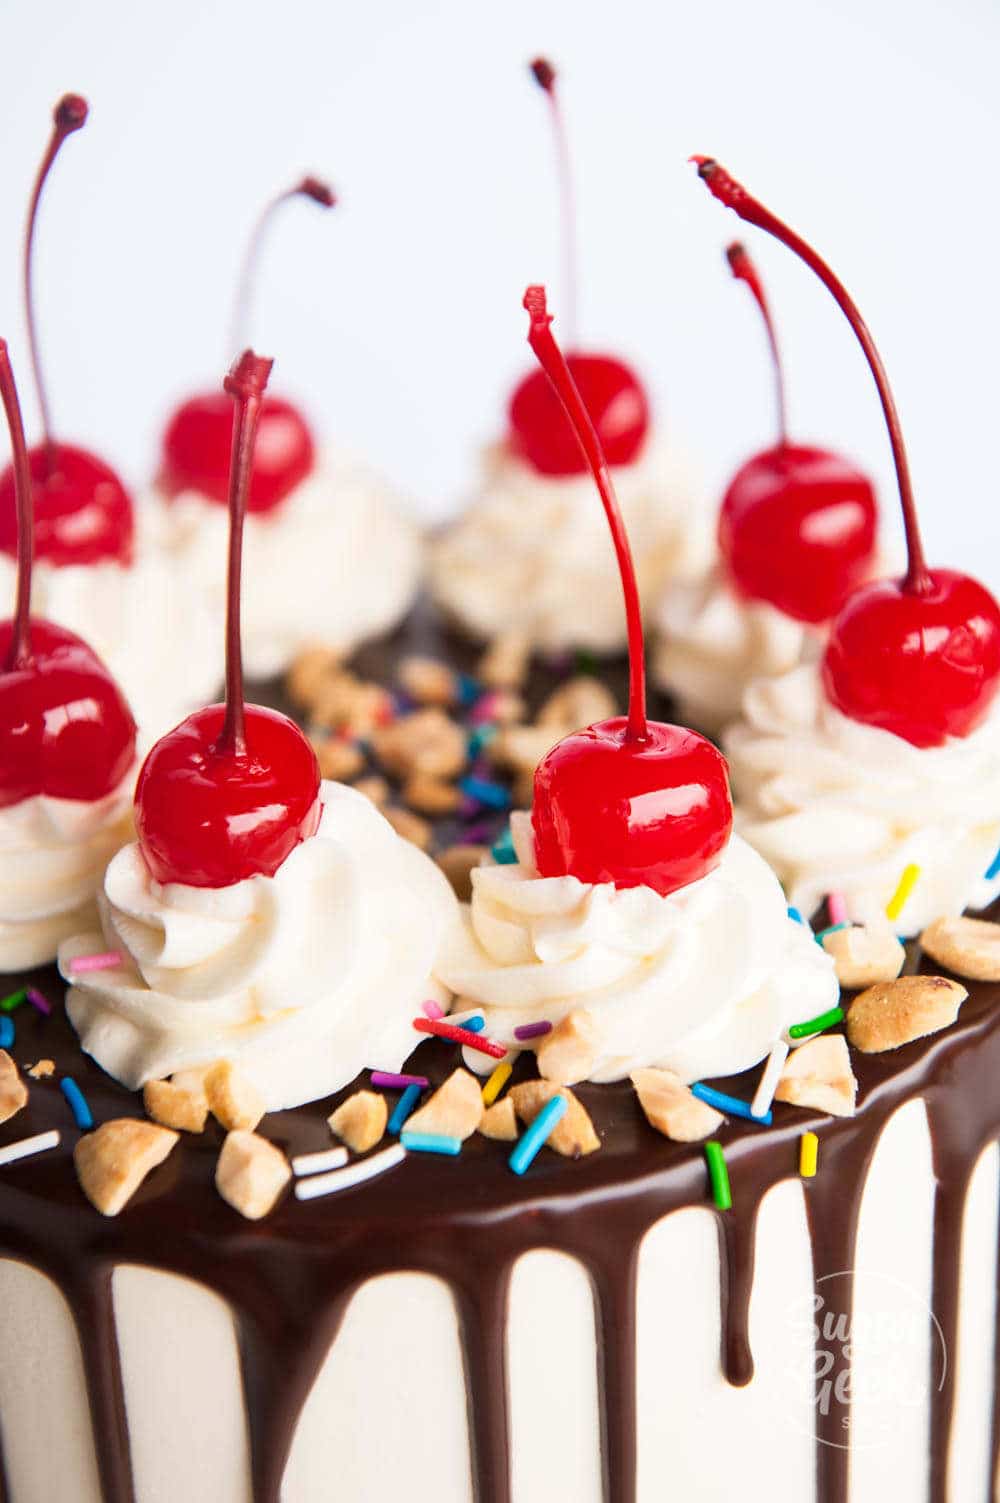
Next, I added some chopped peanuts to the top of my cake. Traditionally, a banana split also has crushed pineapple and strawberries on top. I thought that would look too messy so I left it off.
I used a 1M piping tip to make some swirls of buttercream on the top of my cake which looked SUPER cute when I added the maraschino cherries. You better believe I emptied my whole jar searching for the perfect cherries with intact stems.
You could definitely use fresh cherries too. They just don't have that classic bright red look that you usually see on a banana split.
Add a few more rainbow sprinkles and the banana split drip cake is complete! I LOVED how this cake looked! The best part? My husband said this was one of the most delicious cakes he has had! He loved how all the flavors worked together.
He is my biggest flavor critic so if he says it's good, it's really good!
Cake Batter and Frosting Calculator
Select an option below to calculate how much batter or frosting you need. Adjust the servings slider on the recipe card to change the amounts the recipe makes.
Choose a pan type
Choose a cake pan size
(based on 2" tall cake pan)
Choose a cake pan size
(based on 2" tall cake pan)
Cupcake Tin Size
Choose number of pans
Cups of Batter Needed
8 cups
Cups of Frosting Needed
5 cups
Note: measurements are estimated based off the vanilla cake recipe using standard US cake pans and sizes. Measurements used are for 2" tall cake pans only. Your results may vary. Do not overfill cake pans above manufacturer's recommended guidelines.
Recipe
Ingredients
Banana Cake Ingredients
- 6 oz cake flour
- ¾ teaspoon baking soda
- ½ teaspoon baking powder
- ½ teaspoon cinnamon
- ½ teaspoon salt
- 3 large eggs room temperature
- 4 oz sugar
- 1 oz brown sugar
- 4 oz very ripe banana puree (about 2 bananas)
- 2 oz vegetable oil
- 1 oz buttermilk room temperature
- 4 oz softened butter
Vanilla Cake Recipe
- 6 oz cake flour
- 6 oz granulated sugar
- 2 teaspoon baking powder
- ⅛ teaspoon baking soda
- ⅛ teaspoon salt
- 4 oz unsalted butter room temperature
- 1 teaspoon vanilla extract
- 3 large eggs room temperature
- 5 oz milk room temperature
- 1 oz vegetable oil
Chocolate Cake Ingredients
- 1.5 oz dutched cocoa powder
- 4 oz boiling water
- 2 large eggs room temperature
- 1 teaspoon vanilla extract
- 2 oz mayonaise
- 7 oz cake flour
- 6 oz granulated sugar
- 1 teaspoon baking powder
- ½ teaspoon baking soda
- ½ teaspoon salt
- 3 oz unsalted butter room temperature
Chocolate Drip
- 4 oz hot cream
- 7 oz semi-sweet or dark chocolate
Buttercream
- 8 oz pasteurized egg whites
- 16 oz unsalted butter softened
- 16 oz powdered sugar
- 1 teaspoon vanilla extract
- ½ tsp salt
- ¼ cup strawberry puree For filling
Instructions
Banana Cake Instructions
- Preheat oven to 350ºF and prepare one 8" cake pans with cake goop or other cake release. Make sure all cold ingredients are room temp or slightly warmed.Combine together flour, baking soda, baking powder, cinnamon and salt and set aside.Combine together buttermilk, banana, oil and vanilla. Whisk and set aside.Place softened butter in the bowl of a stand mixer with the paddle attachment and cream until smooth. Sprinkle in brown and white sugar and whip on medium until light and fluffy.Add in your eggs one at a time, waiting for them to be combined before adding the next.Add in ⅓ of your flour mixture and then ⅓ of your liquid. Alternate two more times and mix until just combined.Pour into your prepared cake pans and bake for 35-40 minutes until a toothpick comes out cleanly. Let cool fully before frosting.
Vanilla Cake Instructions
- NOTE: It is SUPER IMPORTANT that all the room temperature ingredients listed above are room temperature and not cold or hot.Place 2oz of the milk and oil in a separate bowl or cup and set asideCombine remaining milk, vanilla and room temp eggs in a separate measuring cup and set asideMeasure out dry ingredients (flour, sugar, baking powder, baking soda, and salt) and place them into the stand mixer bowl.Attach the paddle to the mixer, and turn on the slowest speed (setting 1 on Kitchen Aid mixers). Slowly add chunks of your softened butter until it is all added. Let mix until batter resembles coarse sand.Add milk/oil mixture into the dry ingredients and mix on medium speed (speed 4 on my KitchenAid) and mix for 2 full minutes. Do not skip this step or your cake will not rise. Add in ⅓ of your milk/egg mixture. Repeat 2 more times until batter is just combined. Don't forget to scrape your bowl. I always start by baking for 30 minutes for 8" then checking for doneness. If the cakes are still really jiggly, I add another 5 minutes. I check every 3 minutes after that until I'm close and then it's every 2 minutes. Cakes are done when a toothpick inserted in the center comes out with a few crumbs.Remove the cake pan from the oven and "tap" it lightly on the counter once to remove air from the cake and keep it from shrinking un-evenly. Place cakes on a cooling rack and press down the dome immediately with an oven mitt covered hand. After cakes have cooled for 10 minutes or the pans are cool enough to touch, flip the cakes over and remove from the pans onto the cooling racks to cool completely. Wrap in plastic wrap and chill in the refrigerator.Once the cakes are chilled in the refrigerator (about an hour for this size, longer for larger cakes), tort, fill and crumb coat all at once. If you do not plan on crumb coating the same day, you can leave the wrapped cakes on the countertop. Chilling can dry out your cakes before they are iced, so avoid keeping them in the refrigerator longer than necessary. Cakes can be frozen in freezer bags for later use as well.
Chocolate Cake Instructions
- Preheat oven to 350ºF and prepare two 8" cake pans with cake goop or other cake release. Make sure all cold ingredients are room temp or slightly warmed.Bring the water to a boil. Add in cocoa powder.Whisk until smooth then add in cold mayonnaise, vanilla and eggs. Whisk to break up the eggs.Weigh out all dry ingredients (flour, sugar, baking powder, baking soda and salt) and place into a stand mixer bowl and attach the paddle attachment.Turn mixer on low (setting 1 on Kitchen Aid mixers). Add in your room temperature butter in small chunks. Combine on low until you achieve a sandy mixture.Add ½ of your liquid ingredients into your dry ingredients and mix on medium for 2 minutes. If you do not do this step, your cake could collapse.Turn your mixer back down to low and add in the rest of your liquids slowly. Stop once or twice to scrape the bowl as needed.Once they are all combined, turn back up to medium for another 30 seconds.Lightly grease one 8" round cake pans prepared with your choice of pan release. I prefer cake goop.Bake for 30 minutes at 350ºF depending on how big your pans are. The bigger the pan, the longer it will take for them to bake.When a toothpick comes out of the center with a few sticky crumbs on it, the cake is done.After the cakes have cooled for about 10 minutes, or the pans have cooled to the point they can be touched, flip the cakes over and remove from the pans onto a cooling rack to cool completely. I cover mine in plastic wrap to keep them from drying out why they cool.Once the cakes are completely cool you can trim them and frost them.
Chocolate drip
- Chop chocolate finely and place in heat proof bowl.Heat cream until just starting to steam, do not boil.Pour hot cream over chocolate and let set 5 minutes. Whisk until smooth
Buttercream Instructions
- Combine egg whites and powdered sugar in the stand of your mixer with whisk attachment. Mix on low to combine then bump up to high for 5 minutes. Add in your softened butter in small chunks.Add in vanilla and salt.Whip on high until white, fluffy and creamy.Switch to paddle attachment and mix on low for 15 minutes to remove air bubbles. Add ¼ cup strawberry puree to 1 cup buttercream and mix together until combined to use as your cake fillingSave the rest of the buttercream for frosting the cake
Video
Nutrition

Ashley Adams says
Hi! So excited to try this recipe. I tried the WASC it was delicious. What is cake flour? It wasn’t used in the other recipe.
Elizabeth Marek says
Almost all my recipes use cake flour 🙂 It's a low-protein flour that is used for making cakes. Makes them very delicate.
Jalou says
Hello im trying to convert oz to cups but its just to confusing could you help me thanks alot
Elizabeth Marek says
Hi there, all my recipes are in ounces for accuracy. Cups are very inaccurate and can cause a cake to fail and ingredients to be wasted. Here is why I use a kitchen scale for baking. Much easier and less work once you try it once. https://sugargeekshow.com/digital-kitchen-scale/
Kelsey says
Love how this American classic translated to cake! This was a hit!
Vanessa says
Hi! In both the Banana cake and chocolate cake recipes it says to prepare 2 8" pans but in the intro it says it "Makes one 8"x2" cake per flavor". Which is it?
I'm trying to make 3 6"x3" cakes. Thanks!
The Sugar Geek Show says
Sorry, that is a typo from the original recipe. The batter fills one 8" cake pan so it's enough batter to put into a 6" cake, you might have a little batter leftover.
Anisor F says
Hi could I use this Banana Split Cake for the carved and stacked Gravity Defying Bowls tutorial? Or is the strawberry and banana cake too soft for that? Thank You ?
The Sugar Geek Show says
Yes you could! The bowls are mostly supported by the structure 🙂
Elaine magalhaes says
Hi the vanilla cake on this recipe you use AP flour and did the reverse method, I am confuse ; because you said that you have to use cake flour because the AP flour has more gluten.
The Sugar Geek Show says
That should read cake flour, fixing now