
A mirror glaze cake is one of those baking moments where science meets literal magic. The first time I poured a traditional mirror glaze over a frozen cake, I swear I stopped breathing for a second. Watching the whole thing turn into a glossy, reflective finish that looked like it came straight from TikTok was so satisfying. And the good news? Even though mirror glaze cakes look complicated, they're actually super doable once you understand the right temperature, the right consistency, and the base of every mirror glaze recipe.
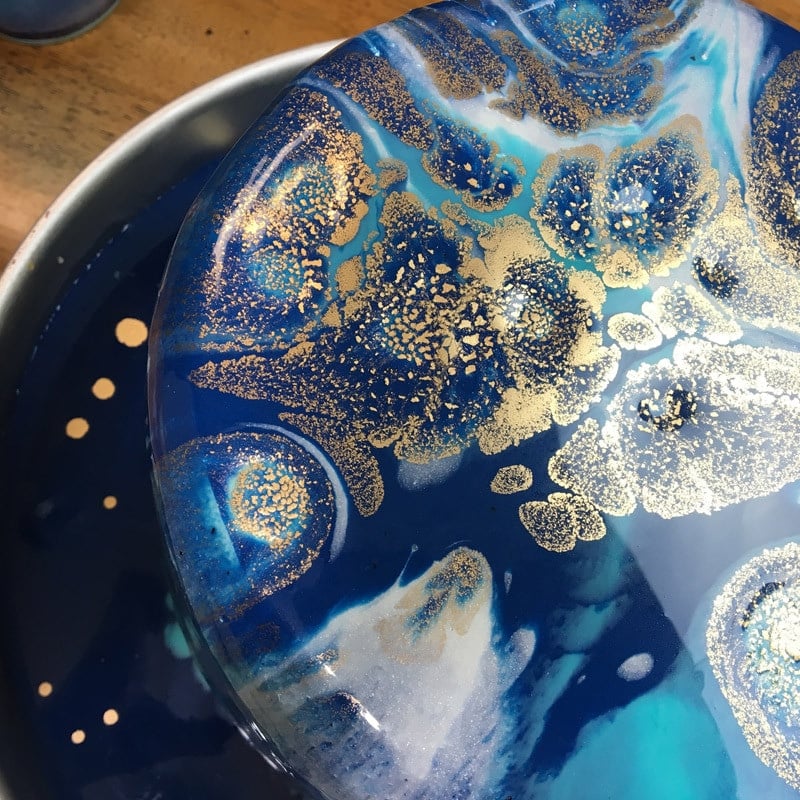
I started making mirror glaze cakes long before they blew up on social media, but I'll be honest - the vibrant color options and different looks people make on TikTok and Instagram totally inspired me to play with gel food coloring, cocoa butter variations, and different shade combinations. Whether you're glazing an entremet cake, an eight-inch layer cake, or even a chocolate cake covered in buttercream frosting, the technique is exactly the same: start with a frozen cake, get your glaze to the appropriate temperature, and pour with confidence.
What's In This Blog Post
My Inspiration
My own mirror glaze journey began when I was testing a mousse-covered cake for class and accidentally poured the glaze too warm. The colors combine, the glaze slid right off the sides of the cake, and I ended up with a run-off glaze disaster on my baking sheet. But that failure taught me the biggest difference between a beautiful creation and a sad puddle on parchment paper: temperature. Once I stuck to 90ºF and kept my cake frozen solid, everything changed.
And because I love bright colors, I always experiment with different colors in smaller bowls so I can swirl, drizzle, and layer them over the center of the cake. If you're glazing for the first time, trust me - play with color. A tiny bit of liquid food coloring or a very small amount of gel food coloring makes a huge difference in the final result.
Mirror Glaze Cake Ingredients
- Granulated sugar - Helps create the shiny reflective finish. Replace with equal parts glucose syrup and sugar if you want a thicker layer of glaze.
- Sweetened condensed milk - Adds richness and smoothness. Can be replaced with milk chocolate or real chocolate for a different type of glaze.
- Water - Used to hydrate the gelatin and dissolve the sugar. Cold water works best for blooming gelatin.
- Gelatin powder - The key ingredient for the outer layer texture. You can use plain gelatin or sheet gelatin.
- White chocolate - The best results come from high-quality white chocolate. Valrhona is amazing, but any real chocolate works.
- Gel food coloring - Gives a vibrant color without thinning the glaze. Replace with liquid food coloring sparingly.
- White food coloring - Helps brighten the whole thing so your glaze color pops.
- Plastic wrap & airtight container - Important for storing leftover glaze without air bubbles.
Tips & Tricks
Keep your cake frozen. Keep your glaze at 90ºF. And always strain everything to avoid lumps. If you're making this for uploading & non-users on social media, use bright colors and a clean cake board so the whole cake looks flawless. Set your cake on a wire rack over a baking sheet to catch the excess glaze and keep your workspace clean.
And don't rush your pour. Confidence is the secret glazing technique nobody talks about.
Step-by-Step Mirror Glaze Cake Instructions
- Heat the sugar mixture
Add the granulated sugar and the first amount of water to a saucepan. Bring it to a gentle simmer - not a boil - and let it dissolve. - Bloom your gelatin
Mix the second quantity of cold water and the gelatin powder together and let it absorb for 15 minutes. This step ensures the right consistency. - Prepare your chocolate base
Combine the white chocolate and sweetened condensed milk in a large bowl. - Add gelatin to the syrup
Once the sugar mixture is hot (but not boiling), remove from heat and add the bloomed gelatin. Stir until completely dissolved. - Melt everything together
Pour the hot mixture over the chocolate and condensed milk. Let it sit for 5 minutes so the chocolate can melt, then whisk or use an immersion blender until smooth. - Color your glaze
Add gel food coloring, white food coloring, or several different colors split into smaller bowls if you want a multi-shade effect. - Strain and cool
Pass the glaze through a fine strainer to remove air bubbles and lumps. Let it cool to 90 degrees F - this is the most important part. - Glaze your cake
Place the frozen cake on a circular object or small cake pan turned upside-down on a baking sheet. Pour the glaze over the center of the cake, letting it flow down the sides of the cake until the entire cake is coated. - Finish your edges
After about 5 minutes, scrape off excess glaze at the bottom with a hot knife or offset spatula. - Serve or store
Refrigerate until serving. Finished cakes keep their shine for about 24 hours. Store leftover glaze in an airtight container wrapped with plastic wrap touching the surface to prevent a skin from forming.
Final Thoughts
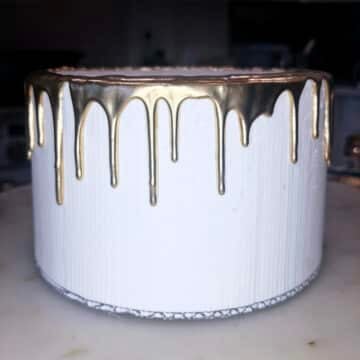
A mirror glaze cake might look like something only professional pastry chefs make, but once you understand the consistency of the glaze and the appropriate temperature, it becomes one of the most fun techniques in baking. You can go minimalist with one glaze color or mix up different colors for a vibrant shade marble effect. Whether you're making this for a special event, your first time experimenting, or just to impress social media, you'll end up with something gorgeous.
Frequently Asked Questions
How much mirror glaze do I need?
This recipe is enough to glaze an eight-inch cake or a small entremet cake with tons of glaze for extra coverage.
Why does my glaze slide off?
Your cake wasn't frozen or your glaze was too warm.
Can I use corn syrup instead of glucose syrup?
Yes - it works great and is the closest substitute.
How do I store leftover glaze?
Pour it into a container, press plastic wrap onto the surface, and refrigerate. Reheat gently to reuse.
Can I glaze a buttercream cake?
Yes, as long as the buttercream frosting is super smooth and the cake is well-chilled.
Want me to turn this into a short-form version, a Pinterest title, or an Instagram caption?
Recipe
Equipment
- 1 Fine Sieve
- 1 Immersion blender
- 1 Kitchen Scale
Ingredients
- 2 ounces Cold Water for the gelatin
- 20 grams Powdered Gelatin
- 12 ounces White Chocolate high quality for best results such as Valrhona
- 5 ounces Water
- 11 ounces Sugar
- 7 ounces Sweetened Condensed Milk
- 1 Tablespoon Vanilla
- 2 drops White Food Coloring
- 1 Frozen Cake
Instructions
- Sprinkle the gelatin into the water and mix to combine. Set it aside to bloom for 15 minutes.
- Combine the water, sugar, and condensed milk in a medium saucepan over medium heat until it begins to gently simmer.
- When the sugar and water mixture begins to simmer (do not boil), remove from the heat and add the bloomed gelatin. Stir until the gelatin has dissolved.
- Strain this mixture through a sieve to remove any lumps and return it to the saucepan.
- Pour the hot liquid on top of the chocolate and let it sit for 5 minutes.
- Use an immersion blender to stir the glaze until the chocolate has completely melted.
- Add the gel food coloring and stir until well-mixed. Pass the glaze through a fine sieve to remove any lumps. Leave the glaze to cool to 90ºF.
- Once the glaze has cooled to 90º F / 32º C, pour it over the frozen cake which is on top of a cup, sitting on a tray or plate with a edge to catch the drips.
- Leave the glaze to set for 5 minutes before using a hot knife to remove the drips.
- Enjoy your cake right away or refrigerate until serving. Keep in mind that glaze loses it's shine after 24 hours so if you're making this for a client make sure you pour the same day as delivery.
Video
Nutrition

Amanda says
I'm going to be making this in my baking class tomorrow. I read all the previous commentor's questions, and I really appreciate that you've answered them. I feel pretty confident that I'll get every right during class.
Marlene Raymond says
I haven't tried if yet, but will definitely be trying this weekend thanks so very much for the best recipe and for sharing the QA, they were so very helpful
Stacey Janz says
This was the easiest ever and I made the galaxy look and it turned out so good. Super impressed and so was everyone else who ate it.