Square Cake With Acrylics Tutorial
How to get sharp edges with buttercream or ganache using square acrylics
Servings 1 cake
Equipment
- Square Acrylics
- Parchment Paper
- Tape
- Two Bench Scrapers
- Level
- Square Cake Board
- Offset Spatula
Ingredients
Square Cake Edible Materials
- 2 6" White Cakes Chilled and trimmed
- 6 cups Easy Buttercream Or ganache
Instructions
How to use square cake acrylics
- Cut a square piece of parchment that is 2″ bigger than the square acrylic. Cut the corners off of the parchment, fold the sides onto your acrylic, and tape it down. Make sure your parchment is flat and tight with no wrinkles.
- Cut a square cake board. Your cake board should be a little smaller than the acrylic so that the buttercream covers the cake board. For a 6″ cake, my boards are 5 ¾″ square.
- Place your first acrylic tape side down onto the turntable with a non-skid underneath.
- Put a little bit of frosting on the acrylic then put your cake board on top of the acrylic and center it.*NOTE* you can also crumb coat your square cake on the cake board FIRST then place it onto the acrylic.
- Then place your first cake layer on the cake board and put an even layer of frosting. You can use a piping tip if you’re not comfortable with putting ¼ inch buttercream right on there. Just make sure your buttercream layers are even and flat. Continue layering cakes and buttercream.
- Place a thick layer of frosting on your second acrylic and place that on top of your cake. Push down to make a good connection. Use a level to make sure the acrylic is level on top of the cake.
- Use your bench scrapers to make sure the top acrylic lines up with the bottom acrylic.
- Fill in the sides with more buttercream and chill until firm. About 20 minutes.
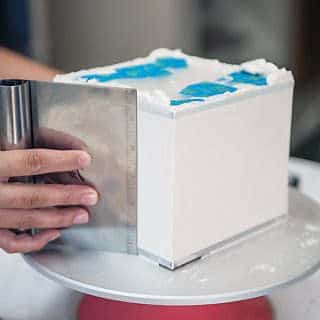
- Use your offset spatula to add more buttercream to the corners. Use the bench scraper to sharpen the corners. I start at the corner and pull towards the center of the cake. Do not go all the way past the second corner or you will ruin it.
- Repeat this process until your corners are pretty sharp. Chill for another 15 minutes.
- To get those REALLY sharp corners, I do a final pass with one more coat of buttercream and this time I warm up my metal bench scraper in hot water, then I dry it off. This warm bench scraper gets the corners really sharp and also get’s rid of any bubbles on the surface of the buttercream. Chill one more time for 10 minutes.
- Now that our cake is chilled, we can remove the acrylics. The first thing I do is flip my whole cake over so that the cake board is facing the top. Don’t worry, this won’t hurt the cake. It’s nice and chilled.
- Remove the tape carefully, unfold the parchment paper and remove the acrylic. Carefully peel away the parchment paper.
- Place a cake board on top and flip the cake back over so the cake board is on the bottom.
- Repeat the process for the top acrylic. Fill in any wrinkles with more buttercream and smooth out your edges.