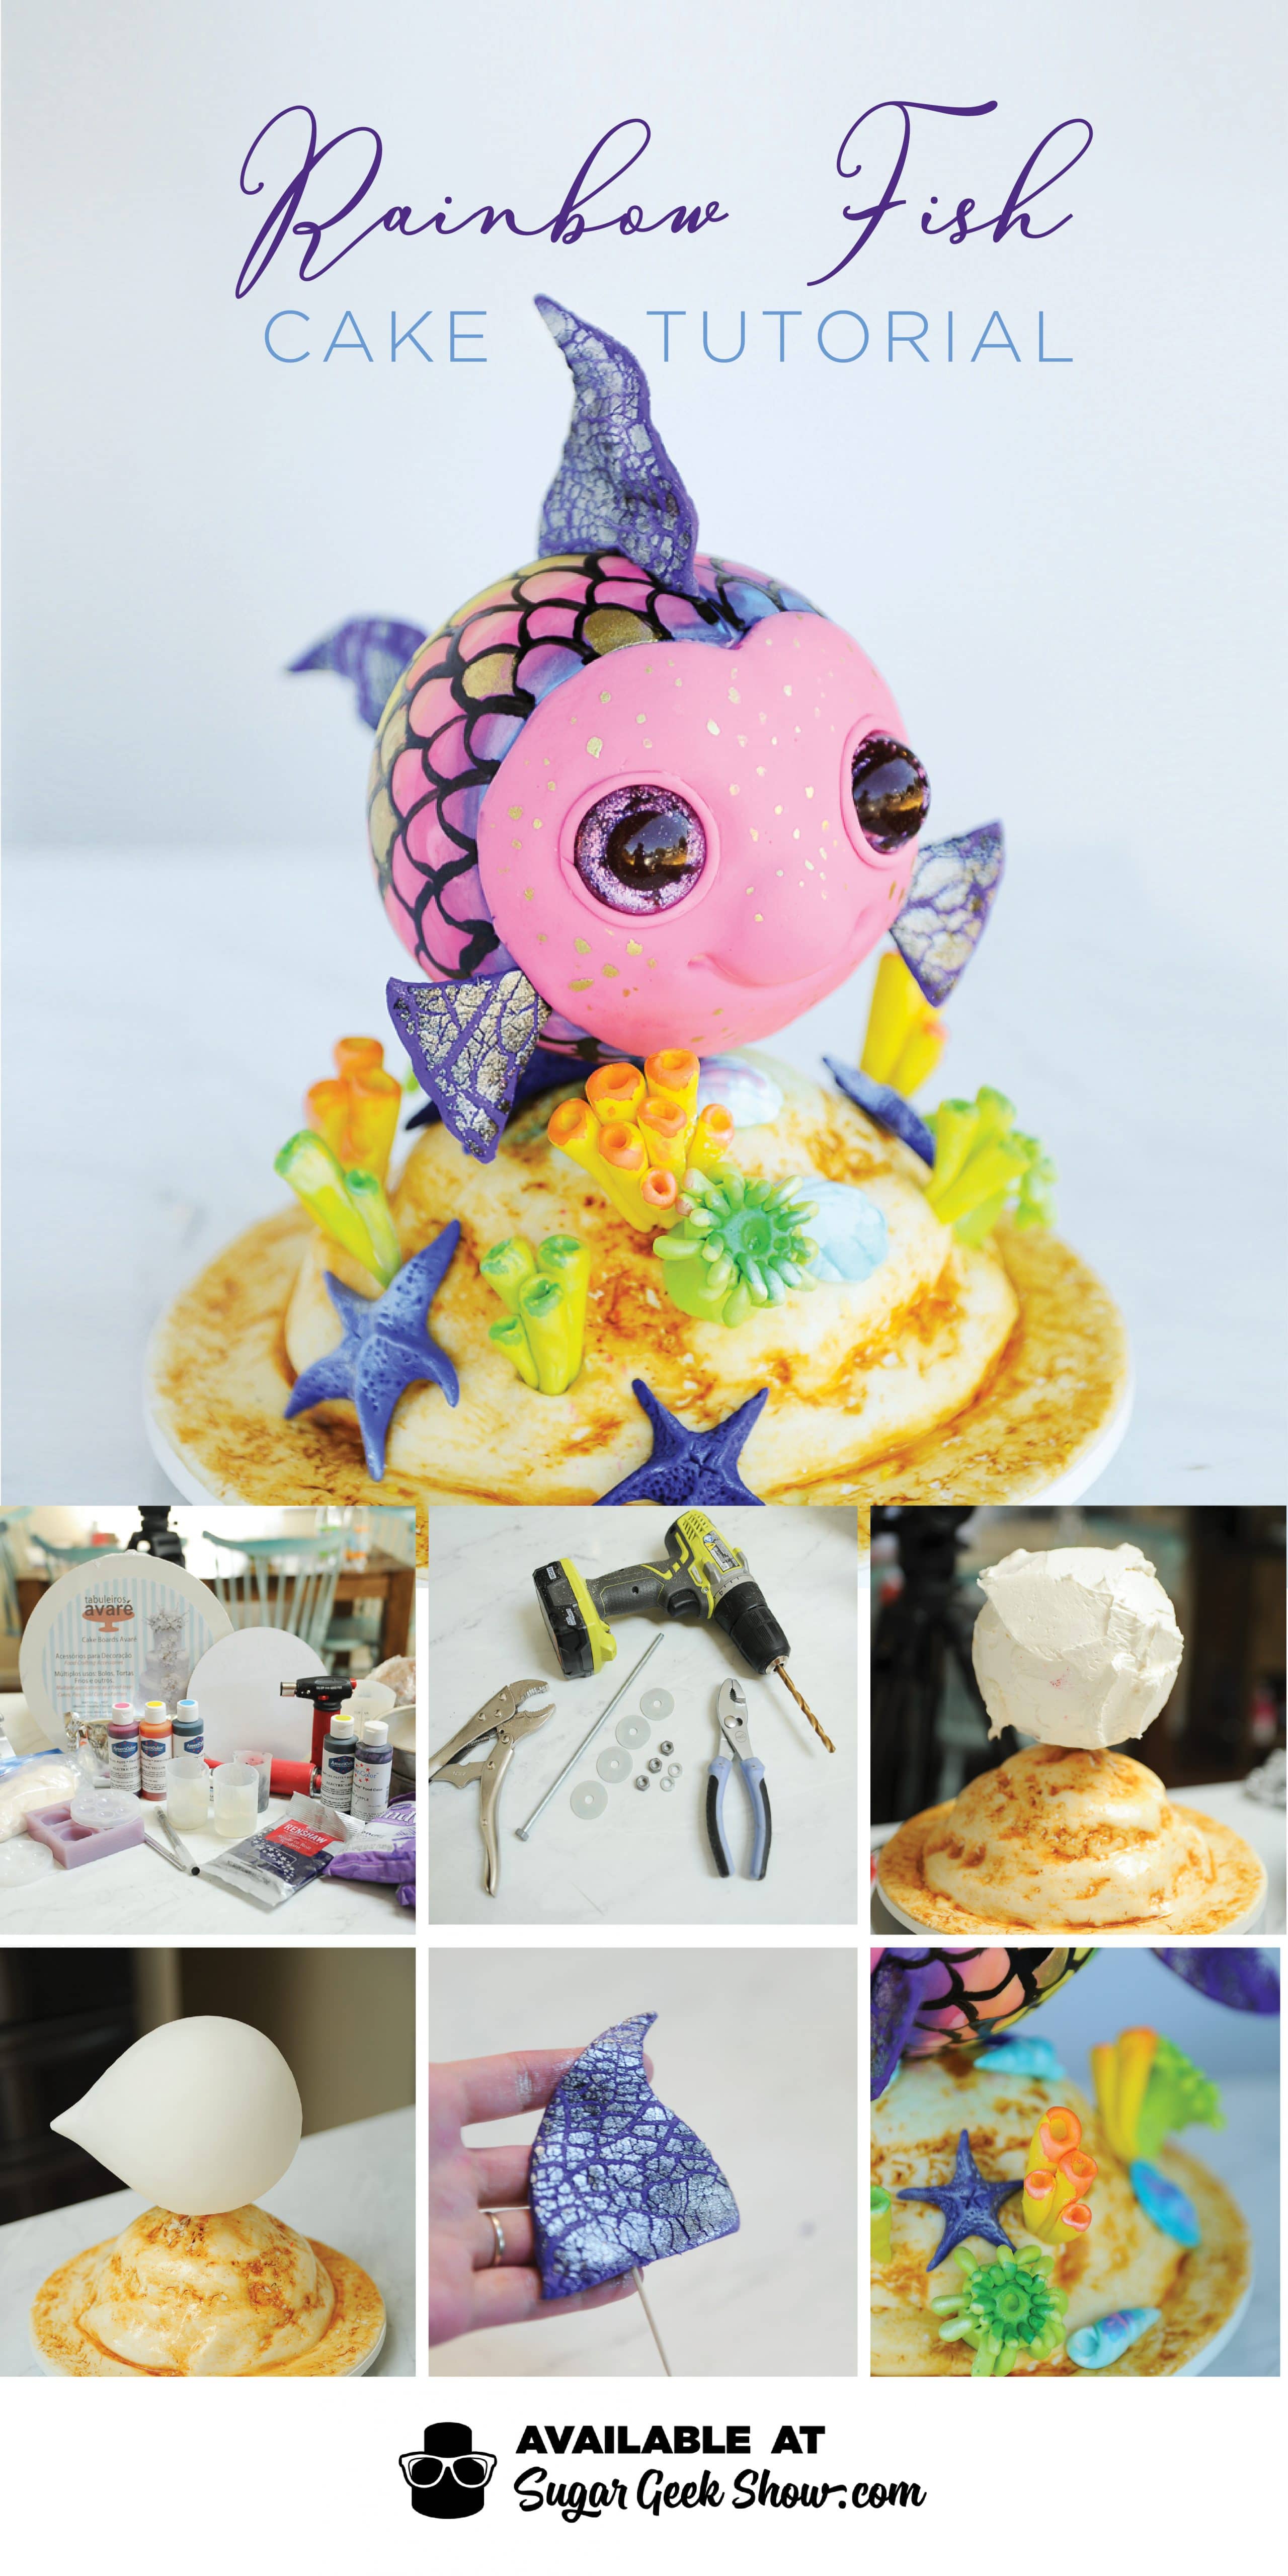
This Rainbow Fish Cake Tutorial Is The Next Step In Learning How To Make Gravity Defying Sculpted Cake Structures
In this rainbow fish cake tutorial I'm going to introduce you to one of my favorite things to use in structured sculpted cakes, long bolts. If you have enjoyed the other cakes in this series so far (sculpted turtle cake & octopus cake tutorial) then you're probably ready to take the next step in sculpted cakes.
This tutorial will teach you the basics of building a simple structured cake using items you can find at your hardware store. I'll show you how to build your structure, sculpt a sphere out of cake and chocolate, make fun realistic shells and sea anemones, add the details to our rainbow fish and put it all together.
Materials List
One 6” Pink/Yellow Marbled Cake Round
One 6” Pink/Yellow Marbled Dome Cake
One 8” Vanilla Cake Dome
Food coloring - Ivory, yellow, blue, pink, purple, green, black
Confectioners glaze
Flash Dust
3 cups buttercream
12 oz candy melts
2 lbs White fondant divided
3 oz Pink fondant
3 oz Purple fondant
5 oz gumpaste
Vegetable shortening
Edible Artists Decorative paint
Hot glue (low temp)
Everclear or other alcohol
Gold dust
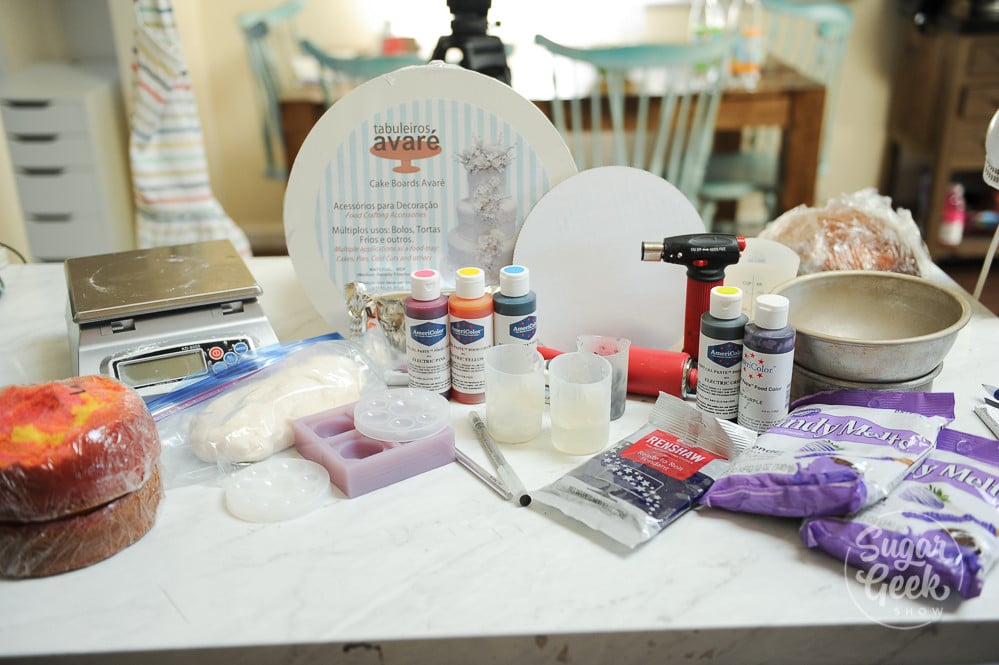
Structure
Two 6” cardboard round
12” wooden cake board
Aluminum foil tape
Two skewers
Tools
Small offset spatula
Serrated knife
Scissors
Glue gun
Low temp glue stick
Medium round paintbrush
- 1.5″ silicone sphere mold
- silicone cabochon mold
- 3 oz simi cakes clear isomalt
- black food coloring
- silicone cups for melting isomalt
- edible glitter (or non-toxic is fine)
- creme brulee torch
- cake gloss
- nitrile gloves for hand protection
- silmat for protecting your work surface
- microwave for melting isomalt
Rainbow Fish Cake Structure
Let's talk a little bit about the cake structure. I know that some of you may not have access to the same structure materials as other people in the world but most hardware stores have some version of a bolt. Usually you would see a bolt that is shorter but they actually come in several lengths.
If you can't find a bolt long enough then another option is threaded rod (all-thread). This also comes in various lengths but here in the US, it's generally either 12" or more. You can cut threaded rod with a hacksaw or a Dremel tool with a metal cutting attachment. Some hardware stores will even cut them for you if you ask nicely.
To support my fish cake and to create the gravity defying look, I'm using washers. Washers are flat pieces of metal with a hole in the middle which creates more surface area for a cake or a board to sit against than a small little nut. When you start tightening things down, the nut tends to dig into the surface of soft materials like boards or chocolate. The washer spreads out the pressure from tightening the nut so it doesn't dig in.
In this cake structure, I also use the washer as a way to support the weight of the heavy chocolate sphere and cake. Even though it's very small and might not seem like enough to hold the cake, it's actually very strong and you only need a couple inches to support the chocolate sphere which results in a cake that looks like it's floating.
Making The Rainbow Fish Cake
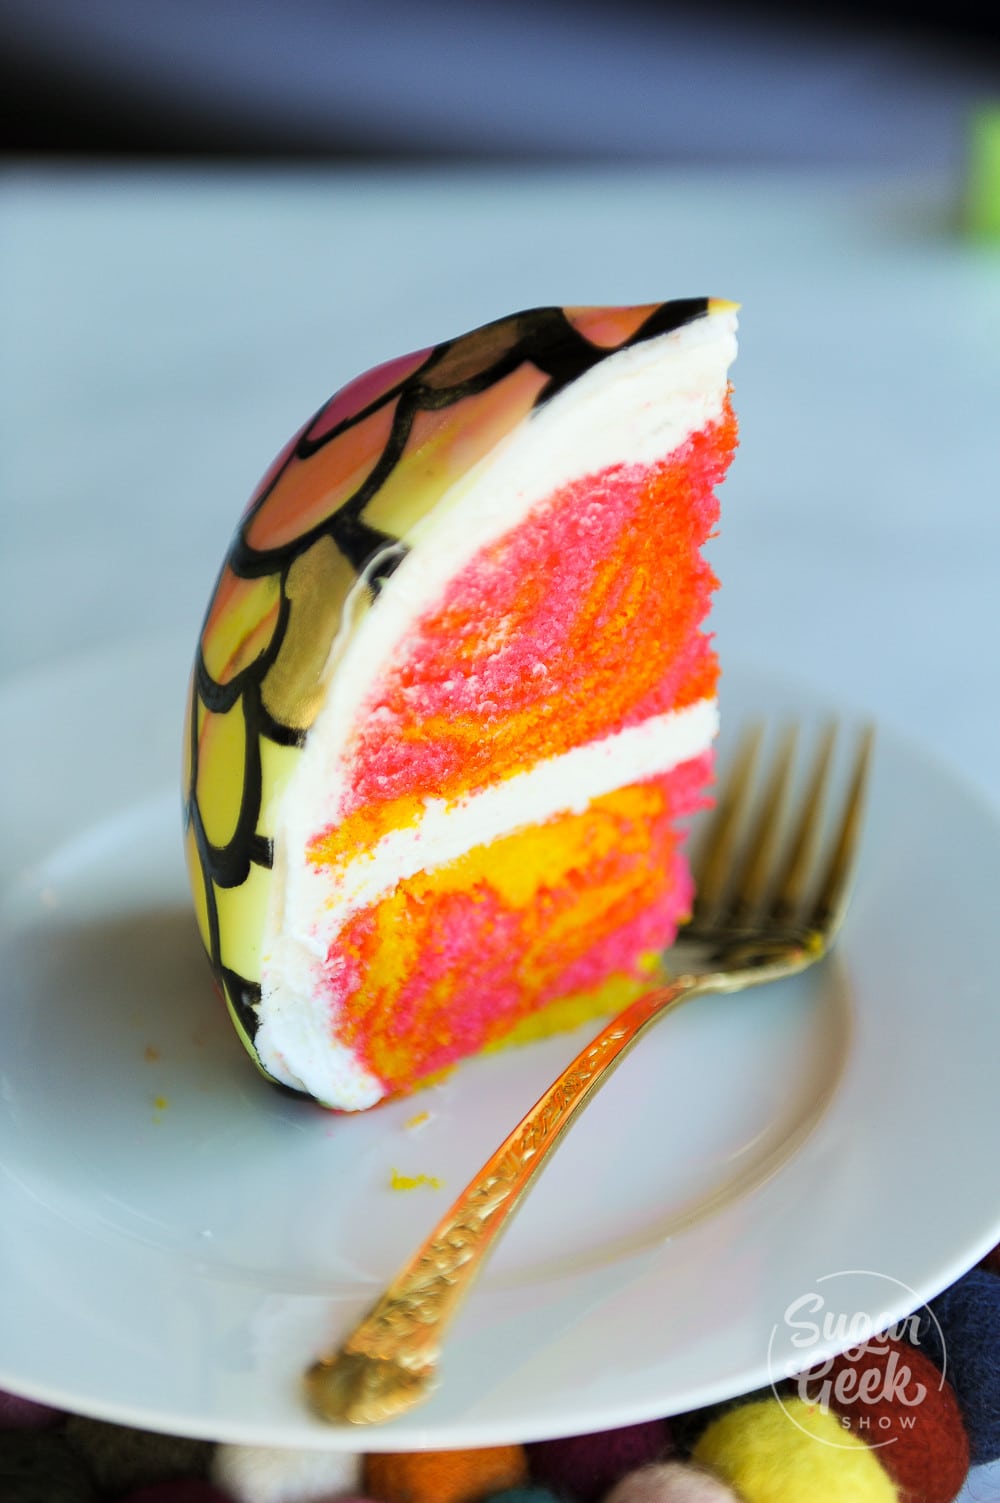
For the cake I used my favorite vanilla cake recipe. I colored half the batter yellow and half bright pink using Americolor food coloring. I swirled the colors together after adding them to the cake pan. You don't have to color your cake but I liked the pop of bright colors when I cut into the cake.
Using chocolate for the support under the cake is a great way to make a sphere without using any styrofoam. Because we're using chocolate instead of cake, the sphere will not lose it's shape under the weight of the cake stacked on top.
How To Make A Rainbow Fish Cake
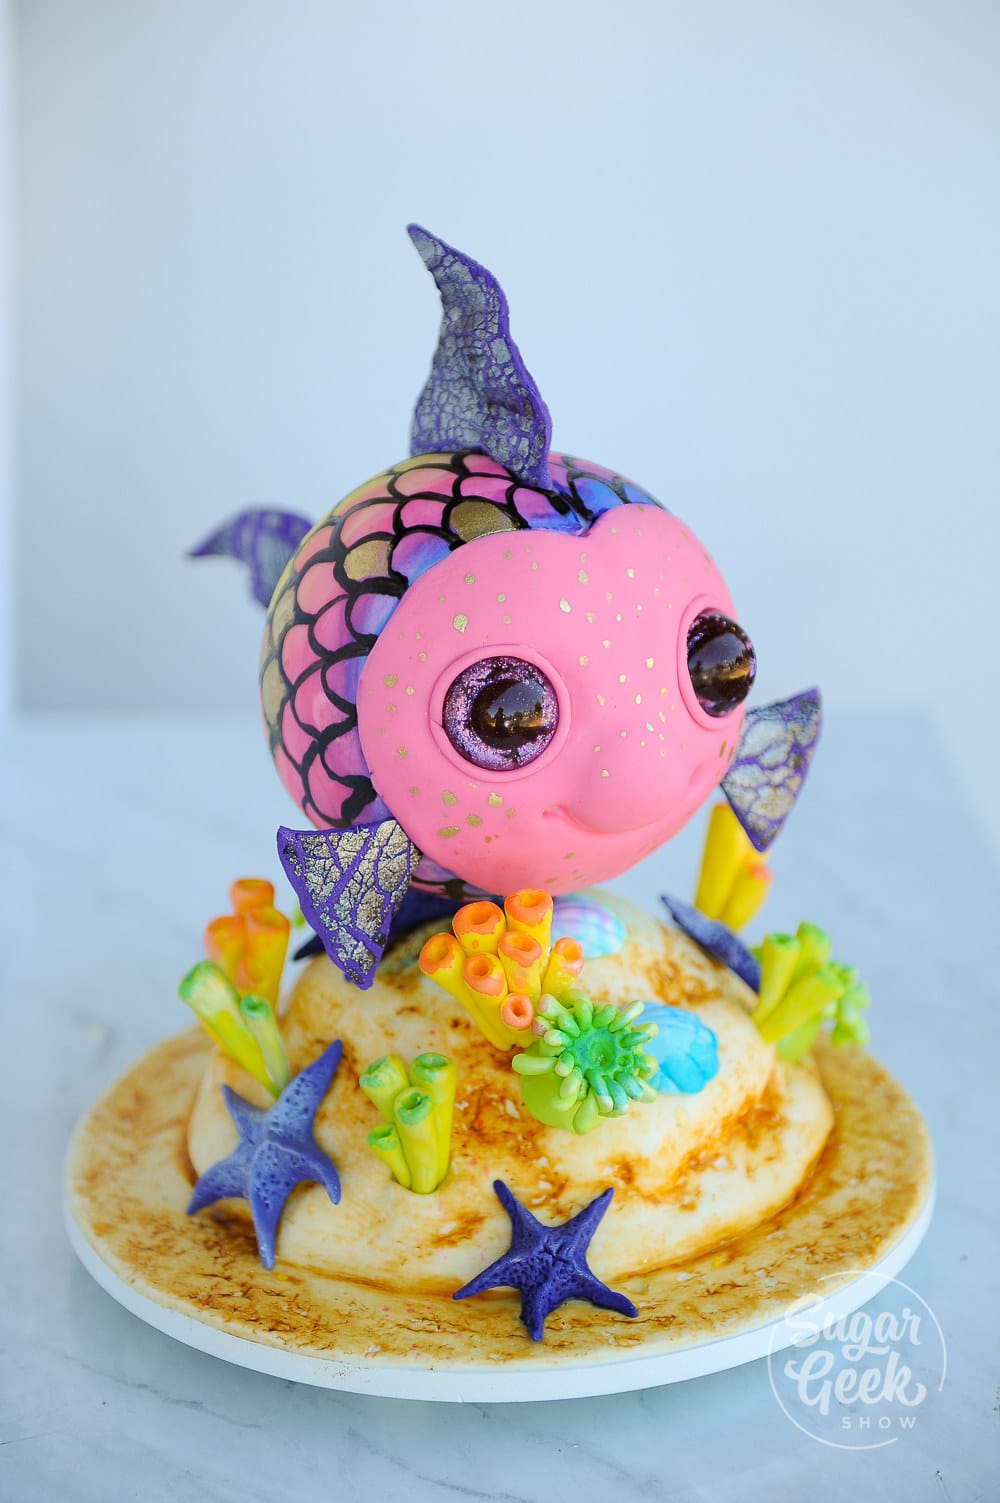
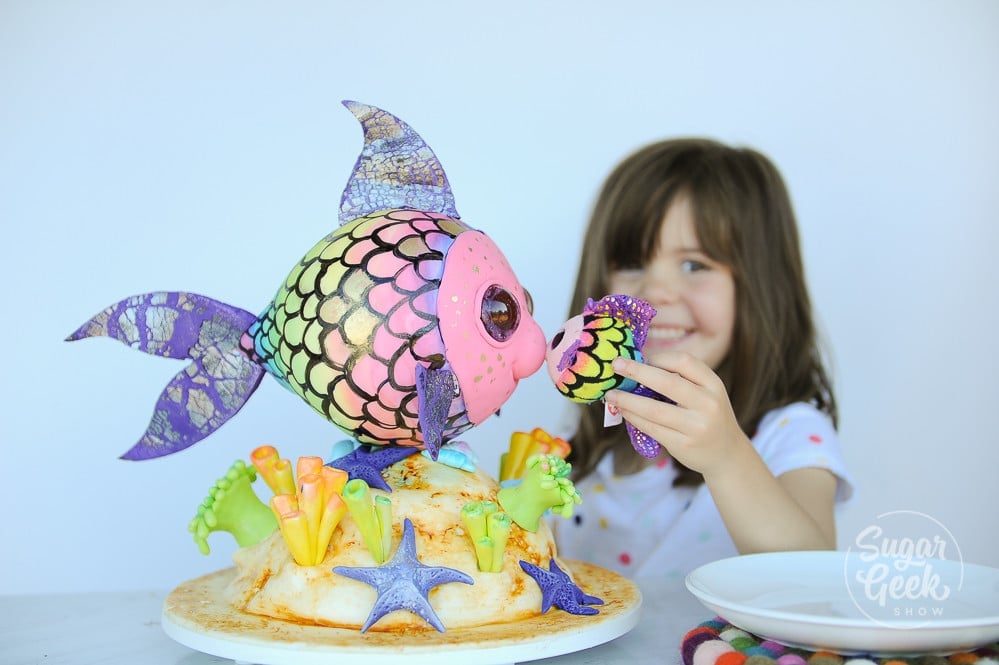
Now I know what you must be thinking, this isn't like THE rainbow fish exactly and I know this. My daughter loves those books but this cake isn't inspired by THAT rainbow fish, it's actually inspired by one of her beanie boo keychains (just like my other cakes in this series) that looks like a rainbow fish. This little guy hops a ride on her backpack every morning to school and she happened to name him rainbow fish.
To make your rainbow fish cake, assemble your structure by inserting your bolt through a hold drilled into the center of your cake board. Insert your bolt and secure with your nuts, locking washer and washers.
Drill a hold in the center of an 8" cake cardboard round. Stack and fill your 8" dome on top then chill. Drill a hold in a 6" cardboard round. Then stack and fill your 6" cakes and carve into a dome. Crumb coat and chill.
Pour your chocolate into your 6" cake pan lined with plastic wrap and let chill until firm. Once chilled, drill a hold into the center of the chocolate.
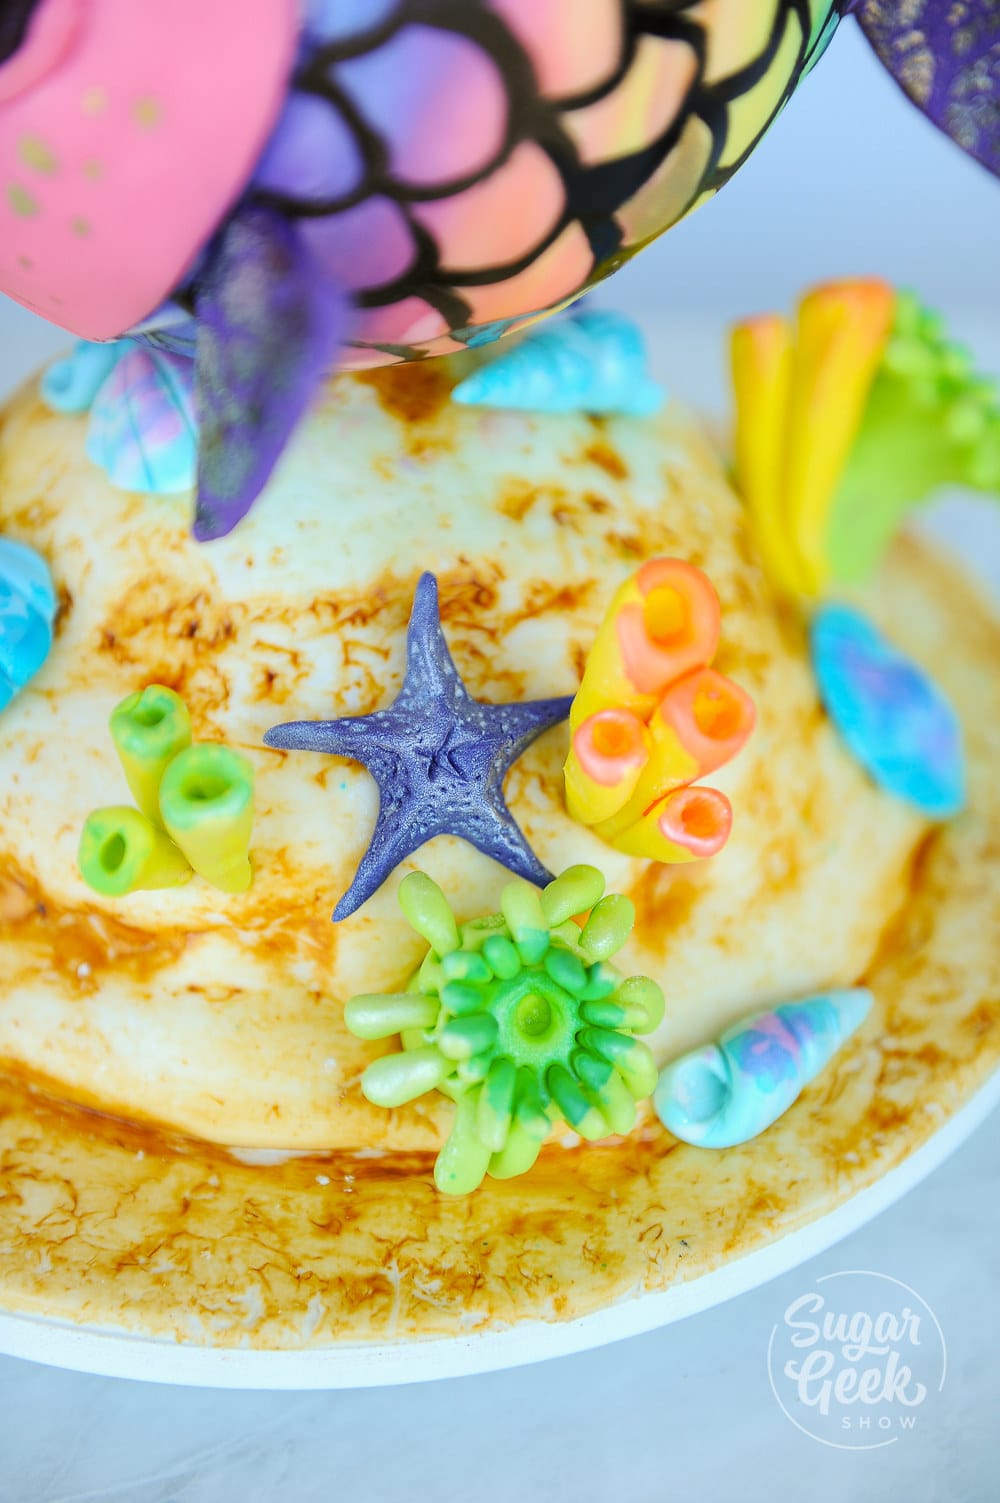
Next we're going to cover our 8" cake dome in some white fondant and texture it with some crumpled up aluminum foil. Brush the surface with some ivory food coloring and wipe off the excess food coloring to reveal the texture. Place your textured cake onto the cake board.
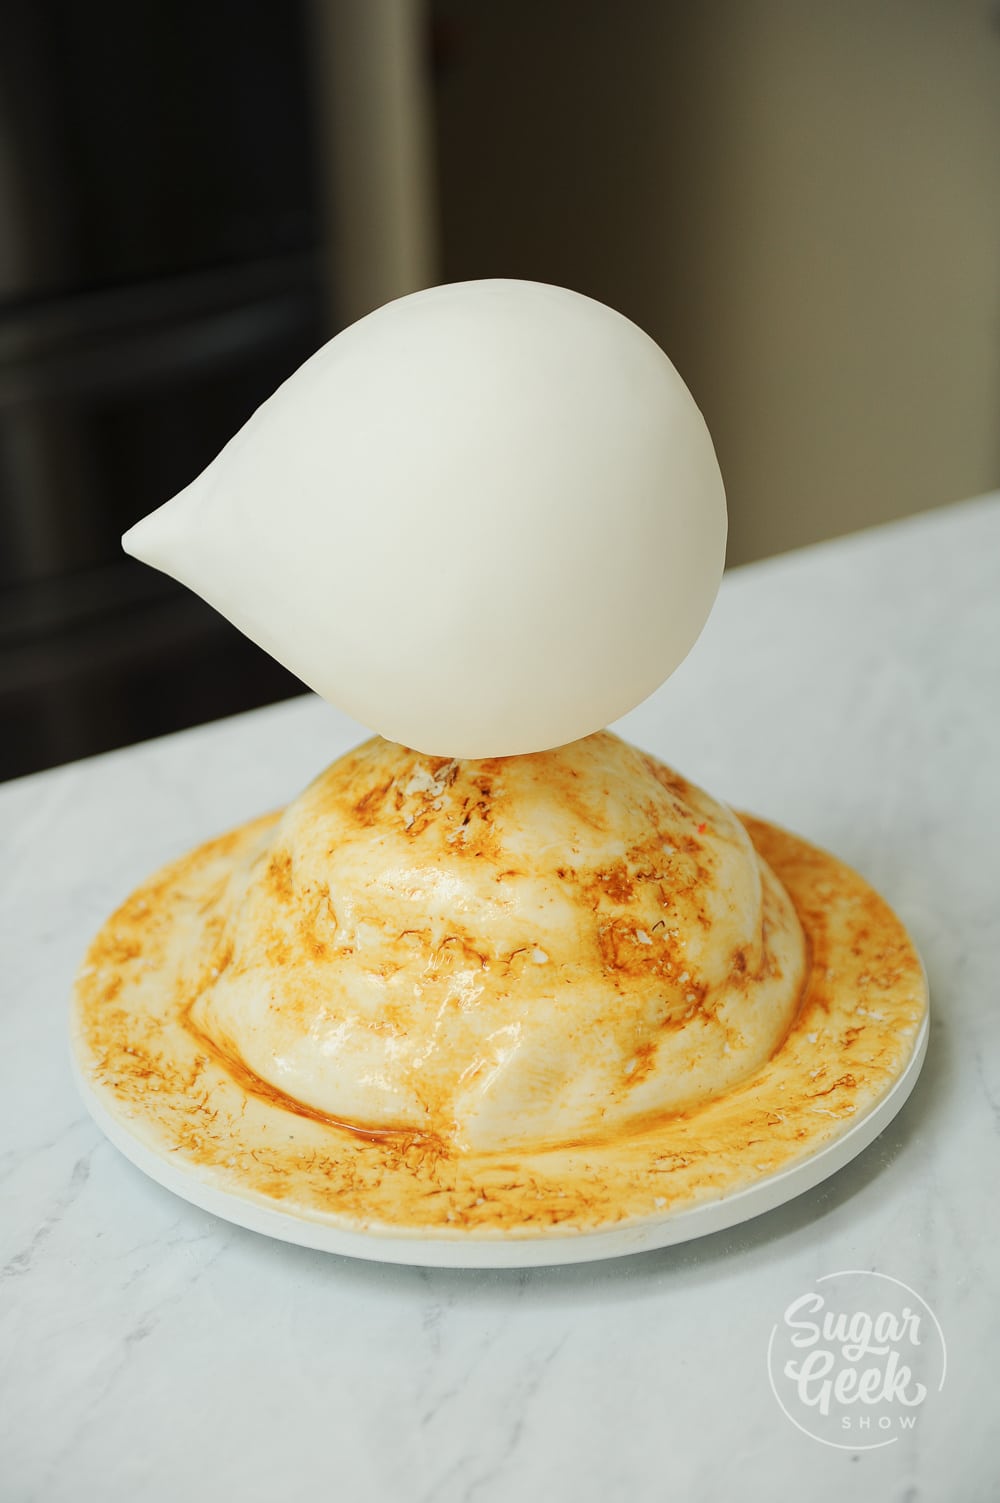
Screw on a nut until it is flush with the top of the cake. Place your washer on top of the nut then slide your chocolate dome on top. Place your 6" cake on top of the chocolate. Add more buttercream and ice until smooth. Add a small bit of pointed fondant to the back of the sphere to make the tail.
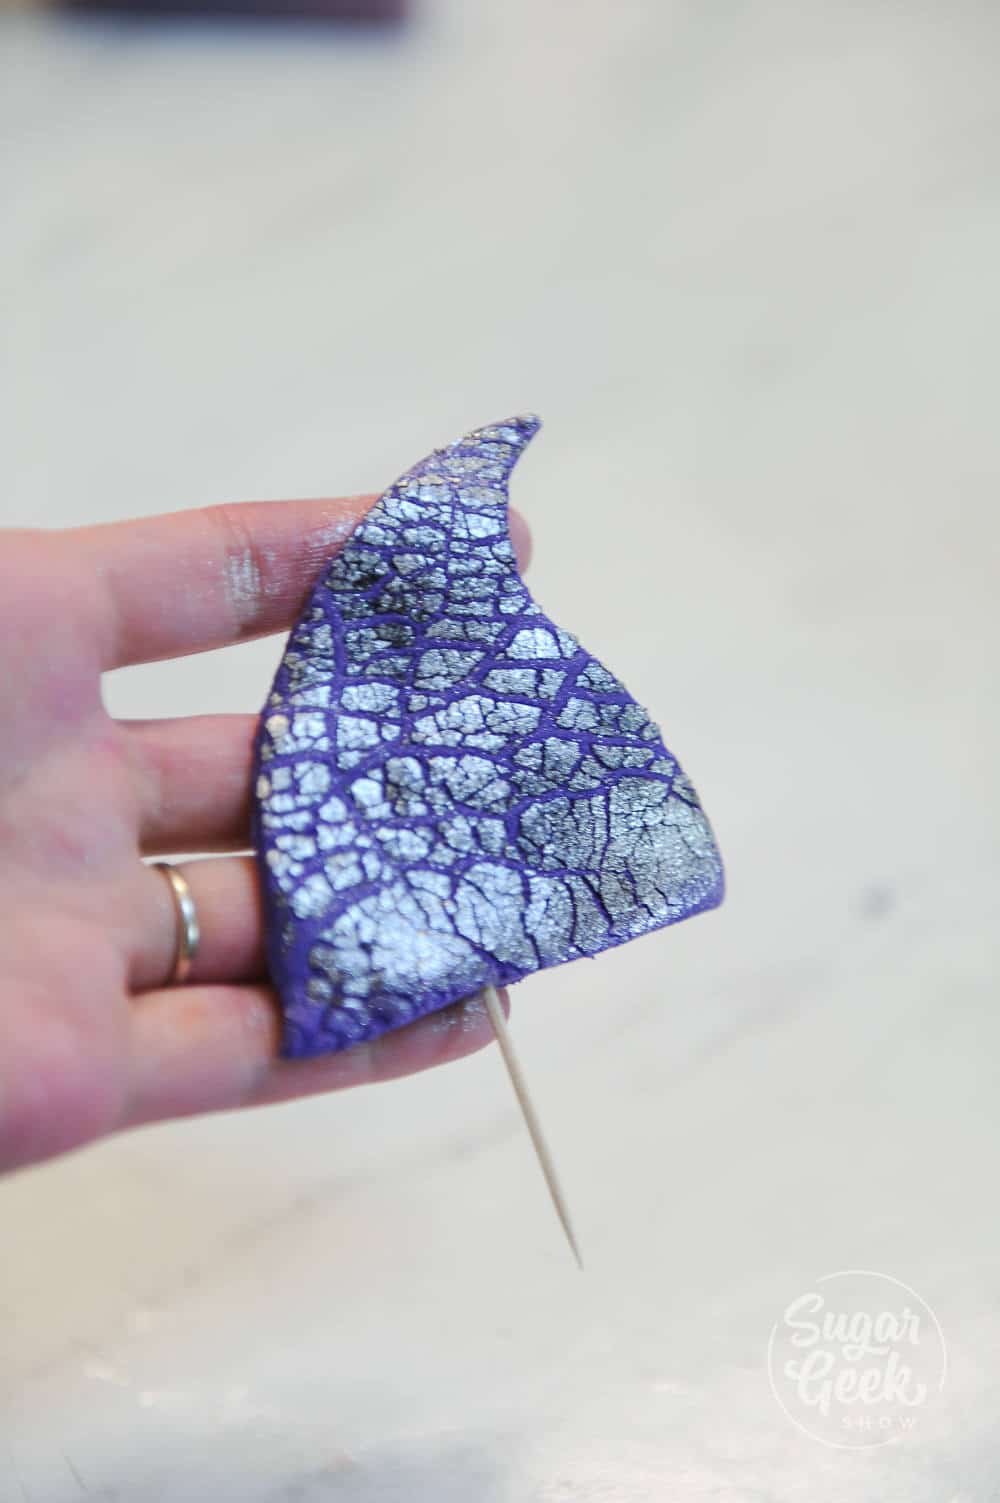
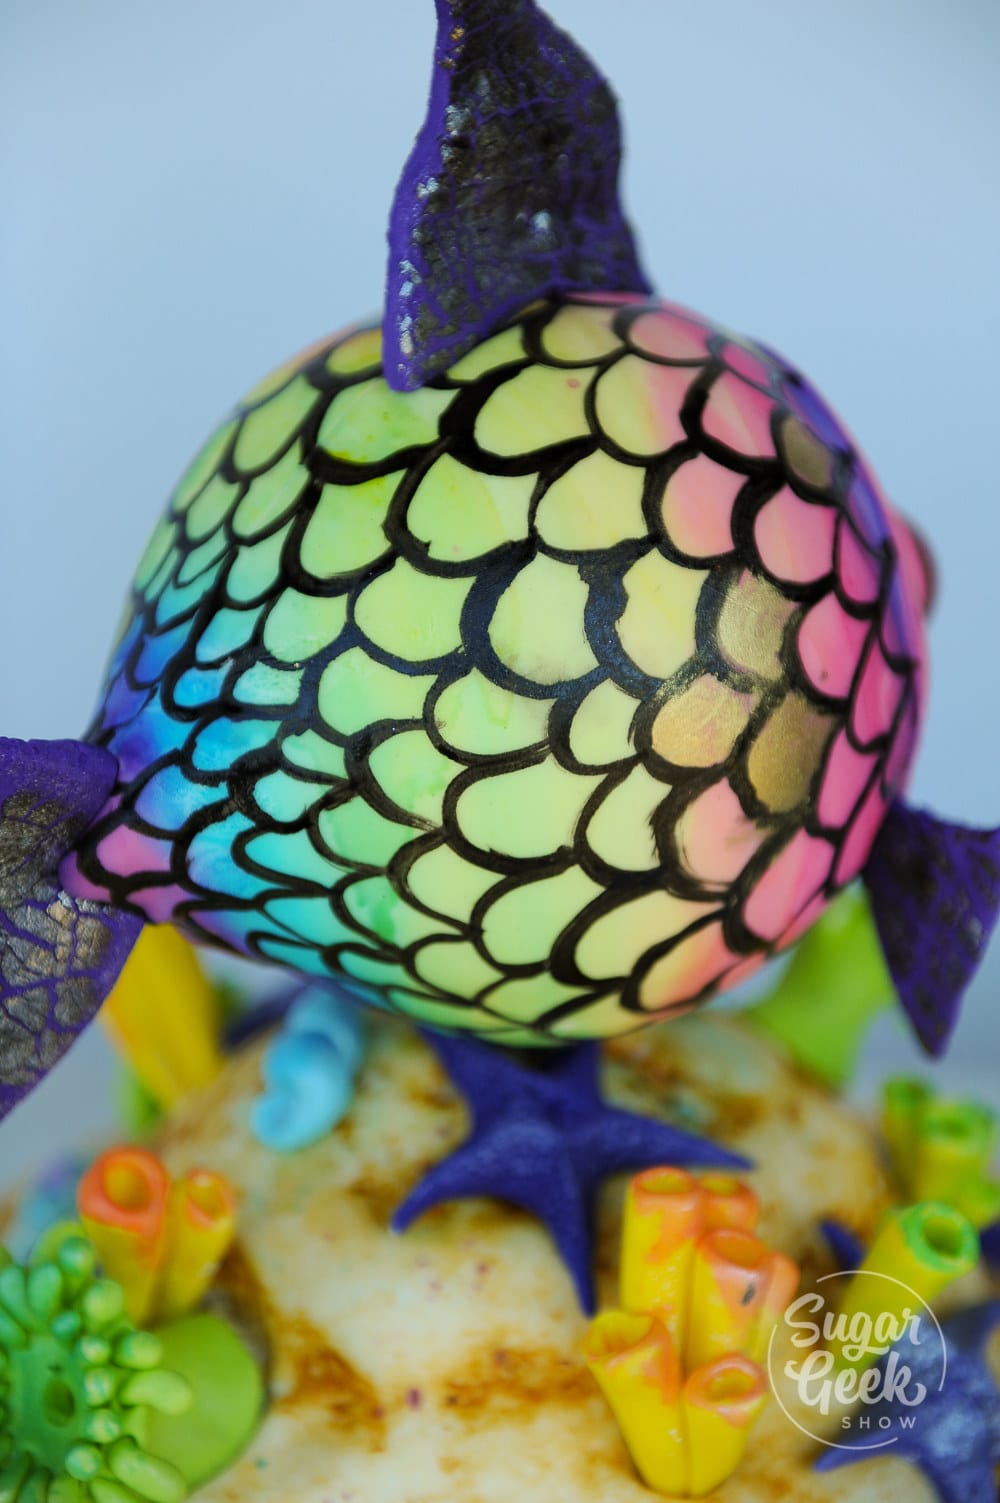
Cover your cake in white fondant in two pieces. One on each side. Cut off the excess. Crackle some fondant for the side fins, top fin and tail using purple fondant and flash dust. Cut the fondant into the fin shapes and insert a toothpick. Let dry overnight.
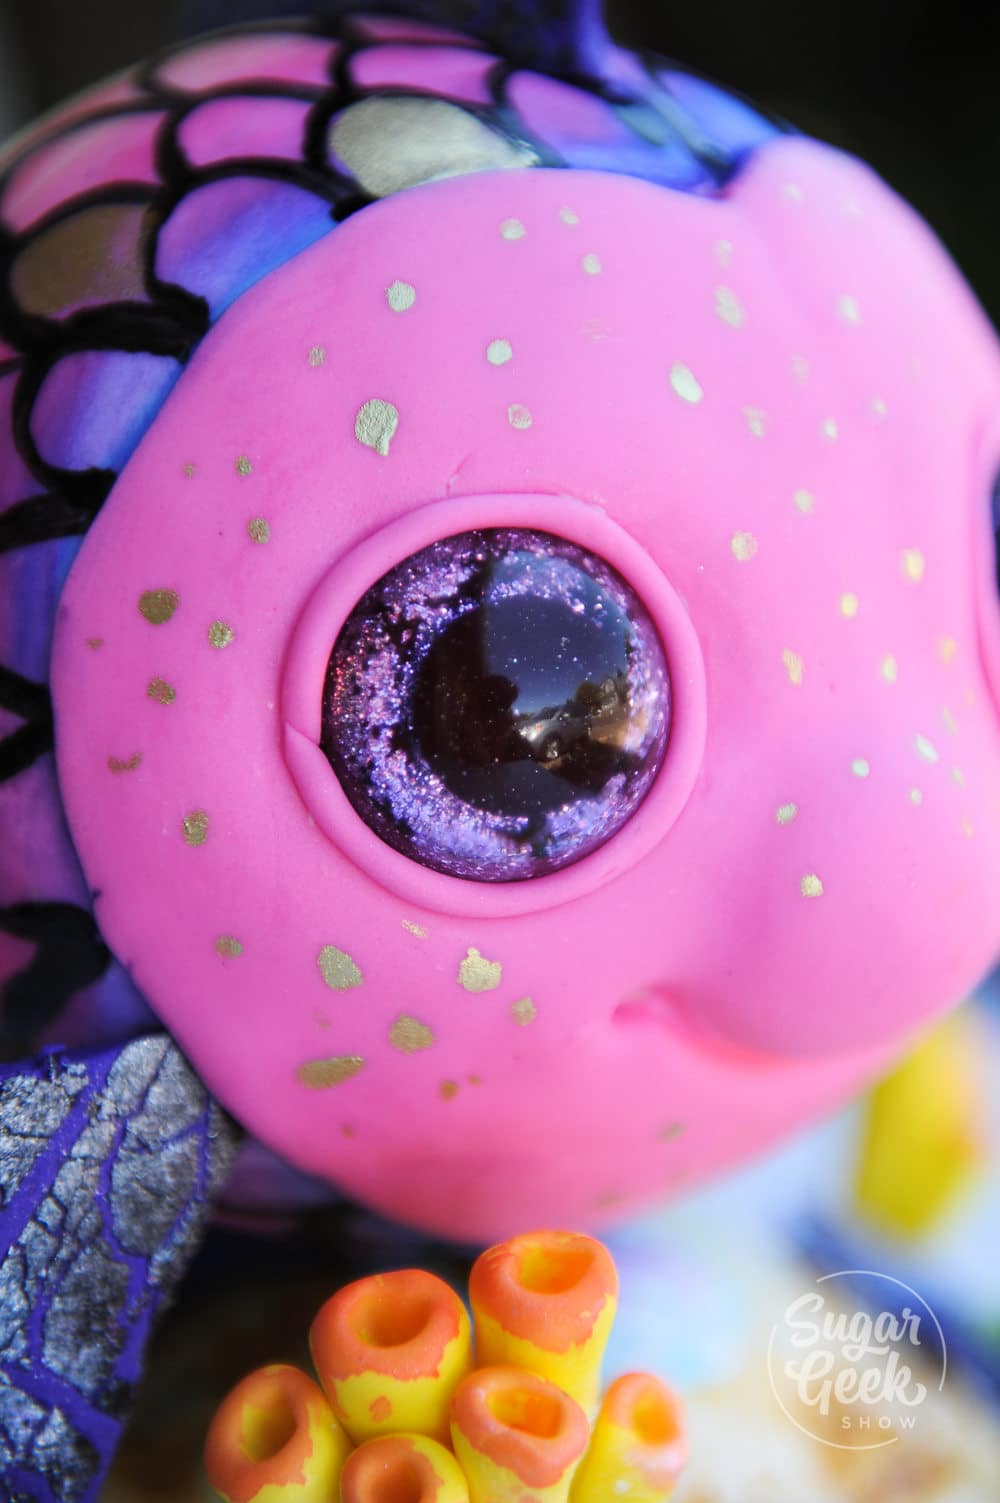
Add a small ball of fondant to the front of your fish for the nose. Cover the face of the fish with some pink fondant and cut into a round shape. Remove the excess fondant. Use some edible watercolors to color the sides of your fish. Paint on some scales using black food coloring. Add your fins to the fish and your fondant shells to the base of the cake.
Watch the full video tutorial below to see how to make this super fun rainbow fish cake tutorial.